To install your above-ground pool DIY-style, start by choosing a level, clear site free of rocks and roots. Gather your tools and assemble the frame and liner carefully, ensuring everything is secure and aligned. As you fill the pool, check for leaks and stabilize the structure with supports. Don’t forget regular water treatment and safety checks. Keep up with maintenance to enjoy safe, clean water—if you follow these steps, you’ll be well on your way to pool perfection.
Key Takeaways
- Choose a flat, level site away from trees and debris for stability and cleanliness.
- Prepare the ground by clearing debris, compacting soil, and ensuring proper drainage.
- Assemble the pool frame and liner carefully, checking for levelness and secure connections.
- Properly secure walls, supports, and stabilize the structure to prevent shifting and damage.
- Maintain regular water treatment, cleaning, and equipment checks for safe, clear swimming conditions.
Choosing the Right Location for Your Pool
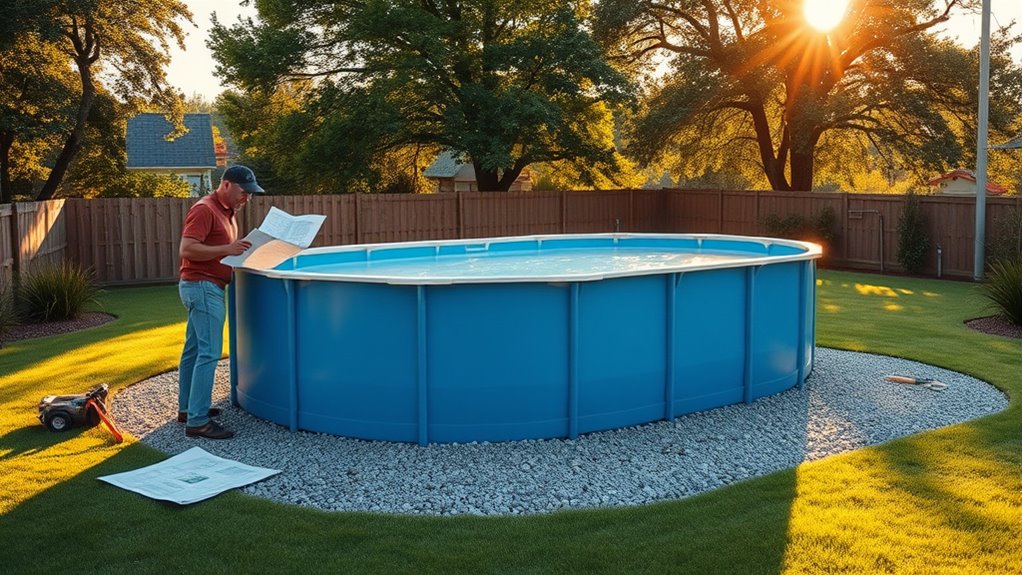
Choosing the right location for your above-ground pool is essential to guarantee safety, convenience, and longevity. You want a flat, level area free of roots, rocks, or debris that could damage the pool or cause instability. Make sure the spot is away from trees to prevent leaves and debris from falling into the water and to reduce shading that can promote algae growth. Consider sunlight exposure; adequate sunlight helps keep the water warm and reduces algae buildup, but too much direct sun can increase evaporation. Keep the pool close enough to a power source if you plan to use a filtration or lighting system. Ultimately, verify there’s enough space around the pool for easy access, maintenance, and future expansion, making your pool both safe and enjoyable. Additionally, assessing proper drainage is crucial to prevent water accumulation around the pool area, which can lead to erosion or instability. Incorporating drainage solutions can further enhance the stability and longevity of your pool setup. Ensuring proper ground preparation can also prevent shifting or settling over time, extending the life of your installation. Furthermore, checking the soil stability of the chosen site can help prevent sinking or shifting as the pool settles, and considering proper grading can help direct water away from the pool area to avoid pooling or erosion.
Preparing the Ground for Installation

You need a flat, clear site to guarantee your pool sits safely and evenly. Remove any debris, roots, or rocks that could cause problems later. Once the area is clean, compact and stabilize the soil to provide a solid foundation for installation. Additionally, ensuring proper ground preparation can prevent issues with uneven settling or shifting over time. Properly prepared ground can also improve air quality, minimizing the risk of future complications related to uneven terrain. Taking the time to properly level the ground ensures your above-ground pool remains stable and secure over time.
Clear and Level Site
Before installing an above-ground pool, ensuring the site is clear and level is essential for safety and stability. You need a flat, even surface free of rocks, sticks, and debris to prevent damage and ensure proper support. Use a level to check the area’s surface from multiple angles. If the ground isn’t level, you’ll need to fill low spots or remove high points. Proper preparation avoids shifting or tilting once the pool is filled. Here’s a quick overview:
| Step | What to Do | Why It Matters |
|---|---|---|
| Clear the site | Remove debris, rocks, and grass | Prevents punctures and unevenness |
| Check level | Use a bubble or laser level | Ensures stability and safety |
| Adjust the ground | Fill or remove soil accordingly | Keeps the pool balanced and secure |
Remove Debris and Roots
To guarantee a smooth pool installation, start by thoroughly removing all debris, rocks, and roots from the site. Clear the area of sticks, leaves, and trash that could interfere with the pool’s foundation. Use a rake or shovel to dig out any large stones or roots that are embedded in the soil. Roots, in particular, can cause unevenness or shift over time, jeopardizing the stability of your pool. Double-check the entire area to ensure no small debris or organic matter remains, as these can decompose and create uneven spots. Taking this step now prevents future problems, ensuring your pool sits on a clean, stable surface. Properly clearing the site is essential for a secure, level installation that lasts.
Compact and Stabilize Soil
Once the debris and roots are cleared, it is essential to compact and stabilize the soil to create a solid foundation. Use a tamper or plate compactor to press down the soil evenly, removing air pockets and ensuring stability. If the soil is loose or soft, add a layer of gravel or crushed stone before compacting to improve drainage and support. Check the level frequently with a spirit level or straightedge, adjusting as needed. Proper compaction prevents shifting or sinking once the pool is filled, reducing the risk of damage or uneven surfaces. Take your time to achieve a firm, flat surface that can support the weight of your pool. A stable base guarantees safety, longevity, and a smoother installation process.
Gathering Essential Tools and Materials
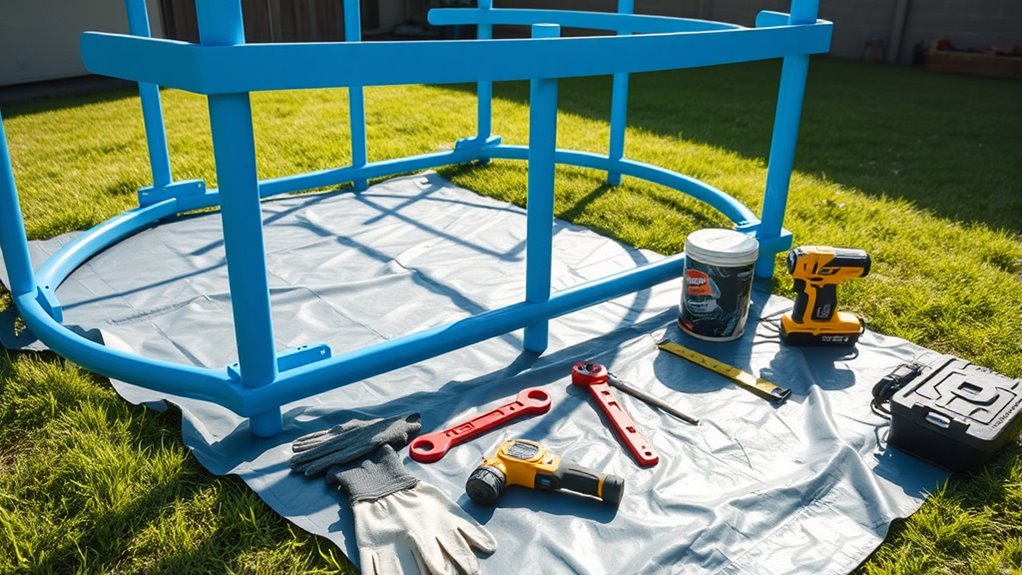
Gathering all the necessary tools and materials is an essential first step to guarantee your above-ground pool installation goes smoothly. Start by listing everything you’ll need: a level, tape measure, screwdriver, wrench, pliers, and a rubber mallet. You’ll also require pool-specific items like the liner, side panels, top rails, and supports. Don’t forget safety gear such as gloves and goggles. Check your pool kit for included tools and materials, and purchase any extras needed, like ground cloth or sealant. Organize everything in one place before beginning. Having all tools and materials on hand prevents delays and helps keep the process efficient. Preparing thoroughly ensures you won’t need to stop mid-assembly to hunt down supplies or tools.
Assembling the Pool Frame and Walls

Begin by laying out the side panels on a flat, level surface, ensuring they are oriented correctly according to your instructions. Connect the panels step-by-step, locking them into place using the provided connectors or brackets. Take your time to align each piece properly; a misaligned frame can cause issues later. To help visualize the process, here’s a quick overview:
| Step | Action | Tip |
|---|---|---|
| 1 | Lay out panels | Keep panels organized |
| 2 | Connect side panels | Use connectors firmly |
| 3 | Secure frame with braces | Check for stability |
Additionally, verifying the levelness of your setup can help prevent structural issues. Ensuring your foundation is properly prepared can also contribute to the overall stability of your pool. Proper alignment of the panels is essential for a secure fit. It is also beneficial to periodically check the connection points throughout the assembly process to maintain the integrity of the structure. Follow these steps carefully to build a sturdy, secure frame that will support your pool walls perfectly.
Installing the Pool Liner Correctly

Installing the pool liner correctly is crucial to guarantee a smooth, leak-free experience. Begin by laying the liner flat on a clean, smooth surface to remove wrinkles and creases. Carefully unfold it inside the pool, ensuring the liner’s seams align properly. As you position the liner, work from the center outward, smoothing it evenly over the walls and floor, avoiding folds or bunches. Use a garden hose to fill the pool gradually, which helps the liner settle naturally into place. Avoid pulling or forcing the liner into shape, as this can cause tears or damage. Double-check that the liner fits snugly against the walls and floor before filling completely. Proper installation ensures your pool remains watertight and looks great for seasons to come, emphasizing the importance of a proper fit for longevity. Additionally, taking the time to inspect the liner thoroughly during installation can prevent future issues and extend the life of your pool. Incorporating quality materials can further enhance the durability of your liner and ensure a longer lifespan. Recognizing the significance of correct installation techniques can help you avoid common mistakes and achieve optimal results.
Connecting the Filtration System
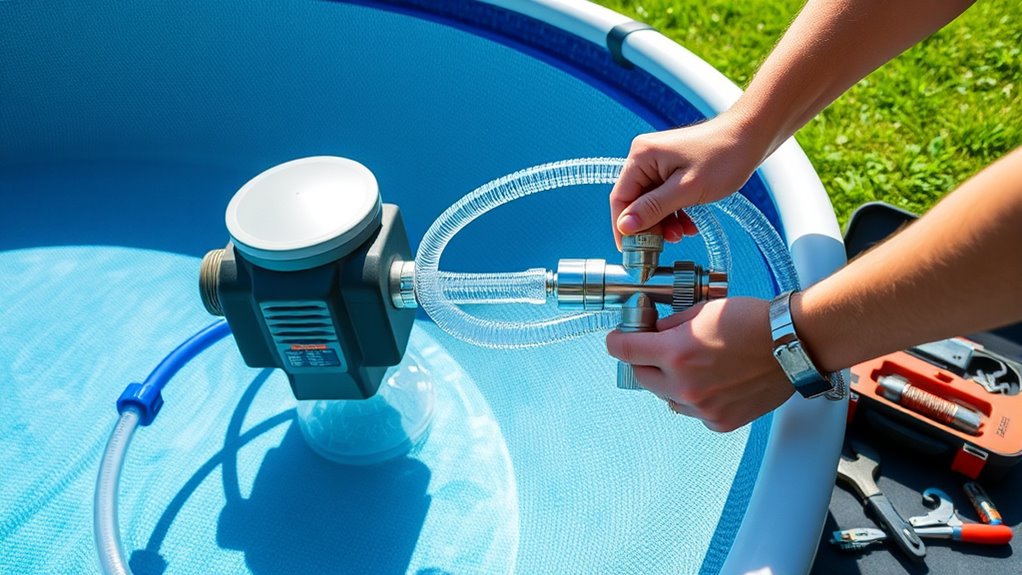
Once your pool liner is properly in place, the next step is to connect the filtration system to guarantee clean and clear water. Start by assembling the pump and filter according to the manufacturer’s instructions. Place the pump on a stable, level surface near the pool. Connect the intake hose to the skimmer or pool inlet, ensuring a tight seal to prevent leaks. Attach the other end to the pump’s inlet port. Next, connect the outlet hose from the pump to the filter unit, then link the filter’s outlet back to the pool’s return fitting. Double-check all connections for leaks or loose fittings. To ensure the system runs efficiently, verify that the connections are compatible with the specifications provided by the manufacturer. Proper connection techniques are essential for preventing system failures and ensuring optimal performance. Once everything is secure, plug in the pump and run it briefly to verify proper operation and that water circulates smoothly through the system. Regularly monitoring your system can help maintain optimal ananda aromatherapy essential oils.
Filling the Pool and Checking for Leaks
As you start filling your pool with water, keep a close eye on all connections and fittings to spot any leaks early. Watch for drips or sudden drops in water level around the pump, hoses, and valves. It’s best to fill the pool gradually, so you can inspect each connection as it fills. If you notice water escaping from any fitting, turn off the pump and tighten or reattach the connection. Use soap and water to check for bubbles at joints—bubbles indicate leaks. Once the pool is filled to the recommended level, double-check all fittings for stability. Regularly monitor the water level over the first few hours to ensure there’s no ongoing leak. Catching leaks early prevents water loss and possible damage.
Securing the Pool and Ensuring Stability

After filling your pool and checking for leaks, the next step is to secure it properly and guarantee it remains stable during use. Begin by leveling the ground beneath the pool, ensuring there are no high spots or dips that could cause shifting. Use a level to double-check the foundation. Once the surface is even, install the pool’s stabilizing components, such as ground cloth pads or foam strips, to protect the liner and improve stability. Secure the pool walls with the provided fasteners or straps, tightening them evenly to avoid warping. If your pool includes stabilizing braces or supports, install these according to the manufacturer’s instructions. Properly securing your pool prevents shifting, reduces stress on the liner, and ensures safety during swimming. Additionally, consider the best beaches in your area for a scenic backdrop and added relaxation after installation. Incorporating remote work principles like organization and proper setup can also help you manage your installation project efficiently. Ensuring proper ground preparation is essential for long-term stability and safety of your above-ground pool. Being attentive to these details can help prevent pool shifting and prolong the lifespan of your investment.
Adding Water Treatment and Safety Measures

To keep your pool safe and inviting, you need to focus on proper water treatment and safety measures. Regularly test the water to maintain the right chemical balance, and use appropriate safety equipment whenever the pool is in use. Taking these steps helps guarantee a clean, safe environment for everyone enjoying your pool. Additionally, implementing necessary cookies can help monitor and improve your pool management system. As technology advances, integrating AI-driven safety features can further enhance pool safety and maintenance efficiency.
Proper Chemical Balance
Maintaining proper chemical balance is essential for safe and enjoyable swimming in your above-ground pool. You want to keep the water sanitized and clear while preventing algae growth and corrosion. Start by testing your water regularly and adjusting chlorine levels to keep them within the recommended range. pH levels should stay between 7.2 and 7.6, as imbalances can cause skin irritation or damage to pool equipment. Alkalinity should be maintained between 80 and 120 ppm to stabilize pH. Add appropriate chemicals as needed, following manufacturer instructions carefully. Keep an eye on your water’s overall balance, and make adjustments promptly to ensure safe, clean, and comfortable swimming conditions. Proper chemical management is key to extending your pool’s lifespan and protecting your health.
Regular Water Testing
Regular water testing is the foundation for ensuring your pool remains safe and inviting. By regularly checking your water’s chemical levels, you prevent issues like algae growth, cloudy water, and skin irritation. Consistent testing helps you catch imbalances early, saving time and effort later. Use a reliable test kit or strips to monitor key parameters such as pH, chlorine, and alkalinity.
Remember, maintaining proper water quality involves more than just testing; it’s about understanding what the results mean. Keep in mind:
- Maintaining correct chemical levels prevents bacteria buildup.
- Regular testing extends your pool’s lifespan.
- Proper water safety ensures a fun, healthy swimming experience for everyone.
Safety Equipment Usage
Using proper safety equipment and water treatment measures is essential to keep your above-ground pool safe and clean. Always have safety gear like life rings, reaching poles, and a first aid kit nearby. Wear goggles and gloves when handling chemicals. Regularly test and adjust water chemistry to prevent bacteria growth and algae. Use chlorine or bromine tablets to maintain proper sanitation. Ensure your pool cover is secure when not in use. Here’s a quick guide:
| Safety Equipment | Water Treatment | Precautions |
|---|---|---|
| Life rings | Chlorine/Bromine | Keep chemicals out of reach |
| Reaching pole | pH balancer | Never mix chemicals |
| First aid kit | Water test strips | Follow manufacturer instructions |
| Goggles & gloves | Algaecide | Store chemicals safely |
| Pool cover | Shock treatment | Regular safety checks |
Regular Maintenance and Troubleshooting

To keep your above-ground pool clean and functioning properly, you need to stay on top of routine maintenance and address issues promptly. Regularly check and adjust chemical levels to prevent algae growth and bacteria. Skim debris from the surface daily, and clean the filter as recommended to ensure proper circulation. When problems arise, troubleshoot quickly—look for leaks, cloudy water, or equipment malfunctions.
Remember these key points:
- Consistent chemical balance keeps the water safe and clear.
- Regular filter cleaning prevents buildup and improves circulation.
- Early troubleshooting avoids costly repairs and extends your pool’s life.
Staying proactive guarantees your pool stays inviting, safe, and ready whenever you want to swim.
Frequently Asked Questions
How Long Does a Typical Above-Ground Pool Installation Take?
You’re probably wondering how long installing an above-ground pool takes. Typically, it can take anywhere from a day to a weekend, depending on your pool size and site preparation. If you handle the setup yourself and have everything ready, you could finish in just a few hours. However, if you’re doing it alone or need extra time for leveling and accessories, expect it to stretch out over a couple of days.
Can I Install an Above-Ground Pool on Uneven Ground?
Imagine a smooth canvas for your dream pool—unfortunately, uneven ground isn’t that canvas. You can install an above-ground pool on uneven terrain, but you’ll need to level the site first. Use shims, gravel, or a concrete pad to create a stable, level foundation. Skipping this step risks damage or instability, so take time to prepare. Proper leveling turns your backyard into a perfect oasis, ready for endless summer fun.
What Is the Best Time of Year to Install a Pool?
You should aim to install your pool during late spring or early summer when the weather is warm and dry. These conditions make it easier to work outdoors, and you’ll avoid delays caused by rain or cold temperatures. Installing during this time also guarantees the ground is less likely to be frozen or overly soft, providing a stable foundation for your pool. Planning ahead helps you enjoy your pool all season long.
Do I Need a Permit for Installing an Above-Ground Pool?
Imagine you’re planning to set up your above-ground pool this summer. You might need a permit, depending on your local regulations. For example, in some areas, you’re required to obtain a permit if your pool exceeds a certain size or if it includes electrical components. Check with your city or county’s building department before starting. Not securing the proper permits could lead to fines or having to dismantle your pool later.
How Often Should I Inspect the Pool for Safety Issues?
You should inspect your pool weekly for safety issues. Check the stability of the structure, look for rust or damage, and verify the water level is appropriate. Also, examine the pool’s electrical components and filters for proper operation. Regular inspections help prevent accidents and maintain safe swimming conditions. After storms or heavy use, do a more thorough check. Staying vigilant keeps your pool safe and enjoyable all season long.
Conclusion
By following these DIY tips, you can enjoy your above-ground pool without breaking the bank. Did you know that properly installed pools can last up to 10 years or more? Taking the time to prepare, assemble, and maintain your pool guarantees safe, fun summer days for years to come. With a little effort, you’ll create a revitalizing oasis right in your backyard—so plunge in and make the most of your new pool adventure!