To repair fiberglass pool cracks with DIY kits, start by thoroughly cleaning the area to remove dirt and debris. Follow the kit instructions to mix the epoxy or resin, then apply it directly into or over the crack, smoothing it out with a putty knife. Allow sufficient curing time before using the pool again. Maintaining proper water chemistry and inspecting regularly can prevent future issues, and you’ll discover more tips if you continue exploring this solution.
Key Takeaways
- Clean the cracked area thoroughly to ensure proper adhesion before applying the DIY repair kit.
- Mix the epoxy or resin components as instructed, then fill and smooth the crack with a putty knife.
- Allow sufficient curing time, typically hours to a day, before exposing the repaired area to water or stress.
- Monitor the repair periodically for signs of crack spreading or new damage.
- Use appropriate preventive measures, like maintaining water chemistry, to minimize future crack development.

Cracks in your fiberglass pool can quickly turn into bigger problems if left unaddressed, so it’s important to repair them promptly. Ignoring small cracks can lead to leaks, structural damage, and costly repairs down the line. Using DIY kits to fix these issues is a practical way to handle minor damage, especially if you’re comfortable with basic pool maintenance. By addressing cracks early, you help ensure your pool stays in good condition and prevent more extensive damage. Proper crack prevention starts with regular pool maintenance; keeping your pool clean, balanced, and inspected regularly allows you to spot trouble before it worsens. When you notice a crack, don’t delay in taking action. DIY repair kits are designed to be user-friendly, offering you a cost-effective and efficient way to restore your pool’s integrity. These kits usually include epoxy or resin-based compounds, which are specially formulated for fiberglass surfaces. Before you begin, clean the area around the crack thoroughly to remove dirt, algae, or loose debris. This step ensures a strong bond between the repair material and the pool surface. Follow the instructions carefully, mixing the epoxy or resin as directed, and then apply it directly into or over the crack. Use a putty knife or similar tool to smooth out the repair compound, ensuring it fills the crack completely and adheres well to the surrounding surface. Once the repair is cured, usually within a few hours to a day depending on the product, you can sand it lightly if needed to make it flush with the surrounding area. It’s also wise to monitor the repair periodically to catch any signs of spreading cracks early. Preventive measures, such as maintaining proper water chemistry, avoiding sudden impacts or stress on the pool, and checking the pool’s structure regularly, can considerably reduce the risk of future cracks. When cracks are repaired promptly with DIY kits, you’re effectively preserving your pool’s structure and avoiding more drastic repairs later. Keep in mind that DIY repairs are best suited for small or superficial cracks; larger or more complex damage might require professional assistance. Still, performing routine crack prevention and swift repairs when needed can extend the life of your fiberglass pool and keep it looking and functioning its best. With a little effort and the right tools, you can maintain your pool’s integrity and enjoy many years of trouble-free swimming. Regular inspection and timely repairs are essential to prevent structural damage and ensure longevity.
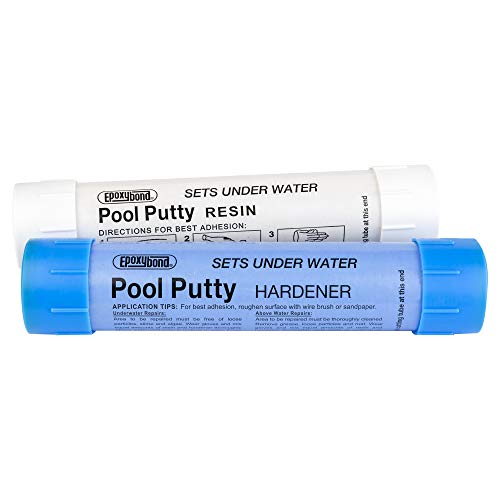
Epoxybond Pool Putty 2-Part Set | Swimming Pool & Spa Repair | Easy DIY | Fix Cracks Leaks Underwater or Above | Concrete, Fiberglass & Variety of Other Surfaces | by Atlas Minerals
- Safe, Hand-Moldable Putty: Apply easily to fix leaks underwater
- Effective Leak and Crack Sealing: Hardens underwater, prevents shrinking or sagging
- Easy Application Without Draining: Use above or below water without draining pool
As an affiliate, we earn on qualifying purchases.
As an affiliate, we earn on qualifying purchases.
Frequently Asked Questions
How Long Does a DIY Fiberglass Pool Crack Repair Last?
A DIY fiberglass pool crack repair typically lasts around 3 to 5 years if you maintain proper pool care. To guarantee longevity, keep your pool’s color vibrant and monitor the chemical balance regularly. Proper surface preparation and following kit instructions also help. Remember, neglecting chemical balance or exposing the repair to harsh elements can shorten its lifespan, so consistent maintenance is key for a durable, long-lasting fix.
Are DIY Kits Suitable for Large or Deep Cracks?
DIY kits aren’t ideal for large or deep cracks because of material limitations that may guarantee a proper seal. For bigger issues, you risk incomplete repairs, which can lead to more damage and higher costs later. While DIY kits are cost-effective for small cracks, tackling large or deep ones requires professional help to ensure a durable fix. This approach saves you money and prevents future problems.
Can Repairs Be Made Underwater or Only When Dry?
You can’t do underwater repairs with DIY kits; they require a dry environment to bond properly. Attempting underwater repairs is like trying to fix a spaceship in flight—nearly impossible. For effective results, you need to drain the pool and use dry repair methods. Once the area is dry, apply the kit carefully, ensuring the crack seals completely. This guarantees a durable fix that lasts longer than a lifetime.
What Safety Precautions Should I Follow During Repair?
During repairs, you should wear protective gear like gloves, goggles, and a mask to prevent chemical exposure and debris inhalation. Always follow pool chemical safety guidelines, especially when handling adhesives or sealants. Make certain proper ventilation if working indoors, and keep the area clear of children and pets. Double-check the product instructions for safety measures, and wash your hands thoroughly afterward to avoid chemical irritation.
Is Special Training Needed to Successfully Repair Pool Cracks?
You don’t need special training to attempt repairing pool cracks, but a professional assessment is prudent beforehand. It helps you understand the extent of damage and determine if DIY kits are suitable or if you should seek expert help. While you can handle minor repairs with proper instructions, complex cracks may require proper training to ensure safety and a durable fix. When in doubt, consulting a professional is always the best choice.
Conclusion
Repairing fiberglass pool cracks with DIY kits is a practical and cost-effective solution that you can tackle yourself. Keep in mind that about 65% of pool owners successfully repair minor cracks without professional help, saving both time and money. By following proper steps and using quality kits, you can extend your pool’s lifespan and enjoy many more seasons of swimming. Don’t overlook small cracks—they often grow if left unaddressed, so act quickly for the best results.