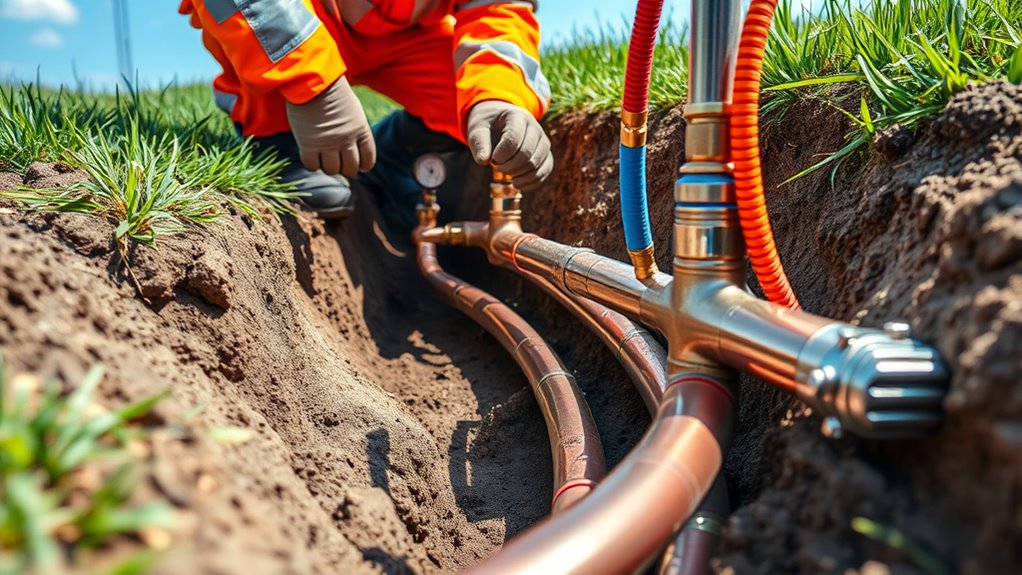

To detect underground plumbing leaks with pressure testing, you’ll first shut off all fixtures and attach a pressure gauge to the main line. Then, use a pump or compressor to raise the pressure to the recommended level. By monitoring the pressure over 15-30 minutes, you can identify leak signs from drops in pressure. This method quickly uncovers hidden leaks without digging, and exploring further can help you understand how professionals pinpoint these elusive issues.
Key Takeaways
- Pressure testing involves sealing the system and monitoring pressure drops to identify hidden underground leaks.
- A pressure gauge is attached, and the system is pressurized to detect any significant pressure loss over time.
- Signs like increased water bills or wet patches can indicate the presence of underground leaks during pressure testing.
- Accurate leak detection requires professional plumbers with specialized equipment and experience in pressure testing techniques.
- Pressure testing allows for non-invasive identification of leaks behind walls, under floors, or underground, preventing unnecessary excavation.

SENCTRL 0-200 Psi Water Pressure Gauge Test with Lazy Hand, Lead-Free, Waterproof, 2.5" Dial Size, 3/4" Female Garden Hose Thread, Stainless Steel Case, for Home Potable Water, House Tube
- Waterproof and Corrosion Resistant: IP67 waterproof stainless steel case
- Clear, Fog-Resistant Dial: Design reduces internal fogging
- Lead-Free Wetted Materials: Brass, stainless steel, food-grade silicone
As an affiliate, we earn on qualifying purchases.
As an affiliate, we earn on qualifying purchases.
How Pressure Testing Detects Hidden Leaks
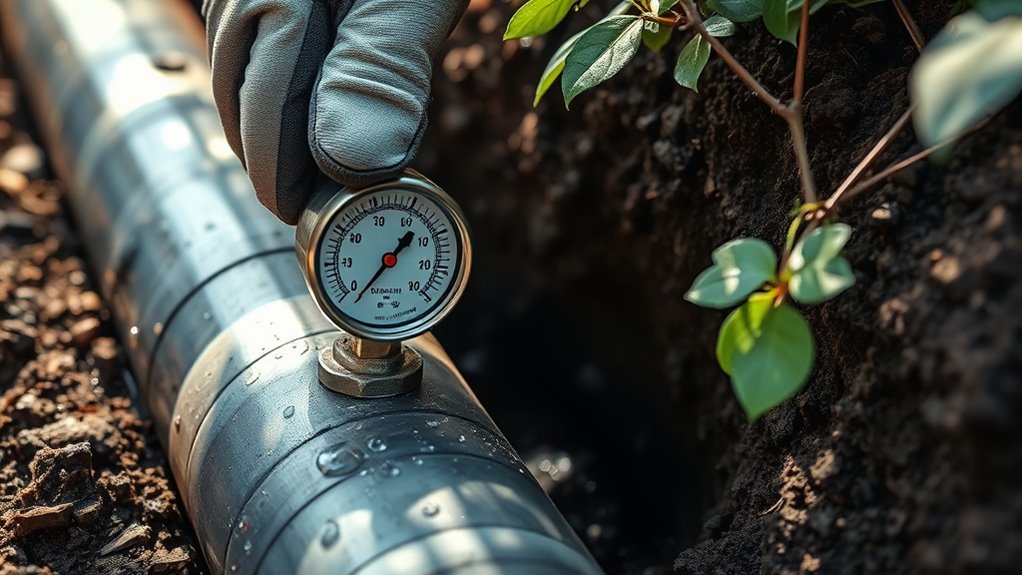
Pressure testing is a reliable method for uncovering hidden plumbing leaks that aren’t visible to the naked eye. When you perform a pressure test, you seal off the plumbing system and introduce air or water at a specific pressure. If there’s a leak, the pressure will drop over time, signaling a problem somewhere in the pipes. This method allows you to detect leaks deep within underground or concealed pipes without digging. Because the pressure change is precise and measurable, you can confirm the presence of leaks even if they’re not obvious. Pressure testing is effective for identifying leaks behind walls, under floors, or underground, giving you confidence that your plumbing system is sound before more invasive inspections are necessary. Vetted techniques ensure accurate detection and reduce unnecessary repairs. Additionally, understanding underground piping can help you better interpret pressure test results and plan appropriate repairs. Proper pressure regulation is essential during testing to avoid false alarms or missed leaks.
The Step-by-Step Process of Pressure Testing
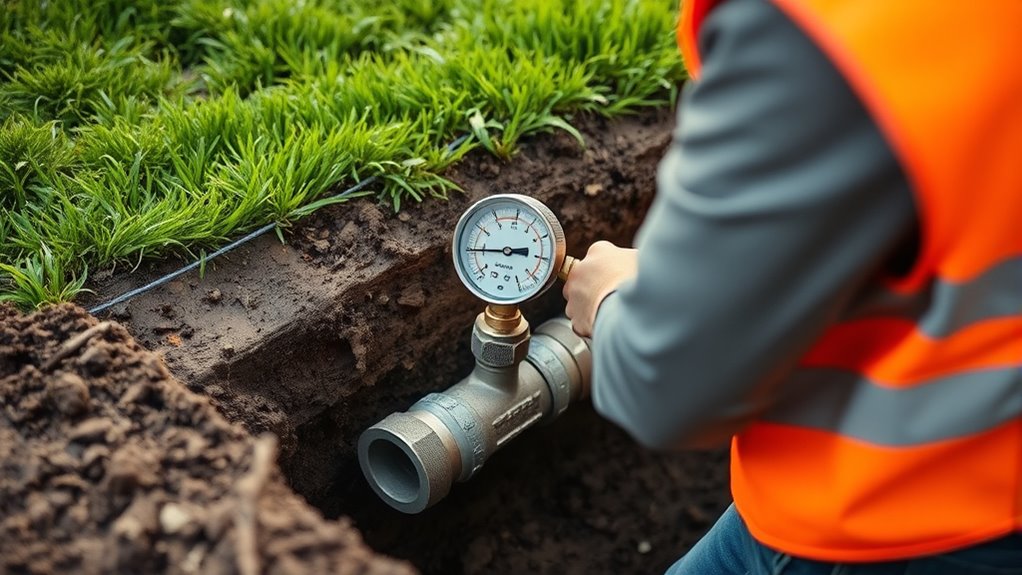
To perform a pressure test effectively, you need to follow a systematic process that guarantees accurate results. First, shut off all fixtures and appliances connected to the plumbing system. Next, attach a pressure gauge to the main line or test point. Then, use a pump or compressor to increase the system’s pressure to the recommended level, usually specified by local codes or manufacturer guidelines. Once the desired pressure is reached, close the valve and monitor the gauge. Keep an eye on the pressure for a designated period, typically 15-30 minutes. If the pressure drops, it indicates a leak. Carefully record the readings and inspect the entire system for signs of escaping air or water, pinpointing potential leak locations. Additionally, understanding pressure testing techniques can help identify hidden leaks that may not be immediately visible. Recognizing the importance of proper system maintenance can prevent future leaks and prolong the lifespan of your plumbing system. Regular inspections and pressure monitoring are essential for early leak detection and system integrity. Incorporating detecting underground leaks methods can further improve the accuracy of your assessments. Employing advanced diagnostic tools can also assist in pinpointing leak sources more precisely.
Benefits of Using Pressure Testing for Leak Detection

Using pressure testing for leak detection offers several significant advantages. It provides a quick and accurate way to identify leaks without invasive excavation, saving you time and money. Pressure testing reveals even small leaks that might go unnoticed with visual inspections, helping prevent future water damage and costly repairs. It allows you to isolate specific sections of your plumbing system, pinpointing problem areas precisely. This method is reliable, reducing the guesswork involved in leak detection. Additionally, pressure testing can be performed regularly as part of routine maintenance, ensuring your plumbing remains in good condition. Incorporating pressure testing into your maintenance routine can also detect subtle issues early, helping to avoid major repairs later. Regularly conducting pressure tests can also identify potential weak points before they develop into full-blown leaks. Moreover, this technique enables proactive maintenance, which is essential for preventing costly damages. Pressure testing’s accuracy and reliability make it an invaluable tool for maintaining an efficient, leak-free plumbing system and avoiding unexpected breakdowns. Overall, using pressure testing gives you peace of mind, knowing you’re proactively preventing damage and maintaining an efficient, leak-free plumbing system.
Signs That Indicate a Possible Underground Leak

While pressure testing can quickly confirm the presence of underground leaks, recognizing early signs can help you catch problems before they worsen. Look out for:
- Unexplained spikes in your water bill, suggesting hidden water loss.
- Wet spots or lush patches on your yard that stay damp despite no rainfall.
- The sound of running water or hissing noises when no fixtures are in use.
- A persistent decrease in water pressure throughout your home.
- Changes in system efficiency may also indicate underground leaks affecting your plumbing performance.
These signs often indicate underground leaks that haven’t yet caused visible damage. Addressing them early can save you money and prevent more extensive repairs later. Keep an eye on your water usage and yard condition to catch leaks before they escalate.
Choosing the Right Professionals for Pressure Testing

Choosing the right professionals for pressure testing is essential to accurately detect underground leaks and prevent unnecessary damage. Look for licensed and experienced plumbers who specialize in leak detection and underground inspections. They should have the proper equipment, such as specialized pressure testers and sensors, to guarantee accurate results. Ask for references or reviews to verify their expertise and reliability. A qualified professional will conduct a thorough assessment, explain the testing process clearly, and interpret the results correctly. Proper equipment and tools are crucial for reliable testing, ensuring that no leaks are missed. Employing advanced pressure testing techniques can further improve detection accuracy and reduce the risk of oversight. Using proper testing procedures helps ensure that the assessment is comprehensive and precise. Avoid amateurs or companies without proper credentials, as inaccurate testing can lead to costly repairs or overlooked leaks. Investing in skilled professionals assures precise detection, saving you time, money, and potential property damage down the line. Additionally, understanding essential oils for leak detection can sometimes support your overall home maintenance routine.
Frequently Asked Questions
How Long Does a Typical Pressure Test Take?
A typical pressure test usually takes between 1 to 4 hours, depending on the system’s size and complexity. You’ll want to guarantee the pressure is maintained steadily during this time to accurately detect leaks. Smaller systems may require less time, while larger or more complex setups could take longer. It’s important to follow proper procedures and allow enough time for the test to confirm the integrity of your plumbing.
Can Pressure Testing Damage Existing Plumbing?
Did you know that improper pressure testing can cause damage in up to 10% of cases? When you pressure test your plumbing, it’s natural to wonder if it could harm your pipes. Generally, if done correctly, pressure testing is safe and won’t damage your plumbing. However, if the pressure exceeds recommended levels or the pipes are already weakened, it could lead to cracks or leaks. Always follow proper procedures.
What Are the Costs Associated With Pressure Testing?
When you consider pressure testing, you’re likely wondering about the costs involved. Typically, these costs include labor, which varies depending on the system size and complexity, and equipment rental or usage fees. Additional expenses might arise if repairs are needed after detecting leaks. Overall, expect to pay a few hundred to over a thousand dollars, but it’s a worthwhile investment to prevent costly water damage and ensure your plumbing’s integrity.
Is Pressure Testing Safe for All Types of Pipes?
You might wonder if pressure testing is safe for all pipe types. While it’s generally effective and safe, some older or fragile pipes, like certain plastics, could be at risk of damage if pressure levels are too high. Always consult a professional to guarantee the testing process is tailored to your pipe material. Properly conducted, pressure testing is a reliable way to detect leaks without harming your plumbing system.
How Often Should Underground Plumbing Be Tested?
You should test your underground plumbing regularly to catch leaks early and prevent costly damage. Typically, a professional recommends testing every 1 to 3 years, depending on the pipe material, age, and local water conditions. If you notice signs of leaks like reduced water pressure or damp spots, you might need to test more frequently. Routine testing keeps your plumbing system in good shape and avoids bigger problems later.
Conclusion
Think of pressure testing as your underground plumbing’s health check-up. By catching leaks early, you prevent costly damage and keep your system flowing smoothly. When you know the signs of trouble and choose the right professionals, you’re like a skilled detective uncovering hidden clues. Don’t wait for a flood to realize there’s a problem—stay ahead of the game and guarantee your plumbing stays in top shape, just like a well-oiled machine.