
To replace a burned-out pool light, first turn off the power at the circuit breaker and verify it’s off. Drain water from the light niche if needed, then carefully unscrew and remove the fixture using insulated tools. Install the new bulb or fixture, ensuring a proper seal and secure connections. Once everything’s in place, restore power, turn on the light, and check for proper operation. Continue exploring for detailed steps and safety tips.
Key Takeaways
- Turn off the circuit breaker controlling the pool light and verify power is disconnected before handling.
- Drain water from the light niche to prevent electrical hazards and facilitate safe removal.
- Carefully remove the damaged fixture using insulated tools, handling wiring gently.
- Install the new bulb or LED, ensuring proper sealing and secure attachment to prevent leaks.
- Restore power gradually, then test the light for proper operation and check for any issues.

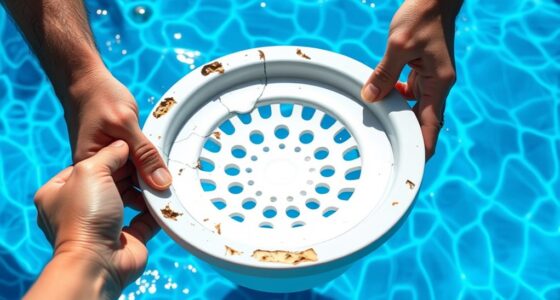
SOLAR SPORTS 10'' Pool Light Maintenance Kit, Fixing Clamp 79111000,Sealing Ring 79101600Z, Stainless Steel Face Ring 79110600, Suitable for Maintenan
- Complete Replacement Kit: Includes all necessary parts for pool light repair
- Durable Stainless Steel: Made from high-quality stainless steel for strength
- Easy to Install: Simple steps for quick pool light replacement
As an affiliate, we earn on qualifying purchases.
As an affiliate, we earn on qualifying purchases.
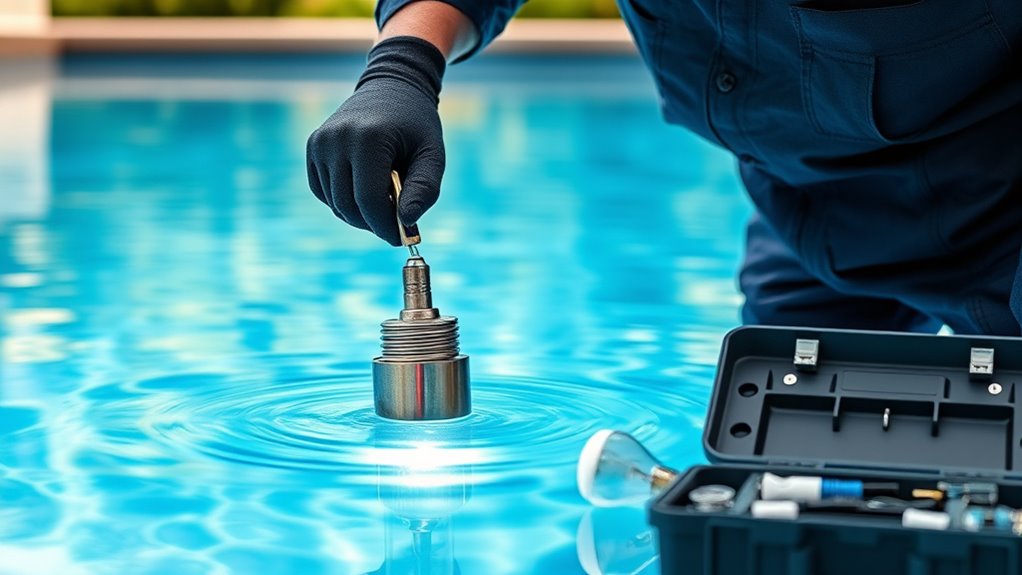
Assessing the Situation and Gathering Needed Tools
Before you begin replacing the pool light, it’s important to carefully assess the situation and gather all necessary tools. Start by inspecting the pool area to determine if the light fixture is accessible and identify potential hazards. Check if you have the right replacement bulb compatible with your fixture. Gather essential tools like a screwdriver, a wrench, a waterproof ladder, and safety gloves. Having a bucket or towel nearby can help catch any water or debris. Clear the workspace of obstacles to ensure safe and easy access. Confirm that you have the correct replacement parts to avoid multiple trips. Taking these steps ensures you’re prepared, minimizes errors, and helps you work efficiently while maintaining safety during the process. Additionally, understanding the importance of proper lighting conditions can prevent future issues and improve your overall experience. Ensuring proper pool lighting setup not only enhances safety but also extends the lifespan of your equipment.
Turning Off Power and Ensuring Safety

To guarantee safety during the pool light replacement, you must turn off the power supply to the fixture. Locate your circuit breaker panel and identify the breaker controlling the pool area. Switch it off completely to cut power. Confirm the power is off by attempting to turn on the light or using a non-contact voltage tester near the fixture. Never skip this step, as working with live electrical components can cause serious injury or shock. Additionally, consider turning off the breaker to other pool equipment for extra safety. Once the power is off, wait a few minutes to ensure any residual electricity dissipates. Taking these precautions protects you from electrical hazards and creates a safe environment for the replacement process. Being aware of data privacy challenges and the importance of secure procedures can further enhance safety practices.
Draining the Pool Light Niche (If Necessary)

If water has seeped into the light niche, you’ll need to drain it to prevent electrical hazards and make removal easier. First, locate the drainage plug or screw, usually at the bottom of the niche. Remove the plug carefully and allow the water to drain into a bucket or container. If there’s no drain plug, use a turkey baster or wet/dry vacuum to extract the water. Be cautious not to splash or spill water outside the niche. Once drained, wipe around the area with a cloth to dry any remaining moisture. Draining the niche ensures you can safely proceed with removing the light fixture without risking electrical shock or damaging the fixture or pool components. Monitoring the cultural and regional aspects of pool maintenance can also help prevent common issues like water intrusion. Additionally, understanding the vital importance of proper sealing can help prevent future water seepage into the niche. Recognizing the significance of regular inspections can further safeguard your pool from similar problems.
Removing the Burned-Out Light Fixture
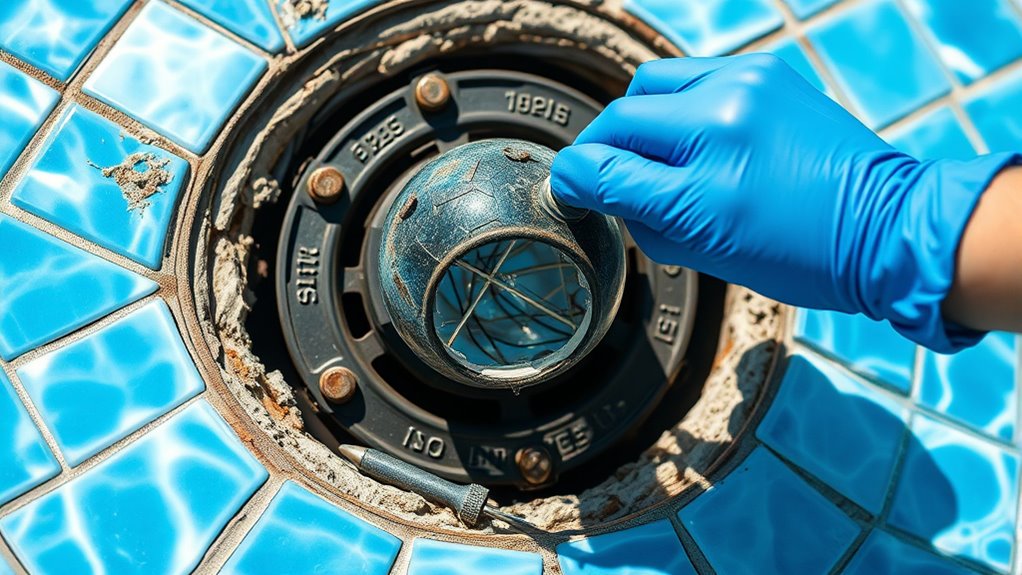
Before removing the fixture, make sure the power is turned off to avoid shocks. Carefully loosen and take out the burned-out light fixture, handling it gently. Taking these steps guarantees your safety and prevents damage during removal. If the fixture is complex or difficult to access, consider consulting a professional electrician to ensure proper removal and safety. Additionally, inspecting the area for any electrical issues can help prevent future problems.
Turn Off Power
Since working with electrical components can be dangerous, you should turn off the power supply before removing the burned-out pool light fixture. Locate your circuit breaker and shut off the breaker that controls the pool light. Confirm the power is off by testing the fixture with a voltage tester or a non-contact tester. This step ensures you won’t get shocked while handling electrical parts.
| Step | Details |
|---|---|
| Find the breaker | Locate the circuit breaker for the pool light. |
| Turn off breaker | Flip the breaker switch to the off position. |
| Confirm power | Use a tester on the fixture to verify no current. |
| Wait for safety | Wait a few minutes after turning off for safety. |
| Proceed with care | Only continue once you’re sure power is off. |
Remove Fixture Carefully
Carefully removing the burned-out pool light fixture is essential to prevent damage or injury. Start by ensuring the fixture is completely disconnected from power, which you’ve already confirmed. Use a sturdy ladder or step stool to reach the fixture safely. Carefully unscrew or unfasten any mounting screws holding the fixture in place. Once loose, gently pull the fixture out of the niche, avoiding sudden movements that could damage the fixture or the pool wall. If the fixture is stuck, don’t force it; instead, wiggle it slightly to loosen it. Be mindful of the wiring connections, and avoid pulling on the wires. Taking your time and handling the fixture gently will help prevent unnecessary damage and guarantee a smooth replacement process.
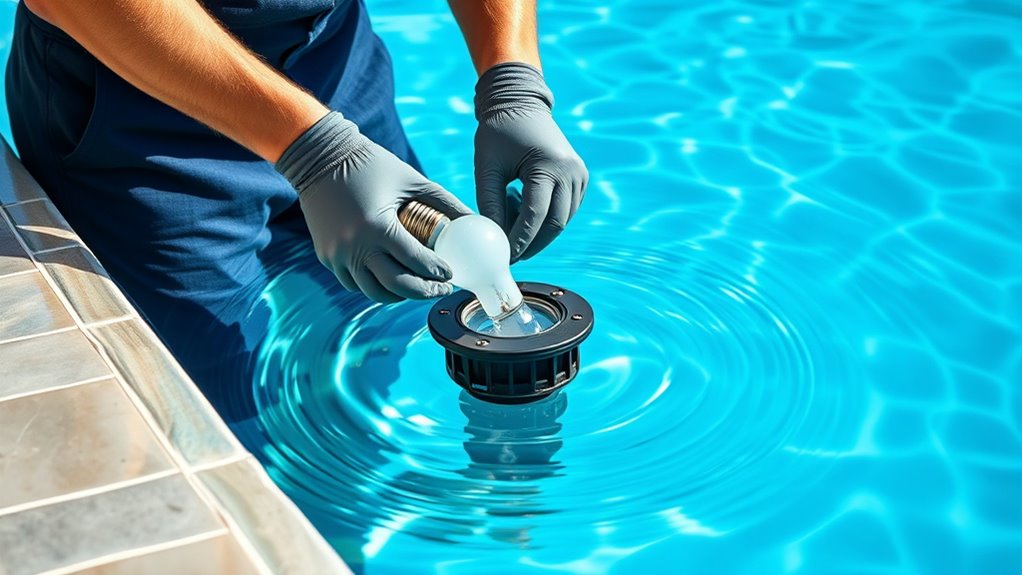
Inspecting and Replacing the Bulb or Fixture

To inspect and replace the pool light bulb or fixture, start by turning off the power at the circuit breaker to guarantee safety. Ensure the breaker is fully switched off before touching any electrical components. Carefully remove the light fixture cover, following the steps from your previous removal process. Once exposed, examine the bulb for signs of damage or corrosion. If the bulb is broken or burnt out, remove it using gloves or a cloth to avoid injury. Check the socket for corrosion or buildup; clean it gently if needed. If replacing the entire fixture, verify compatibility with your pool’s wiring and mounting. Insert the new bulb or fixture securely, ensuring it’s seated properly to prevent leaks or electrical issues. Never rush this step—precision ensures safety and proper operation. Additionally, understanding the significance of angel numbers can provide insight into your emotional state and readiness for new beginnings, which can be helpful during such maintenance tasks.
Reinstalling the Pool Light and Sealing Properly

Before reinstalling the pool light, make certain the fixture is clean and free of debris to create a proper seal. Wipe down the lens, housing, and surrounding area with a clean cloth to remove dirt or algae. Inspect the gasket or O-ring for damage or cracks; replace it if necessary. Carefully insert the light into the niche, aligning it properly with the mounting holes. Tighten the retaining screw or nut securely, but avoid over-tightening, which could crack the fixture. Apply a silicone-based sealant around the edge if recommended by the manufacturer, ensuring a watertight seal. Double-check that all components sit flush and properly aligned. Proper installation techniques help prevent leaks and guarantee the light remains waterproof and functional. Using durable materials suited for pool environments further extends the lifespan of your light and enhances safety. Additionally, considering corrosion-resistant components can significantly improve the durability of your pool light over time. Incorporating high-quality sealants and gaskets designed for aquatic use can further ensure long-lasting waterproofing and prevent leaks.
Restoring Power and Testing the Light

Now, you’ll restore power to the circuit and turn on the pool light to check if it works properly. Make sure the connections are secure and the breaker is switched on. Once powered, observe the light to confirm it’s functioning safely and correctly. To ensure optimal performance and safety, verify that all electrical connections are properly secured and free from corrosion or damage.
Restoring Circuit Power
Once you’ve verified that the circuit breaker or fuse controlling the pool light is in the ON position, you can proceed to restore power to the circuit. Ensure all connections are secure and properly reassembled before turning the breaker back on. Double-check that the pool light wiring is intact and free of damage. Reset the breaker if necessary, and listen for any unusual sounds or clicking. Keep a close eye on the breaker as you restore power, watching for signs of tripping. Remember, never force the breaker if it won’t stay on; this indicates a problem. By carefully restoring power, you set the stage for testing the light’s functionality and ensuring everything operates safely.
- Confirm wiring connections are tight and secure
- Inspect for signs of corrosion or damage
- Reset breaker slowly to avoid surges
- Keep tools and hands clear of electrical parts
- Observe breaker for any tripping or irregular behavior
Testing Light Functionality
How can you confirm that your pool light is functioning properly after restoring power? First, turn on the pool’s switch or remote control to activate the light. Observe if the bulb turns on promptly and illuminates your pool area evenly. Check for any flickering or dim spots, which may indicate wiring issues. If your pool has a control panel, use it to cycle the light through different settings or colors, if applicable. Ensure the light remains steady without flickering or turning off unexpectedly. Listen for any unusual buzzing sounds that could signal electrical problems. If the light doesn’t turn on or behaves erratically, double-check the connections and ensure the circuit switch is fully engaged. Proper testing confirms your repair was successful and the light is ready for regular use.
Ensuring Safe Operation
After confirming your pool light turns on properly, the next step is restoring power safely. Before doing so, double-check all connections, ensuring wires are secure and dry. Turn off the circuit breaker before reconnecting any wiring to prevent shocks. Once everything is in place, switch the breaker back on gradually, observing for any sparks or irregularities. Test the light again to verify proper operation.
- Confirm all wiring is secure and dry
- Use insulated tools for reconnection
- Turn off the breaker before working on wiring
- Restore power gradually, watching for issues
- Test the light thoroughly after restoring power
Troubleshooting Common Issues
When your pool light isn’t working, it’s important to identify the root cause quickly to restore proper illumination. Start by checking the power supply—ensure the circuit breaker hasn’t tripped and that the GFCI outlet is functioning. If wiring looks damaged or loose, tighten connections or replace faulty wires. Inspect the light’s housing for corrosion or debris, which can cause poor contact. If the bulb is new but still not working, test the socket with a multimeter to verify power. Sometimes, issues stem from a faulty switch or a problem with the transformer. Remember, always cut power before troubleshooting to avoid shocks. By systematically ruling out these common issues, you’ll pinpoint the problem and get your pool light back on quickly. Regular maintenance and inspecting electrical components can help prevent future issues and ensure safety. Additionally, using appropriate tools can make diagnosing electrical problems safer and more effective. For ongoing reliability, consider upgrading to modern, energy-efficient lighting designed for pool use. Incorporating proper grounding techniques can also enhance safety and prevent electrical faults over time. Staying informed about potential electrical hazards is essential for safe pool maintenance.
Tips for Maintaining Your Pool Lighting System
Regular maintenance is essential to keep your pool lighting system functioning reliably and looking its best. By staying proactive, you can prevent issues like flickering or burned-out bulbs. Start by regularly cleaning the light fixtures to remove dirt and debris, which can cause overheating. Check wiring connections periodically to ensure they’re secure and free of corrosion. Test your lights monthly to spot early signs of trouble. Keep an eye on the pool’s water chemistry, since imbalances can affect the lights’ longevity. Proper light fixture maintenance ensures optimal performance and prevents premature failure. Additionally, inspecting and cleaning the electrical components can help extend the lifespan of your pool lights. Finally, replace bulbs at the first sign of dimming or flickering to avoid further damage. Incorporating solar-powered lights can also reduce maintenance needs and improve energy efficiency.
Frequently Asked Questions
Can I Replace a Pool Light Without Draining the Pool?
You might wonder if you can replace a pool light without draining the pool. In many cases, yes, you can, especially if the light fixture is designed for it. Some models allow you to access and replace the bulb or the entire fixture while the water level remains above the light. However, check your pool’s manual or consult a professional to guarantee safety and compatibility before proceeding.
What Safety Precautions Should I Take During Replacement?
When tackling a delicate task like replacing a pool light, safety should be your guiding star. You’ll want to turn off the power at the breaker to avoid any surprises. Wear rubber gloves and goggles to protect against electrical mishaps and water splashes. Keep your work area dry and ensure all tools are insulated. By following these precautions, you keep the process safe, smooth, and worry-free.
How Often Should Pool Lights Be Replaced?
You might wonder how often to replace your pool lights. Typically, pool lights last around 5 to 10 years, but this depends on the quality and usage. You should inspect them regularly for signs of damage or dimming. If they flicker or stop working, substitute them promptly to ensure safety and proper illumination. Regular maintenance keeps your pool area safe and enjoyable, so don’t wait for complete failure before acting.
Are There Different Types of Pool Light Bulbs?
You’ll find there are different types of pool light bulbs, each designed for specific fixtures and needs. Common types include incandescent, halogen, LED, and fiber optic bulbs. LED lights are energy-efficient and long-lasting, while halogen bulbs provide bright illumination. Check your pool fixture to identify the compatible bulb type before replacing, ensuring you choose the right one for safety, brightness, and energy savings.
What Are Signs That My Pool Light Needs Replacement?
You’ll notice signs that your pool light needs replacing if it flickers, dims, or stops working altogether. Sometimes, the light may be hazy or discolored, indicating bulb deterioration. If you see moisture inside the fixture or corrosion around the housing, it’s a clear sign to substitute it. Don’t ignore these signs; addressing them promptly keeps your pool safe and ensures your lighting functions properly during evening swims.
Conclusion
Replacing a burned-out pool light might seem intimidating, but with the right steps, you can do it safely and effectively. Don’t let fear of electrical work hold you back—just follow safety precautions and take your time. Imagine enjoying a beautifully lit pool at night, creating perfect ambiance for gatherings or relaxing swims. With patience and care, you’ll have your pool glowing again, transforming your backyard into a stunning oasis you can be proud of.