To resurface your aging fiberglass pool, you can repaint it with specialized pool paints or apply a gel coat to refresh its surface. You might also consider replacing the liner, installing a new overlay system, or adding a pebble or aggregate finish for durability and style. If the damage is extensive, full surface replacement may be needed. Exploring these options further can help you find the best way to restore your pool’s look and longevity.
Key Takeaways
- Options include surface preparation with paints, sealers, and gel coats to refresh and protect the existing fiberglass surface.
- Overlay systems and textured coatings provide durable, stain-resistant finishes that can be applied over aging surfaces.
- Interior replacements like vinyl liners or overlays can improve appearance and water quality without full shell removal.
- Full shell or surface replacements involve removing old material and installing new fiberglass, plaster, or epoxy coatings for extensive damage.
- Choosing the right resurfacing method depends on pool condition, budget, and desired aesthetics for revitalizing aging fiberglass pools.
Repainting With Pool Paints and Sealers
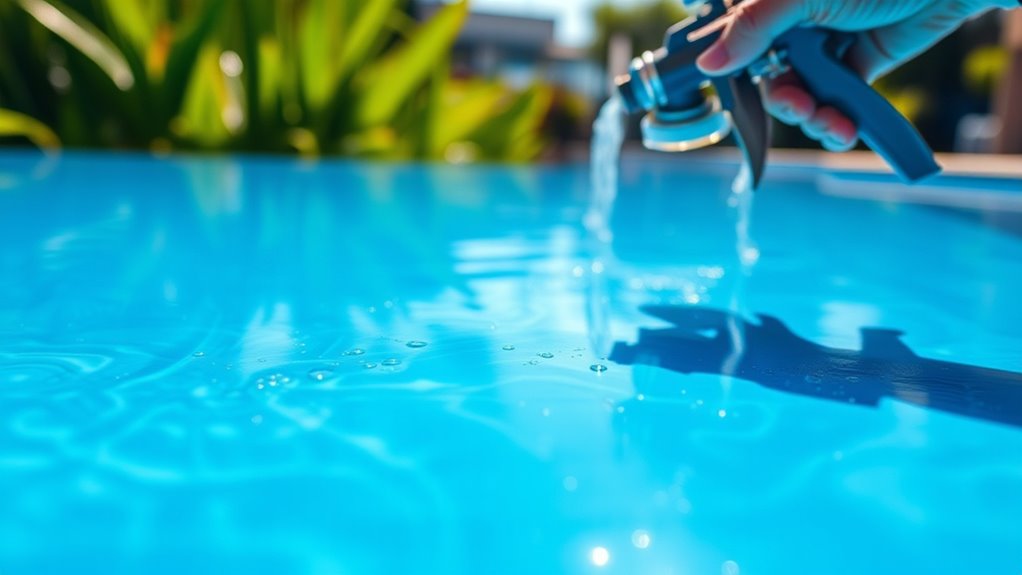
Repainting your fiberglass pool with specialized pool paints and sealers is an effective way to restore its appearance and protect the surface. You’ll want to start by thoroughly cleaning the pool, removing dirt, algae, and loose paint. Once the surface is dry, lightly sand any rough areas to ensure proper adhesion. Choose a high-quality, epoxy or acrylic-based pool paint designed for fiberglass surfaces. Apply the paint evenly with a brush or roller, following the manufacturer’s instructions for drying times and coats. After painting, seal the surface with a compatible sealer to enhance durability and water resistance. This approach not only revitalizes your pool’s look but also creates a protective barrier against future wear and tear, extending its lifespan. Additionally, selecting a high suction power vacuum can help keep the surrounding area clean during the process. To ensure proper adhesion and longevity, it’s important to consider the risk assessment for the materials used and the specific conditions of your pool environment. Proper surface preparation and choosing the right coatings are crucial for achieving lasting results. Incorporating advanced surface technologies can further improve the longevity and appearance of the repaint. Being aware of angel number symbolism can also provide motivational insights during your renovation journey.
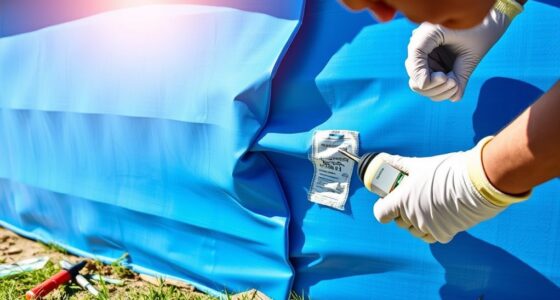
Applying a Gel Coat Resurfacing Layer
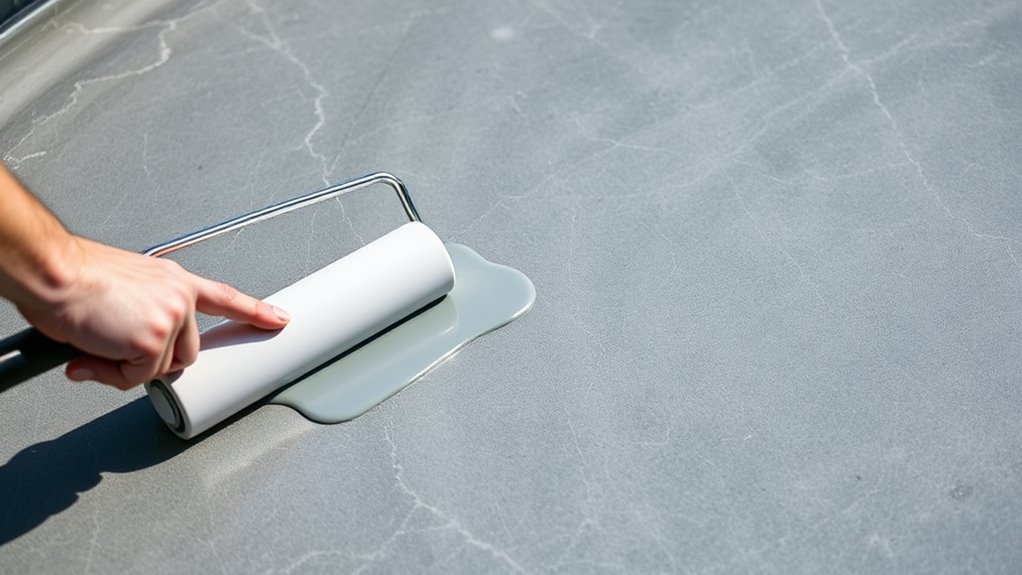
To guarantee a smooth gel coat application, you need to carefully prepare the surface, removing any debris or imperfections. Using proper application techniques, like even spraying or brushing, helps achieve a uniform finish. Once applied, allow the gel coat to cure fully before finishing touches to ensure durability and a sleek look. Incorporating proper surface preparation can significantly enhance the longevity and appearance of the resurfaced pool. Additionally, ensuring the projector bulb is in good condition and properly maintained can prevent issues that may affect your viewing experience during poolside entertainment.
Gel Coat Preparation
Preparing the gel coat for resurfacing is a crucial step to guarantee a smooth and durable finish. First, thoroughly clean the pool surface to remove dirt, oils, and algae. Use a gentle, non-abrasive cleaner and rinse well. Next, sand the entire area with a fine-grit sandpaper to create a rough surface that helps the gel coat adhere better. After sanding, wipe away all dust with a clean, damp cloth. Inspect the surface for any cracks or damage, repairing them before applying the gel coat. Confirm the surface is completely dry to prevent moisture from affecting adhesion. Proper preparation minimizes imperfections and ensures the gel coat bonds securely, resulting in a professional-looking, long-lasting finish. Additionally, understanding the benefits of automation in business can help optimize the resurfacing process for efficiency and scalability. Ensuring proper surface preparation is essential for achieving a high-quality finish and increasing the longevity of the repair, especially when considering the impact of regular maintenance on material adhesion. Proper surface preparation also helps prevent air quality issues that could compromise the curing process and final appearance. Incorporating advanced techniques can further enhance the durability and aesthetic appeal of the resurfaced pool.
Application Techniques
Once the gel coat surface is properly prepared, you can begin applying the resurfacing layer. Use a high-quality roller or brush to spread the gel coat evenly across the entire surface. Work in small sections, maintaining a consistent thickness to ensure a smooth finish. Keep a steady hand to avoid streaks or uneven areas. Avoid overworking the gel coat, as this can introduce air bubbles. Check the manufacturer’s instructions for the correct application temperature and drying time. To help you stay organized, here’s a quick overview:
| Step | Tip |
|---|---|
| Apply in small sections | Prevents uneven coverage |
| Maintain even pressure | Ensures a smooth, consistent layer |
| Use proper tools | Roller or brush as recommended |
| Follow manufacturer’s specs | Adheres to proper curing guidelines |
| Avoid overworking | Prevents bubbles and defects |
Additionally, ensuring proper application techniques can improve the adhesion and durability of the resurfacing layer. Proper preparation and technique are essential for achieving a professional finish, especially when considering industry best practices for fiberglass pool resurfacing. Being aware of the importance of proper angles can help optimize the application process and result in a longer-lasting surface. Incorporating filtering and pump protection methods can further maintain the quality of the coating and prevent issues during application.
Curing and Finishing
After applying the gel coat layer, it’s essential to allow it to cure properly before moving on to finishing touches. Proper curing ensures the layer hardens evenly and bonds securely to the underlying surface. During this time, avoid any contact or water exposure that could compromise the finish. Typically, curing takes 24 to 48 hours, depending on the product and environmental conditions. Keep the pool area well-ventilated and maintain consistent temperature to facilitate even curing. Once fully cured, inspect the surface for any imperfections or bubbles, and lightly sand any rough spots if necessary. Finish by applying a gloss or protective sealant to enhance durability and appearance. This step guarantees a smooth, long-lasting surface that revitalizes your fiberglass pool’s look. Additionally, allowing sufficient curing time helps prevent issues such as improper bonding, which can compromise the longevity of the resurfacing. Ensuring proper curing conditions can also improve the overall durability of the new finish, ensuring it withstands pool use and weathering over time. Incorporating proper preparation can further optimize the bonding process and result in a more resilient surface.
Vinyl Liner Replacement and Overlay

Replacing or overlaying the vinyl liner is a practical option when your fiberglass pool’s interior shows signs of wear, tears, or discoloration. This approach can refresh your pool without full resurfacing. Consider these key points:
- Cost-effectiveness: It’s usually less expensive than complete surface replacement.
- Quick turnaround: Installing a new liner or overlay takes less time, minimizing pool downtime.
- Customization: You can choose from various patterns and colors to update your pool’s look.
- Maintenance: A new liner can improve water quality and reduce algae buildup.
- Compatibility with Pool Tuning: A new liner can also aid in maintaining optimal water chemistry and efficiency, especially when done alongside other upgrades.
While it’s a viable solution, keep in mind that liners may eventually need replacement again, especially if the pool experiences heavy use or structural issues.
Replacing the Entire Pool Surface With New Material

When your fiberglass pool’s surface becomes severely worn, cracked, or stained, replacing the entire surface with a new material can restore its appearance and structural integrity. This process involves removing the old surface entirely and preparing the shell for a fresh finish. You’ll need professional help to guarantee proper surface prep and installation. Common options include applying a new fiberglass layer, a plaster finish, or an epoxy coating. Replacing the surface can be more cost-effective than full shell replacement and extends the pool’s lifespan. It also allows you to choose a finish that matches your aesthetic preferences. Keep in mind that downtime is required for curing and installation, so plan accordingly to minimize disruption. This approach revitalizes your pool and improves its durability.
Using Pebble or Aggregate Finish Coatings
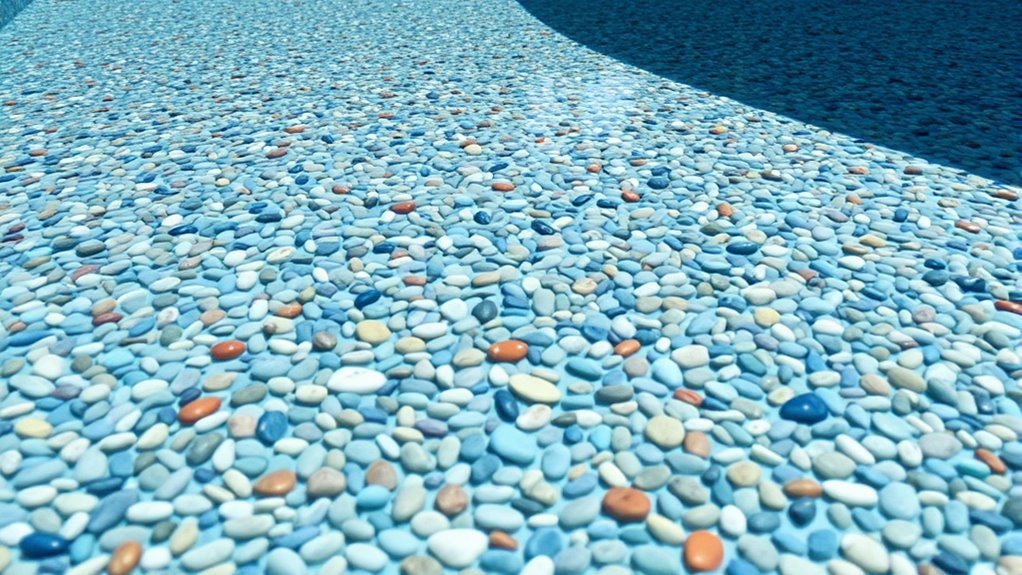
Using pebble or aggregate finish coatings offers a durable and attractive alternative to traditional pool surfaces. These finishes enhance your pool’s appearance, offering a natural, textured look that resists chipping and staining. When considering this option, keep in mind:
- Durability – They withstand pool chemicals and weather, extending your pool’s lifespan. Resistant to cracking and other damage, these finishes contribute to long-term pool integrity.
- Aesthetics – The varied colors and textures create a custom, luxurious look.
- Maintenance – They require less upkeep, making cleaning easier over time.
- Installation – Proper surface preparation and professional application are essential for long-term performance.
- Color Stability – These finishes maintain their color well over time, reducing the need for frequent repairs or refinishing.
Choosing a pebble or aggregate finish can markedly boost your pool’s visual appeal and longevity, making it a smart investment for your aging fiberglass pool.
Installing a Pool Resurfacing Overlay System

Installing a pool resurfacing overlay system is an effective way to breathe new life into your fiberglass pool without a complete overhaul. This process involves applying a durable, specialized coating directly over the existing surface. First, your pool’s surface is thoroughly cleaned and prepped to ensure proper adhesion. Any cracks or imperfections are repaired before the overlay is installed. Once prepared, a bonding agent is applied, followed by the overlay material, which can be a polymer-based coating or a textured surface for better grip. The application is quick compared to full resurfacing, minimizing downtime. After curing, the new surface provides a smooth, attractive finish that resists stains, cracks, and wear. This option is cost-effective, less invasive, and extends your pool’s lifespan with minimal disruption. Incorporating sound healing principles during the process can help reduce stress and promote relaxation for those involved.
Frequently Asked Questions
How Long Does Each Resurfacing Option Typically Last?
You’re wondering how long different resurfacing options last. Generally, a fresh gel coat or repaint can last around 5 to 7 years with proper maintenance. More durable options like epoxy coatings often last 10 to 15 years, while tile or pebble finishes might stay appealing for 20 years or more. Your choice depends on your budget and how long you want the pool to look and perform well.
What Is the Most Cost-Effective Resurfacing Method?
When it comes to saving money, think of your pool’s resurfacing as planting seeds for future savings. You’ll find that a basic acrylic or gel coat resurfacing is often the most cost-effective, offering a quick fix with less expense upfront. While it may not last as long as more durable options, it provides a budget-friendly way to restore your pool’s appearance without breaking the bank.
Can Resurfacing Be Done in Winter or Cold Weather?
You might wonder if you can resurface your pool during winter or cold weather. It’s possible, but not ideal. Cold temperatures can slow down curing times and affect adhesion, leading to longer project durations and potential issues. If you need to do it in winter, make certain the work is done during warmer days or use heating methods to maintain proper conditions. Always consult a professional to get the best results.
How Do I Choose the Best Resurfacing Option for My Pool?
When choosing the best resurfacing option for your pool, consider your pool’s age, condition, and your budget. You should also evaluate the longevity you desire and the climate in your area. Talk to professionals to get expert advice, and review different materials like epoxy, plaster, or pebble finishes. Ultimately, pick a solution that fits your needs, ensuring durability, aesthetics, and ease of maintenance for years to come.
Is Professional Installation Necessary for All Resurfacing Types?
You wonder if professional installation is needed for all resurfacing types. Generally, yes, because each method has specific requirements and techniques. A professional guarantees proper preparation, application, and curing, which help avoid future issues like cracking or peeling. DIY might be possible for minor repairs, but for lasting, quality results, trusting experts is your best bet. They bring experience and tools that ensure your pool’s surface is durable and beautifully finished.
Conclusion
Resurfacing your aging fiberglass pool is like giving it a second chance at life. Whether you opt for a fresh coat of paint, a stunning pebble finish, or a complete overhaul, each choice breathes new energy into your oasis. Think of it as turning a worn-out book into a treasured masterpiece—you hold the pen to restore its beauty. Don’t wait; your perfect pool paradise is just a resurfacing away, waiting for you to make the next splash.