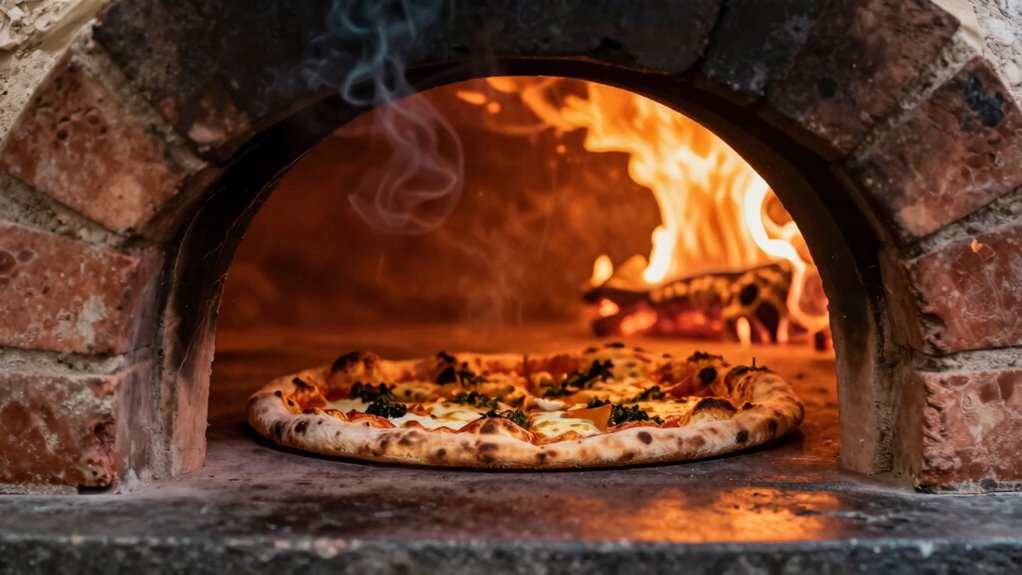
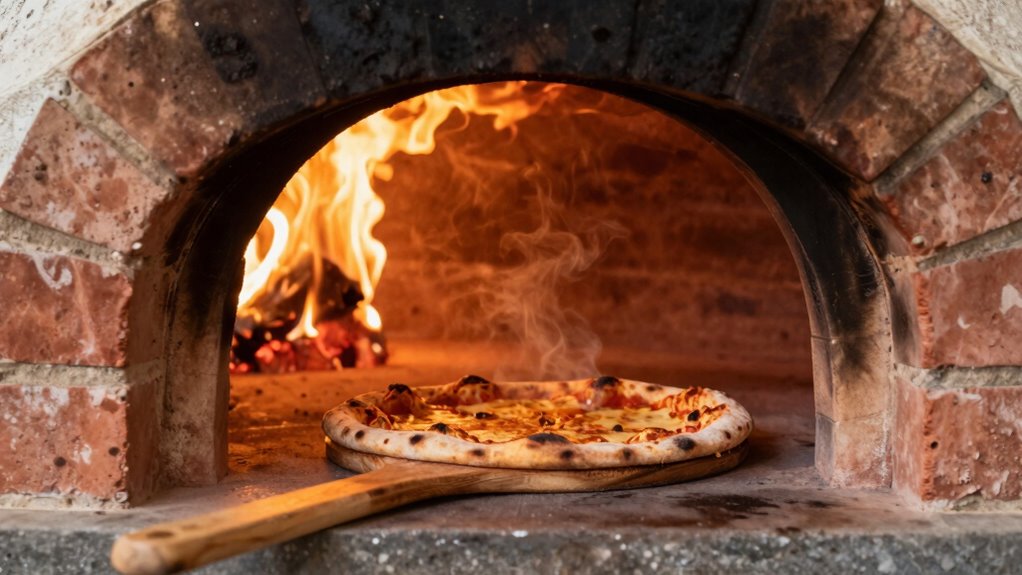
To get a crispy crust without burning your pizza, keep your oven between 450°F and 500°F, and always fully preheat it for 30-45 minutes. Use a pizza stone or steel to distribute heat evenly, and monitor the temperature with a reliable oven thermometer. Adjust hot spots by rotating the pizza, and fine-tune the heat during baking to prevent overbrowning. Keep these tips in mind, and you’ll master the perfect pizza crust every time.
Key Takeaways
- Preheat your oven and pizza stone to 450-500°F for even heat distribution and crispy crusts.
- Use a thermometer to monitor and maintain precise oven temperature during baking.
- Rotate the pizza during baking to avoid hot spots and ensure even crispiness.
- Adjust top and bottom heat settings gradually to prevent burning toppings or undercooking crust.
- Avoid opening the oven door frequently to keep consistent high temperatures and prevent burning.
Why Oven Temperature Matters for the Perfect Pizza Crust

Your oven temperature plays a crucial role in achieving the perfect pizza crust. When the heat is just right, it helps the dough fermentation process develop a sturdy, airy structure that’s essential for a good crust. Too low, and your pizza may turn out limp and undercooked; too high, and it could burn before the toppings cook properly. Proper oven heat also enhances sauce seasoning, allowing flavors to meld and caramelize slightly on the crust’s edges. This balance ensures your crust is crispy on the outside while remaining tender inside. Adjusting the oven temperature ensures your dough fermentation creates the ideal texture and that your sauce seasoning is highlighted without risking burning or sogginess. The contrast between high and low temperatures directly impacts the contrast ratio of your crust’s appearance, influencing how appetizing it looks. Additionally, maintaining the correct oven temperature helps prevent overcooking or undercooking your pizza, leading to more consistent results. Mastering oven temperature control is essential for consistent results and achieving that perfect balance between crispy and tender. Ultimately, temperature mastery makes all the difference in pizza perfection.
What Is the Ideal Temperature Range for Crispy, Non-Burnt Pizzas?

The ideal temperature range for crispy, non-burnt pizzas is usually between 450°F and 500°F. Staying within this range helps you achieve that perfect crust without risking charring. Going too high, however, can lead to burnt edges and uneven cooking. Using giveaways and gear can help you monitor and maintain the optimal temperature more precisely. Additionally, understanding the thermal properties of pizza dough can help you better predict how it will respond to different heat levels. Recognizing the heat transfer mechanisms involved in pizza baking can further improve your results. Being aware of infrared radiation also plays a role in how heat radiates onto the pizza surface, influencing crust crispiness. Moreover, considering convection currents within your oven can enhance heat distribution for more consistent baking outcomes.
Optimal Temperature Range
Achieving the perfect pizza crust requires maintaining the right oven temperature, as too low or too high can ruin your efforts. The ideal temperature range is generally between 450°F and 500°F (232°C to 260°C). Within this range, your dough hydration plays a crucial role—higher hydration helps create a crispy crust without burning, especially at higher temperatures. Cheese selection also matters: opting for cheeses that melt evenly and don’t burn easily allows for a consistent bake. If you aim for a crispy crust, stay near 500°F, but adjust slightly based on your dough’s moisture level and cheese type. This balance ensures a well-cooked, crispy crust without risking overbaking or burning your toppings. Monitoring these factors helps you hit that perfect oven temperature every time. Additionally, understanding the thermal properties of your oven can help you maintain a consistent heat distribution for optimal baking results. Being aware of the heat retention capabilities of your oven allows for more precise temperature control, leading to better baking outcomes.
Risks of Overheating
Exceeding the ideal oven temperature range can quickly lead to burnt toppings and an overly crisp crust that’s hard to chew. When your oven heats too much, poor oven insulation allows heat to escape or concentrate unevenly, increasing the risk of scorching. This not only spoils the flavor but shortens your baking duration, making it easy to overbake the pizza. High temperatures can also cause the crust to burn before the toppings are fully cooked, ruining the texture. To prevent this, stick within the recommended temperature range, typically 450-500°F, and monitor your oven’s heat retention. Maintaining a consistent, moderate temperature guarantees a crispy crust without burning, giving you a perfectly baked pizza every time.
How to Preheat Your Oven for Maximum Heat and Even Cooking

To make certain your oven reaches the right temperature, give it enough time to preheat fully before baking. Using a pizza stone can help distribute heat evenly and improve crust crispiness, but it needs to be heated along with the oven. Pay attention to the recommended preheat duration to achieve maximum heat and perfect results. Additionally, monitoring oven temperature accuracy with an oven thermometer can ensure consistent cooking outcomes. Incorporating sound vibrations into your baking routine can also enhance the overall sensory experience and help maintain even heat distribution in your oven. Implementing durable survival gear essentials like a reliable thermometer can be crucial for precise temperature monitoring, especially in outdoor or less controlled environments. Staying aware of cooking environment factors such as humidity and airflow can further optimize your baking process. Exploring emerging trends in digital publishing can also provide innovative ideas to enhance your cooking content.
Preheat Duration and Timing
Preheating your pizza oven for the right amount of time is essential to guarantee maximum heat and even cooking. Typically, 30 to 45 minutes is ideal, allowing the oven’s walls and floor to reach consistent, high temperatures. Proper preheat timing ensures your dough hydration remains ideal, preventing soggy crusts or burned edges. It also promotes even cheese melting, avoiding uneven toppings or burnt spots. Keep in mind that too short a preheat won’t activate the full heat potential, while too long may cause temperature fluctuations once you start baking. Monitor the oven’s temperature with a reliable thermometer, and wait until it stabilizes before launching your pizza. This way, you’ll achieve that crisp crust without risking burning everything, thanks to precise preheat duration and timing.
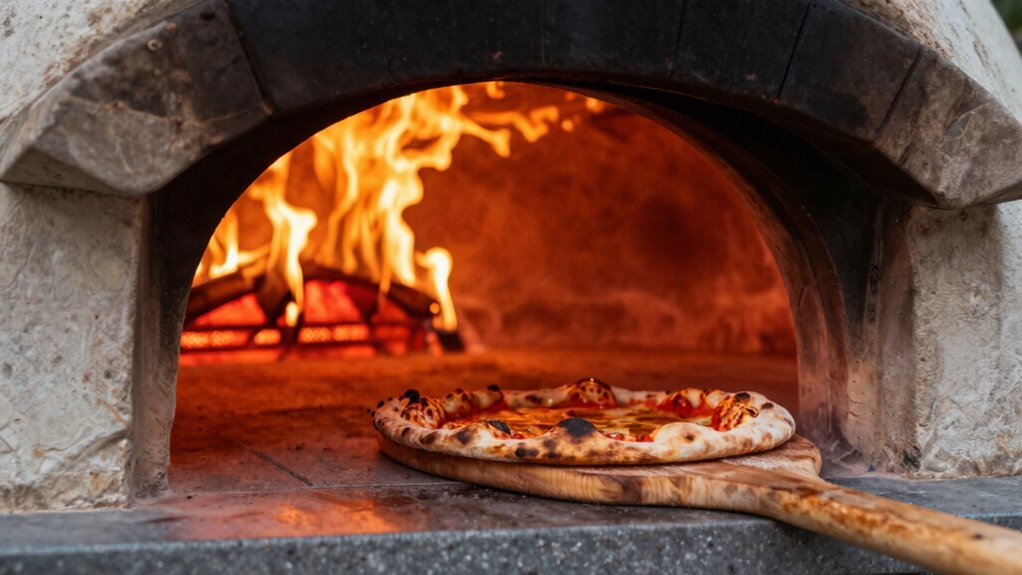
Using a Pizza Stone
For the best results, you should always start by placing your pizza stone in the oven before you begin preheating. This guarantees the stone heats gradually, maximizing its heat retention capabilities and preventing thermal shock. To optimize your crust, consider these tips:
- Place the stone on the middle or lower rack for even heat exposure
- Preheat the oven with the stone inside for at least 30-45 minutes
- Use a high temperature, like 500°F (260°C), for crispy results
- Ensure your oven temperature is calibrated correctly for optimal oven performance
- Remember that natural light can boost your kitchen’s ambiance, making the preheating process more enjoyable
- Additionally, choosing the right pizza baking tools can further improve your results and make the process more efficient.
A well-heated pizza stone creates a hot, even surface that mimics a traditional brick oven, helping your pizza develop a crispy crust without burning. Proper preheating ensures maximum heat transfer and consistent cooking.
How a Pizza Stone or Steel Helps Achieve Crispy Results
A pizza stone or steel acts as a heat conductor that directly transfers high temperatures to your dough, helping you achieve a crisp, golden crust. This rapid heat transfer enhances dough hydration, resulting in better oven spring and a lighter texture. It also promotes even cheese distribution by preventing soggy spots and ensuring the toppings melt uniformly. Using a stone or steel creates a stable baking surface, reducing temperature fluctuations that can lead to burning or undercooked spots. The table below compares their properties:
| Property | Pizza Stone | Steel |
|---|---|---|
| Heat conduction | Moderate | Excellent |
| Durability | Fragile if dropped | Highly durable |
| Heating time | Longer | Faster |
| Retains heat | Good | Superior |
| Maintenance | Needs seasoning | Easy to clean |
Both tools help you achieve crispy results with consistent heat. Additionally, choosing the right baking surface can significantly influence your pizza’s final texture and quality. Incorporating proper preheating techniques ensures your stone or steel reaches the ideal temperature for optimal results. Maintaining the correct temperature management during baking is crucial to avoid burning or undercooked spots and to maximize the benefits of your heat conductor. Proper heat transfer techniques can make a noticeable difference in your pizza’s overall quality.
When and How to Adjust Oven Temperature During Baking
Adjusting your oven temperature during baking is essential for achieving the perfect pizza crust and toppings. Temperature fluctuations can cause uneven cooking or burning, so knowing when and how to tweak the heat is key. First, ensure your oven is properly calibrated; an inaccurate thermometer can mislead you. If you notice the crust browns too quickly or toppings are undercooked, gently lower the temperature. Conversely, if the pizza isn’t crisp enough after a while, slightly increase it. Keep a close eye on these signs:
Adjust oven temp gradually to perfect your pizza; monitor for signs of overbrowning or undercooking.
- Crust browns too fast or burns
- Toppings remain undercooked
- Oven temperature appears inconsistent due to fluctuations
Adjustments should be gradual, and always rely on an accurate oven thermometer for best results.
How to Use Top and Bottom Heat Settings for the Best Crust
To get a perfect crust, you need to control how the heat is distributed in your oven. Adjusting the top and bottom heat settings helps balance the cooking process and improves crust texture. Knowing when to shift heat focus can make a big difference in your pizza’s final quality.
Adjusting Heat Distribution
Mastering heat distribution is key to achieving that perfect crust on your pizza. By adjusting the top and bottom heat settings, you control how evenly your pizza cooks, preventing burning or sogginess. Keep in mind that factors like dough hydration and topping placement impact heat flow. For a crispier crust, increase bottom heat during the first few minutes, then switch to the top to melt toppings without overcooking the base. Conversely, if toppings brown too fast, reduce top heat and focus on bottom heat for a more even bake. To optimize heat distribution:
- Use lower heat for delicate toppings, higher for sturdier ones
- Adjust heat during baking based on dough hydration
- Position toppings strategically to avoid overexposure to direct heat
Fine-tuning these settings helps achieve an evenly cooked, crispy crust every time.
Balancing Top and Bottom
Balancing the top and bottom heat settings is key to achieving that perfect pizza crust. Too much bottom heat can cause a soggy crust, while excessive top heat risks burning the toppings. Adjusting these settings helps control dough hydration and sauce thickness, ensuring even cooking. For a crispy bottom, increase the bottom heat; for a well-cooked top, boost the top heat. Use the table below as a guide:
| Dough Hydration | Sauce Thickness | Best Heat Setting |
|---|---|---|
| Low | Thin | Higher bottom, moderate top |
| High | Thick | Equal or slightly higher top |
| Low | Thick | Lower bottom, higher top |
| High | Thin | Balanced heat for even cook |
Experiment to find your ideal balance for perfect crust every time.
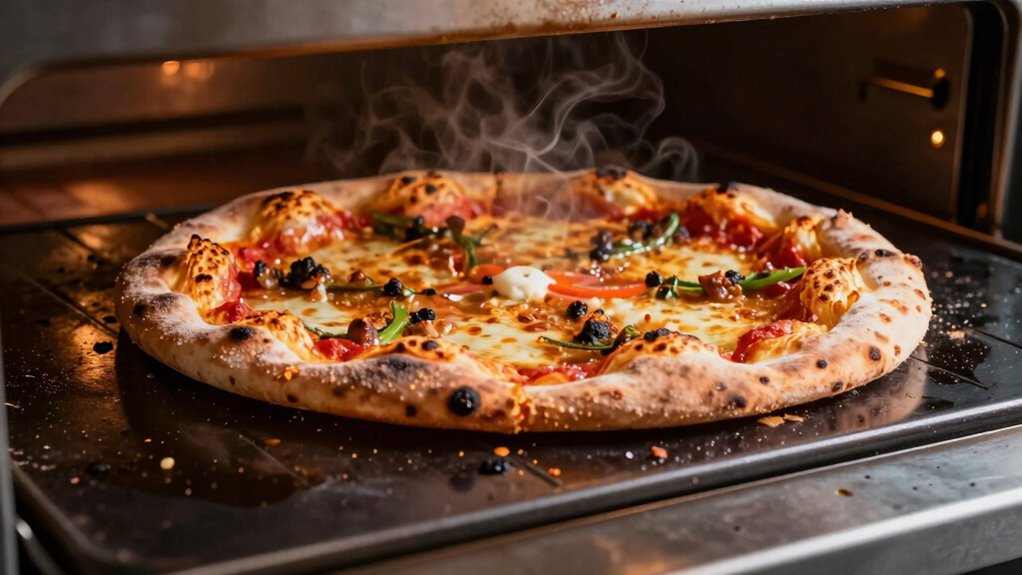
Common Oven Temperature Mistakes That Burn or Undercook Pizza

Many home pizza makers make the mistake of setting their oven temperature too high or too low, which can lead to burnt crusts or undercooked centers. Common errors include ignoring dough hydration, which affects how quickly moisture escapes, and uneven cheese distribution, causing hot spots that burn the toppings.
- Using too high a temperature without adjusting dough hydration can result in a burnt, crispy crust while the center remains undercooked.
- Setting the oven too low prolongs cooking time, risking a soggy crust and underdone dough.
- Not preheating the oven properly or ignoring hot spots can cause uneven cooking and burnt edges.
Pay attention to dough hydration and ensure consistent cheese distribution to help prevent these temperature mistakes and achieve a perfectly cooked pizza.
How to Manage Hot Spots for Even, Crispy Pizza
Hot spots in your oven can cause uneven cooking, leaving some parts of your pizza burned while others remain underdone. To manage this, start by adjusting your oven’s position or rotating the pizza during cooking. Proper dough hydration helps create a more resilient crust that withstands hot spots without burning. Keep an eye on cheese melting; uneven heat can cause patches of over-melted or under-melted cheese. Use a pizza stone or steel, preheated thoroughly, to distribute heat more evenly and reduce hot spots. If your oven has hot spots you’ve identified, try shifting the pizza to different zones during baking. This way, you promote consistent heat exposure, ensuring a crispy crust and evenly melted cheese across the entire pizza.
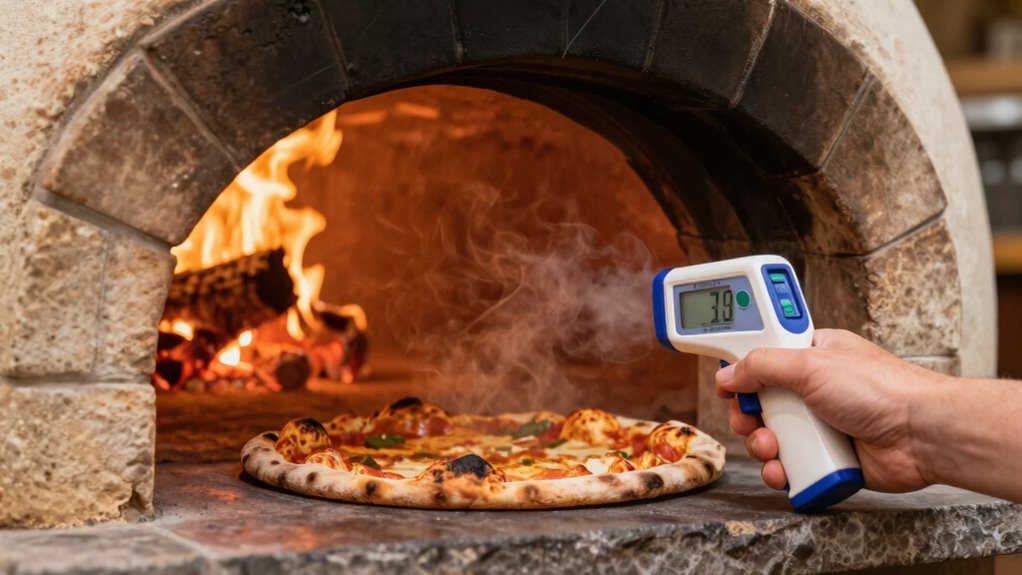
How to Test and Calibrate Your Oven’s Temperature at Home
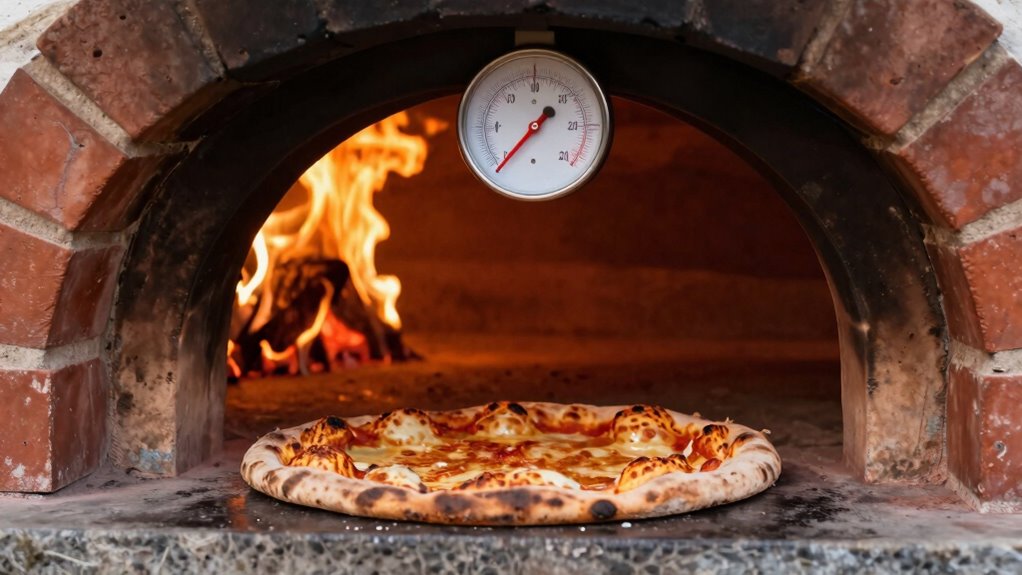
To guarantee your oven is reaching and maintaining the correct temperature, testing and calibrating it at home is essential. Accurate oven calibration ensures your pizza cooks evenly and crisply without burning. To do this, start by placing an oven thermometer inside—preferably one with a digital or dial display for precision. Preheat your oven to your target temperature, then compare the readings. If the thermometer shows a different temperature, you’ll need to adjust your oven’s calibration settings or note the discrepancy for future use. Consider these tips for better results:
- Use a reliable, oven-safe thermometer for accurate readings
- Preheat fully before testing for consistent results
- Record discrepancies to adjust cooking times or calibrate your oven
This process improves temperature accuracy, leading to perfect pizza every time.
Final Tips for Mastering Pizza Oven Temperatures and Serving Perfect Pies

Getting your oven properly calibrated is a great start, but mastering your pizza oven’s temperature requires ongoing attention and some practical tips. Make sure your oven has good insulation, which helps maintain consistent heat and reduces energy loss, leading to better crusts and toppings. Pay close attention to pizza dough hydration; higher hydration levels can create a lighter, crispier crust at high temperatures. Use a pizza stone or steel to promote even heat distribution and achieve that perfect crispy exterior. Keep your oven’s temperature steady by preheating thoroughly and avoiding frequent door openings. Practice makes perfect—adjust your techniques based on how your oven responds. With consistent effort, you’ll serve up perfectly baked pies with crispy crusts and perfectly cooked toppings every time.
Frequently Asked Questions
Can I Achieve Restaurant-Quality Pizza at Home Without Professional Equipment?
Yes, you can achieve restaurant-quality pizza at home by focusing on your pizza dough and cheese melt. Use a hot oven or a pizza stone to mimic professional heat, ensuring a crispy crust. Preheat thoroughly, stretch your dough evenly, and add cheese just before baking to get that perfect melt. With attention to temperature and technique, you’ll get a delicious, crispy crust and gooey cheese every time.
How Does Humidity Affect Oven Temperature and Pizza Quality?
Humidity impact plays a big role in your pizza’s outcome. When humidity is high, moisture control becomes tricky, causing your crust to steam instead of crisp. This can lead to a soggy pizza or uneven cooking. To counter this, you should adjust your oven temperature slightly higher and ensure proper airflow. Managing humidity helps you get that perfect, crispy crust without sacrificing flavor or texture.
What Are the Best Types of Oven Thermometers for Accuracy?
Ever wonder how to guarantee your oven hits the perfect temp? You should choose infrared thermometers for quick, accurate readings from a distance, ideal for checking surface temperatures. Dial gauges are excellent for monitoring the oven’s internal temperature consistently. Both types offer reliable accuracy, but infrared thermometers give instant results, making them your best choice to keep your pizza crust crispy without burning. Which one suits your style best?
How Does Altitude Influence Optimal Pizza Oven Temperatures?
Altitude influences your pizza oven temperature because higher elevations require adjustments for proper cooking. You should perform altitude adjustment and temperature calibration to guarantee your oven reaches the ideal heat, as lower air pressure can cause temperatures to register differently. To get perfect results, fine-tune your oven settings accordingly, increasing or decreasing the temperature based on your altitude. This way, you’ll achieve a crispy crust without burning your pizza.
Are There Specific Oven Settings for Different Pizza Styles?
You should absolutely tweak oven settings for different pizza styles. For thin-crust or Neapolitan pies, go for high heat and stone baking on a cordierite or clay stone, which distributes heat evenly for that perfect crispy base. For thicker, pan-style pizzas, lower temperatures with a seasoned pizza stone help prevent burning while allowing the dough to cook through. Adjust your temperature based on your stone type and pizza style for perfect results every time.
Conclusion
Mastering your pizza oven temperature is like balancing on a thin line between perfection and disaster. With the right heat, your crust turns golden and crispy, avoiding the burnt edges or soggy centers of poor timing. Think of your oven as a canvas—adjusting the heat is your brushstroke. When you find that sweet spot, every slice becomes a masterpiece, crispy on the outside, tender inside, and worth every delicious bite.