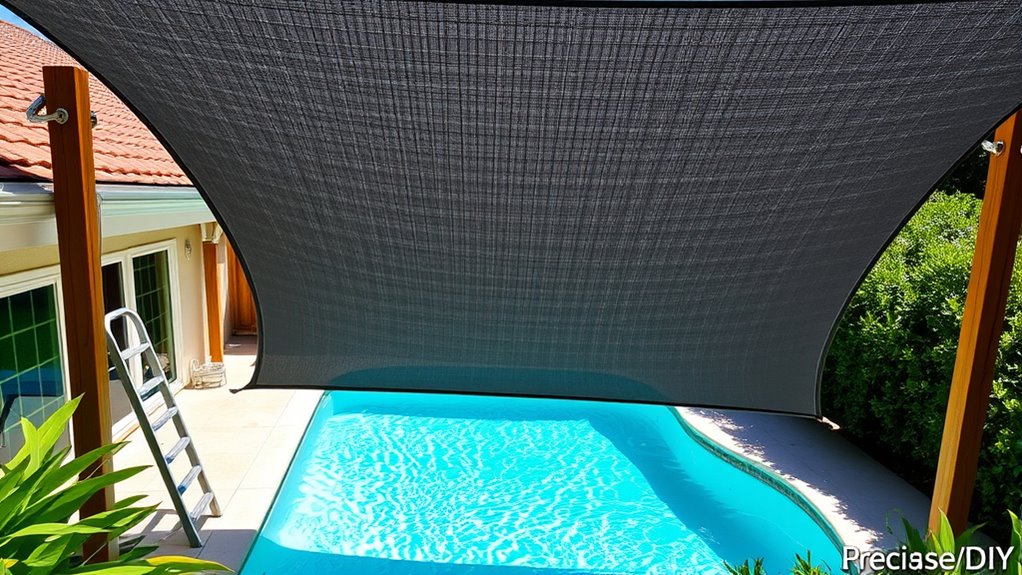

To DIY a shade sail over your pool deck, start by carefully measuring the area to determine the ideal size and placement. Choose weather-resistant fabric and suitable hardware like steel eye bolts and turnbuckles. Identify strong anchor points such as trees or sturdy structures, then install posts and secure anchor points properly. Attach the sail, adjust the tension for a smooth, taut fit, and inspect for safety. Keep going to discover detailed steps for a successful, long-lasting setup.
Key Takeaways
- Measure and mark the installation points accurately, considering optimal height and tension for shade coverage over the pool deck.
- Select durable, UV-resistant shade sail fabric and secure support posts to sturdy structures or use concrete footings.
- Use appropriate outdoor hardware like stainless steel eye bolts and turnbuckles, ensuring they can withstand tension and weather conditions.
- Install support posts plumb and level, then attach the sail corners securely with shackles or carabiners, adjusting tension gradually.
- Verify all attachments are tight, even, and free of wrinkles, making final tension adjustments for a taut, safe shade installation.

EASYTEST 7-Way Pool Test Strips, 150 Strips Water Chemical Testing for Hot tub and Spa, Accurate Test Bromine, Total Alkalinity, pH, Free Chlorine, Total Hardness, Cyanuric Acid, and Total Chlorine
- 150 Test Strips Included: Enough for frequent water testing
- Quick and Accurate Results: Soak for 1 second, read in 15 seconds
- 7-in-1 Water Testing: Measures Bromine, pH, Chlorine, and more
As an affiliate, we earn on qualifying purchases.
Planning and Measuring Your Pool Deck Area

Before installing your DIY shade sail, it is *essential* to plan and measure your pool deck area accurately. Begin by identifying the exact location where you want the shade to provide the most coverage and comfort. Use a tape measure to record the length and width of the space, noting any irregularities or obstacles like furniture, trees, or built-in features. Consider the height at which you’ll install the sail to *guarantee* it provides enough shade without obstructing pathways or views. Mark these measurements clearly, either on paper or digitally, so you can compare different shade sail sizes and shapes. Precise measurements prevent purchasing the wrong size and make installation smoother, saving you time and effort during the actual setup. Utilizing wall organization systems can help keep your deck neat and free of clutter, enhancing the shaded area. Additionally, understanding the regional climate can influence the type and placement of your shade sail to maximize comfort and durability. Incorporating proper tensioning techniques ensures the sail remains taut and secure over time, preventing sagging or damage. Being aware of water-related features or proximity to water sources on your deck can also impact material choice and installation considerations to prevent corrosion or water damage. It’s also important to consider the installation guidelines to ensure your setup adheres to safety standards and manufacturer recommendations.
Selecting the Right Shade Sail and Hardware

Choosing the right shade sail and hardware is essential to guaranteeing a secure and effective installation. First, pick a shade sail made from durable, UV-resistant fabric that suits your style and climate. Next, consider the size and shape to match your deck area. Then, select hardware that can handle the tension and weight; stainless steel eye bolts, turnbuckles, and carabiners are reliable options. Fourth, ensure the hardware’s weight capacity exceeds the sail’s tension requirements to prevent failure. Always opt for hardware specifically designed for outdoor use and heavy-duty applications. Properly chosen materials will keep your shade sail stable, safe, and long-lasting, transforming your pool deck into a comfortable, shaded retreat. Additionally, taking into account the appropriate outdoor hardware can contribute significantly to the durability and safety of your installation. Being aware of the locations of gumball machines can also help in choosing hardware that withstands high traffic and frequent use. Moreover, understanding espionage techniques can inspire innovative ways to conceal or secure your installation from unwanted tampering or observation.
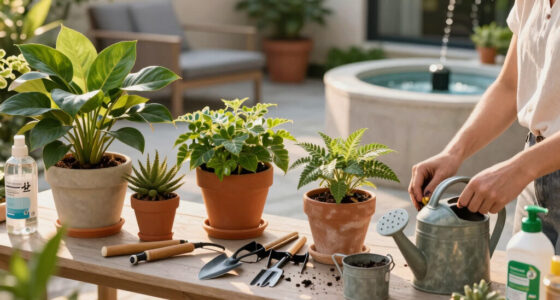
Gathering Necessary Tools and Materials

To make certain your shade sail installation goes smoothly, gather all the necessary tools and materials beforehand. You’ll need a drill, measuring tape, level, ladder, and wrench for assembly and mounting. Make sure you have stainless steel turnbuckles, eye bolts, and D-rings compatible with your shade sail hardware. It’s also essential to have concrete anchors or mounting brackets, depending on your surface. Don’t forget safety gear like gloves and protective glasses. Additional items include a pencil for marking, a rubber mallet if needed, and possibly a helper to hold the sail during installation. Preparing these tools and materials in advance prevents delays and guarantees you’re ready to start confidently, making the installation process smoother and more efficient. Proper planning also involves understanding tuning Hyundai vehicles, which can inform the selection of durable hardware suitable for high-performance environments. Ensuring compatibility of hardware with your surface type is a key step in proper installation techniques, and considering air quality factors can help you choose the best materials for outdoor use. Additionally, checking reviews of skincare products like Patchology can ensure you select high-quality supplies for a safe and successful project. Incorporating mindfulness techniques such as deep breathing exercises can help maintain focus and calm during the installation process.
Identifying Anchor Points and Installing Mounting Posts

Start by locating sturdy structures, like trees or building corners, that can support your shade sail. Next, mark the exact spots where you’ll install your support posts for proper tension and coverage. Once marked, carefully install the posts, ensuring they’re secure and level to keep your sail stable. Additionally, verifying the load-bearing capacity of your anchor points can prevent potential safety hazards. Conducting a site assessment beforehand can help identify any issues with the soil or surrounding environment. Checking the soil type can influence the type of foundation needed for the posts, ensuring stability over time. Remember to also check for existing underground utilities before digging to avoid any accidents or damage.
Locate Stable Structures
Identifying stable structures for your shade sail is crucial to guarantee a secure and long-lasting installation. To assure your sail stays put, look for strong, weight-bearing elements. First, examine existing posts or beams around your pool deck; they can often serve as reliable anchor points. Second, consider the sturdiness of trees or large poles, but only if they’re healthy and firmly rooted. Third, check for concrete or stone walls capable of supporting mounting hardware. Fourth, if natural structures aren’t suitable, plan to install dedicated posts in solid ground. Always test for stability before mounting. Remember, your goal is to find surfaces that can handle tension and weather, ensuring safety and durability for years to come. Additionally, understanding the principles of Fokos can help you select the most appropriate materials and structures for your installation.
Mark Mounting Positions
Before installing your shade sail, you need to carefully mark where the anchor points will go. Start by measuring the desired height and angle for each corner, considering sunlight patterns and wind direction. Use a tape measure and a pencil to mark the exact spots on existing structures or ground anchors. Confirm the distances between points are even for a balanced look and proper tension. Double-check measurements before making any marks to avoid mistakes. If your design includes support posts, mark their locations now, ensuring they’re positioned for stability and accessibility. Keep in mind that the anchor points should be sturdy and capable of bearing the sail’s weight and tension. Ensuring the use of appropriate mounting hardware will help secure the sail effectively. Properly aligning the anchor points is crucial for achieving a taut and secure installation. Accurate marking now makes the installation process smoother and prevents costly adjustments later. Additionally, considering the stability of anchor points can help prevent sagging or shifting over time, ensuring a longer-lasting and safer shade sail setup. Incorporating knowledge of community resilience can also guide you in selecting locations that are less susceptible to environmental damages, adding an extra layer of security.
Install Support Posts
Have you determined the ideal locations for your support posts? Now, it’s time to install them securely. Here’s what you should do:
- Dig holes at your marked spots, ensuring they’re deep enough for stability—typically 2-3 feet.
- Insert the support posts into the holes, making sure they’re level and plumb.
- Use a spirit level to check each post’s alignment before filling the holes.
- Pour concrete around the posts, tamping down to eliminate air pockets and ensure stability.
- Proper placement and secure mounting are essential to prevent vulnerabilities and ensure safety over time. Confirming the support post stability during installation can help prevent issues later on.
Let the concrete cure for at least 24-48 hours before attaching your shade sail. Proper placement and secure mounting guarantee your shade sail will stay sturdy and safe.
Securing the Anchor Points and Installing Hardware

To securely anchor your shade sail, start by selecting sturdy points on your structure or sturdy posts that can handle the tension. Make sure these points are stable and capable of supporting the weight and pull of the sail. Use high-quality hardware, like eye bolts or anchors, suited for outdoor use. Mark where you’ll install each anchor to ensure even tension and proper alignment. Drill holes carefully, avoiding damage to surrounding materials. Insert anchors securely into the structure, tightening them firmly. Attach turnbuckles or tensioners to the hardware to help adjust the tension later. Double-check each connection for stability. Properly securing these anchor points guarantees your shade sail stays taut and safe, providing reliable shade over your pool deck.
Attaching the Shade Sail to the Anchors

Once your anchor points are securely in place, you can begin attaching the shade sail to the hardware. Start by unrolling the sail and locating the attachment points. Then, follow these steps:
- Loop the corner grommets or attachment rings over the hardware, such as turnbuckles or D-rings.
- Secure each corner with a shackle or carabiner, ensuring it’s tightly closed.
- Use a winch or tensioning device if necessary to tighten the connection.
- Check each attachment to confirm it’s stable and properly aligned.
Take your time to ensure all connections are tight and even. Proper attachment guarantees stability and prevents sagging or shifting later on.
Adjusting Tension and Ensuring Proper Fit

Once your shade sail is attached, it’s time to tighten the tension for a secure fit. You’ll want the fabric to be taut without overstretching, ensuring it stays in place during wind or rain. Adjusting the tension properly will keep your shade sail looking neat and functioning effectively.
Achieving Taut, Secure Fabric
Achieving a taut, secure shade sail requires careful tension adjustment to guarantee it stays firm and looks professional. First, start by tightening each corner gradually, checking for evenness. Second, use a tensioning tool or pole to apply steady force, avoiding slack or overstretching. Third, inspect the fabric for smoothness, ensuring no wrinkles or sagging. Fourth, adjust the turnbuckles or hooks so the fabric stays tight without overly stressing the material or hardware. Remember, slight adjustments can make a big difference in appearance and durability. Consistent tension prevents sagging and keeps the shade sail looking sharp. Take your time during this process, and double-check each corner before finalizing. Proper tension ensures your shade sail remains secure and weather-resistant over time.
Adjusting for Optimal Fit
To guarantee your shade sail fits perfectly, you need to focus on adjusting the tension carefully and making sure all corners are properly aligned. Start by tightening each corner incrementally, checking the overall tension as you go. Avoid over-tightening, which can cause undue stress and distort the fabric. Instead, aim for a firm, smooth surface without sagging or pulling. Use a level or straightedge to ensure the corners are even and aligned correctly. Once the tension feels balanced and the sail is taut, double-check all anchor points. Proper tension not only provides a clean appearance but also maximizes the shade’s durability and effectiveness. Take your time during this step to achieve a snug, well-fitted shade sail that stays secure over time.
Inspecting the Installation for Safety and Stability

Before trusting your shade sail to provide reliable shade, ensuring the installation is secure and stable is essential. Start by checking the tension in all corners; they should be firm without sagging. Next, examine the anchor points—look for any signs of wear, rust, or loosening bolts. Then, test the sail’s stability by gently pushing on it; it shouldn’t shift or wobble. Finally, verify that all hardware, such as hooks, turnbuckles, and ropes, are properly secured and in good condition. Regularly inspecting these areas prevents accidents or damage over time. Remember, a well-maintained installation not only keeps you safe but also prolongs the lifespan of your shade sail, ensuring you enjoy your shaded space for years to come.
Maintaining and Caring for Your Shade Sail

Regular maintenance is key to keeping your shade sail in top condition and ensuring it continues to provide effective shade. Check the fabric regularly for tears, mold, or dirt buildup, and clean it with mild soap and water as needed. Inspect the tension and attachment points; tighten any loose fittings to prevent sagging or strain on the fabric. Remove debris like leaves or branches that could cause damage or mold growth. Avoid exposing the sail to harsh chemicals or excessive sun when not in use. Periodically check the anchor points and hardware for corrosion or wear, replacing any damaged components promptly. Proper care extends the lifespan of your shade sail and keeps your outdoor space comfortable and protected year-round.
Frequently Asked Questions
How Long Does a Typical Shade Sail Installation Usually Take?
Installing a shade sail typically takes around a few hours to a full day, depending on your experience and the size of the sail. You’ll need time to measure, mark anchor points, and secure the hardware properly. If you have all tools ready and follow instructions carefully, it’s a manageable project. Expect some adjustments for tension and alignment, but overall, you can complete it efficiently within a day.
Can I Install a Shade Sail Without Professional Help?
While it might seem tempting to skip professional help, installing a shade sail yourself can be quite the challenge. You’ll need to handle measurements, secure anchoring, and tensioning properly to guarantee safety and durability. If you’re comfortable with DIY projects, you can give it a shot, but don’t underestimate the importance of experience. For peace of mind and a flawless finish, hiring a professional is often the smarter choice.
What Safety Precautions Should I Follow During Installation?
When installing a shade sail, safety should be your top priority. You should wear gloves and sturdy shoes to protect yourself. Make sure the area is clear of obstacles and people, especially children. Use appropriate tools and double-check all hardware for stability. Avoid working in bad weather, like high winds or rain. If you’re unsure about any step, consult the manufacturer’s instructions or seek professional advice.
Are There Any Restrictions on the Size of Shade Sails for Pools?
Size restrictions shape your shade sail choices, so scrutinize local standards before starting. Larger sails provide more cover but might breach building codes or pose safety risks. You’ll want to confirm clearance, consider capacity, and comply with community codes. Don’t forget to double-check dimensions, distances, and design details—doing diligent due diligence guarantees your shade sail stays safe, stylish, and within the boundaries of regulations, avoiding unnecessary setbacks.
How Often Should I Inspect and Maintain My Shade Sail?
You should inspect your shade sail monthly for signs of wear, tears, or sagging. Regular maintenance helps prevent damage and prolongs its lifespan. After storms or strong winds, check for any loose fittings or damage. Clean your shade sail with mild soap and water every few months to keep it looking fresh. Address any issues promptly to ensure it remains secure and effective at providing shade over your pool deck.
Conclusion
With your shade sail now securely in place, you’ve transformed your pool deck into a cool, inviting oasis. Remember, regular inspections and maintenance keep your setup safe and lasting. Think of your shade sail as a loyal guardian, shielding you from the sun’s harsh rays day after day. So enjoy your shaded retreat—crafted by your hands and protected by your care—turning everyday moments into lasting memories under your own backyard haven.