To DIY your pool fence’s paint and maintenance, start by inspecting the fence for damage, rust, or peeling paint, and clean or sand the surface as needed. Choose durable exterior paint and primer suited for your fence material, then apply in thin, even coats for a professional finish. Regularly inspect and touch up any issues to extend its lifespan. For detailed steps and tips, continue exploring the best methods to keep your fence looking great and lasting longer.
Key Takeaways
- Thoroughly assess and repair surface damage, rust, and hardware issues before cleaning and preparing the fence for painting.
- Use high-quality, weather-resistant exterior paint and primer suited for metal or wood fences for durability.
- Apply primer first, then multiple thin coats of paint with proper drying time, using appropriate brushes or rollers.
- Conduct regular inspections for damage, rust, loose hardware, and chipped paint; promptly address issues to prevent deterioration.
- Maintain the fence by cleaning periodically, trimming vegetation, fixing damages, and reapplying protective coatings as needed.
Assessing Your Pool Fence and Planning Your Project

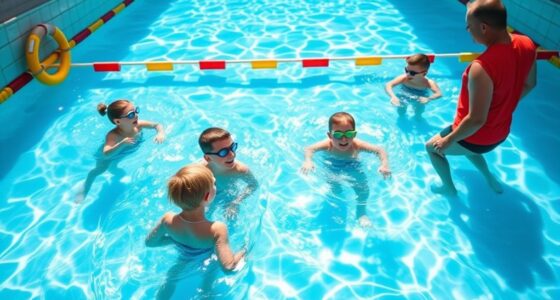
Before you begin painting and maintaining your pool fence, it’s essential to carefully assess its current condition and plan your project accordingly. Walk along the fence line and look for signs of damage, rust, peeling paint, or rotting wood. Check for loose or missing hardware that might need tightening or replacement. Determine if the surface requires cleaning or sanding to ensure proper paint adhesion. Consider the type of material your fence is made of, as this influences your preparation and painting methods. Take note of problem areas so you can prioritize repairs. Planning ahead helps you estimate the time, effort, and supplies needed, preventing surprises mid-project. A thorough assessment ensures your fence looks great and remains durable for years to come. Monitoring for surface deterioration and potential hazards is also crucial to ensure safety and longevity, especially since different materials may require specific maintenance techniques. Incorporating a decluttering approach to your workspace can also make the project more efficient and enjoyable, reducing the risk of losing tools or materials during the process. Additionally, understanding material-specific requirements can help you choose the most suitable paint and protective coatings for your fence. Engaging with curiosity about proper methods can provide new insights that improve your maintenance routine and results.
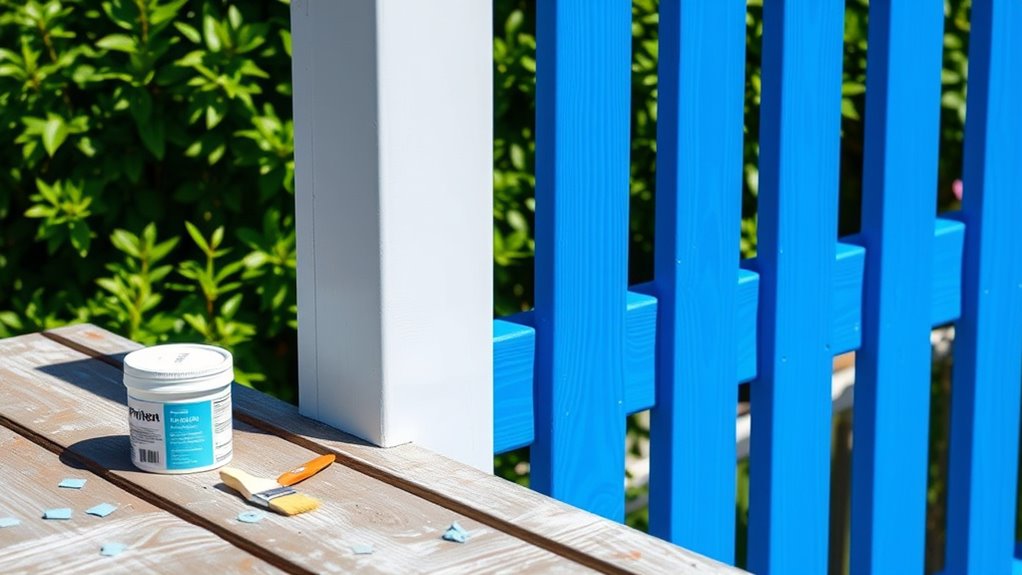
Gathering the Necessary Tools and Materials
To guarantee a smooth painting and maintenance process, gather all the tools and materials you’ll need before starting. Being prepared saves time and prevents interruptions. You’ll want items that help you clean, protect, and paint effectively. Here are some essentials:
Being prepared with the right tools ensures a smooth, efficient fence painting process.
- High-quality exterior paint or spray paint suitable for metal or wood
- Painter’s tape to create clean lines and protect surrounding areas
- Sandpaper or a wire brush for surface prep
- Drop cloths or plastic sheeting to cover the ground and nearby objects
- Understanding common dream symbols can help you interpret subconscious messages during your project or relaxation time.
- Ensuring you have the right colours and finishes can enhance the durability and appearance of your fence.
- Familiarity with local regulations ensures your project complies with community standards and avoids potential issues.
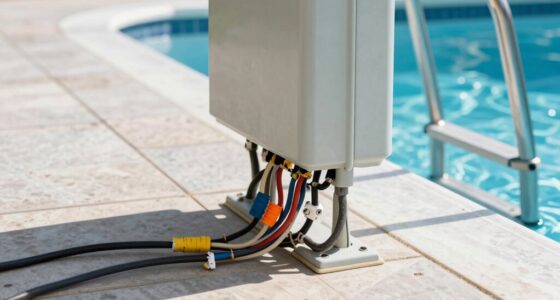
- Regularly inspecting your equipment, including filtration and pump protection, helps maintain optimal performance throughout your project.
- Reviewing state tax implications related to your project can help you plan your budget and expenses more effectively.
Having these tools ready ensures you can work efficiently and achieve a professional finish. Double-check your supplies before beginning to avoid running out midway through the project. Proper preparation is key to a successful fence painting and maintenance experience.
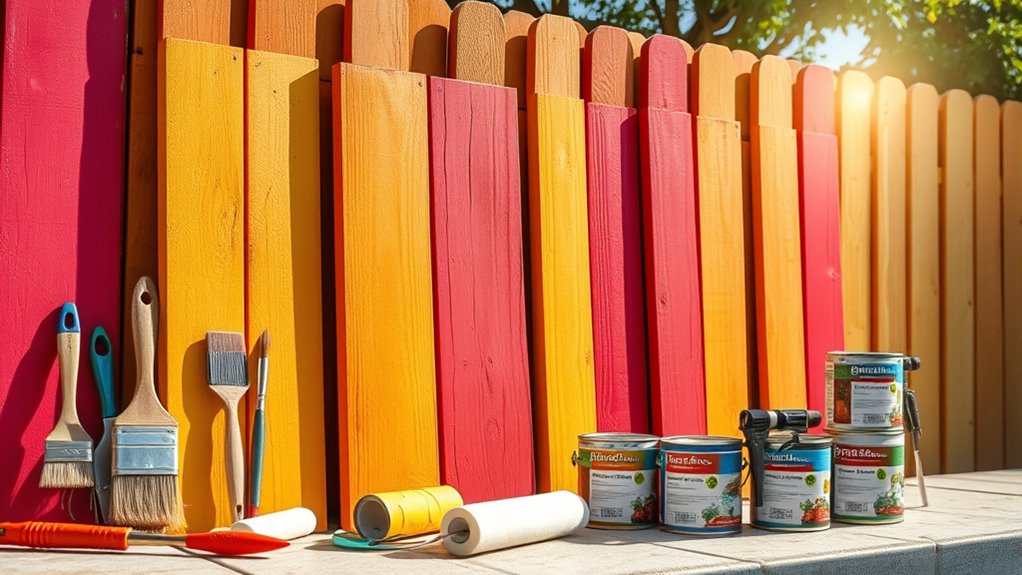
Preparing the Fence Surface for Painting

Before you start painting, make sure to clean the fence thoroughly to remove dirt and debris. Check for any surface imperfections, like cracks or splinters, and repair them to guarantee a smooth finish. Taking these steps will help your paint adhere better and last longer. Additionally, inspecting the surface for surface preparation ensures optimal results and durability of the paint job. Incorporating proper surface preparation techniques can significantly enhance the longevity of your fence painting project. Considering recent AI discoveries, utilizing innovative tools or methods might also streamline your preparation process and improve outcomes. Incorporating smart maintenance tools can further assist in maintaining the fence’s condition over time. Proper surface assessment can also help identify hidden issues that could compromise the paint’s performance down the line.
Clean the Fence Thoroughly
Cleaning the fence thoroughly is essential to guarantee the paint adheres properly and lasts longer. Dirt, grime, and old paint residues can cause peeling or uneven coverage. To get the best results, start by removing loose debris with a stiff brush or broom. Next, wash the surface with a mixture of water and mild detergent to eliminate grease or stains. Rinse thoroughly with a hose to remove soap residue. For stubborn stains or mildew, consider using a pressure washer or a specialized cleaner. Always let the fence dry completely before moving on to painting.
- Remove loose paint and dirt with a brush or broom
- Wash with a gentle cleaning solution
- Rinse thoroughly to eliminate soap residue
- Allow the fence to dry fully before painting
Repair Surface Imperfections
Since surface imperfections can prevent paint from adhering properly, it’s essential to identify and repair any damage before painting. First, inspect the fence for cracks, holes, splinters, or peeling paint. Use a putty knife or sandpaper to smooth out rough areas and fill cracks with exterior-grade filler. Sand the patches smooth to guarantee an even surface. For peeling paint, scrape off loose sections and sand the edges. Proper repair creates a uniform surface that allows paint to stick better and last longer. Understanding prepping surfaces can significantly enhance the durability of your paint job. Additionally, considering paint type and choosing weather-resistant formulas can further improve the longevity of your fence coating. Proper surface preparation is also crucial for ensuring that sound healing science benefits are maximized through a well-maintained finish. When selecting materials, ensure they comply with local divorce laws to guarantee safety and compliance. Incorporating knowledge from AI-driven personalization in e-learning can help tailor your maintenance routine to your specific climate and usage patterns. Here’s a visual guide:
| Imperfection | Repair Method |
|---|---|
| Cracks or holes | Fill with exterior-grade filler |
| Splinters or rough spots | Sand down to smooth surface |
| Peeling paint | Scrape off loose paint, sand edges |
| Uneven surface | Sand to create a flat, smooth finish |
Choosing the Right Paint and Finish for Your Fence
Choosing the right paint and finish for your fence is essential to guarantee durability and a polished look. The right combination protects against weather, chlorine, and general wear while enhancing your fence’s appearance. Consider these factors:
- Weather resistance: Choose paints formulated for outdoor use to withstand sun, rain, and pool chemicals. This ensures your fence can endure climate variations without deterioration.
- Color durability: Opt for colors that resist fading over time, keeping your fence looking fresh.
- Finish type: Decide between matte, satin, or gloss finishes based on the desired shine and ease of cleaning.
- Eco-friendly options: Look for low-VOC or water-based paints to minimize environmental impact and indoor fumes.
- Surface preparation is crucial for ensuring that the paint adheres properly and lasts longer, especially in a pool area exposed to moisture and chemicals. Proper cleaning and sanding help prevent peeling and extend the life of your paint job. Additionally, using appropriate protective coatings can further resist pool chemicals and weather-related damage, ensuring longevity. Being aware of headphone compatibility with outdoor environments can also be beneficial if you plan to listen to music while working or relaxing by your pool.
Applying Primer and Paint for a Long-Lasting Finish
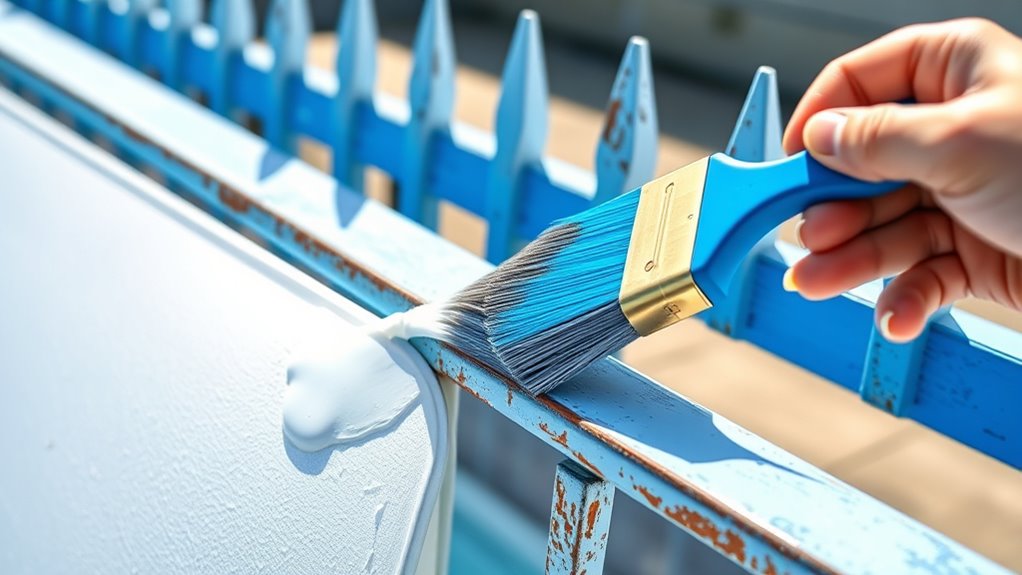
To guarantee your pool fence looks great and lasts for years, applying primer before painting is a vital step. Primer helps the paint adhere better, prevents peeling, and enhances durability. Choose a primer suitable for your fence material and apply it evenly with a brush or roller. Once dry, you can confidently move on to applying your chosen paint. Proper preparation ensures a smooth, professional finish that withstands weather and time. Remember, patience is key—wait until the primer is fully dry before painting. This step not only protects your investment but also gives you peace of mind.
| Primer Application | Paint Application | Long-Lasting Finish |
|---|---|---|
| Prep thoroughly | Use even strokes | Enjoy vibrant color |
| Ensure dry surface | Follow manufacturer | Maintain beauty |
| Trust the process | Finish with care | Protect your investment |
Tips for Achieving an Even and Professional Look

Achieving an even and professional-looking finish requires attention to detail and proper technique. To guarantee your paint job looks flawless, focus on these key tips. First, use high-quality brushes or rollers suited for your fence material to avoid streaks and uneven coverage. Second, work in smooth, consistent strokes, overlapping slightly to prevent lap marks. Third, maintain a wet edge by completing sections before the paint begins to dry, which helps achieve a seamless look. Finally, keep a damp cloth handy to immediately correct drips or smudges.
For a flawless finish, focus on smooth strokes, maintaining a wet edge, and using quality tools.
- Prep your surface thoroughly before painting
- Use painter’s tape for clean edges and corners
- Apply multiple thin coats instead of one heavy coat
- Take your time and don’t rush the process
Regular Maintenance and Inspection Practices

Regularly inspecting your pool fence helps catch issues early before they become costly repairs. Keep an eye out for signs of damage or wear during routine visual checks. When you notice problems, address them promptly to maintain safety and extend the life of your fence.
Routine Visual Inspections
Performing routine visual inspections is essential for maintaining your pool fence’s safety and durability. Regular checks help you catch issues early before they become costly repairs. During inspections, look for signs of wear, damage, or corrosion that could compromise the fence’s integrity. Pay close attention to hinges, latches, and posts, ensuring they function smoothly and securely. Keep an eye out for loose panels, rust spots, or any cracks that may develop over time. Addressing these problems promptly helps maintain your fence’s protective barrier. By incorporating these inspections into your routine, you ensure your pool area remains safe for everyone. Staying vigilant with visual checks will save you time and money while preserving the fence’s appearance and strength.
- Inspect for rust, corrosion, and chipped paint
- Check hinges and latches for proper operation
- Look for loose or damaged fence panels
- Examine posts for cracks or leaning
Timely Repair Procedures
Addressing issues promptly after spotting them during inspections helps prevent minor problems from worsening. When you notice chipped paint, loose posts, or rust spots, tackle these repairs right away. Small cracks or corrosion can quickly escalate, compromising your fence’s safety and appearance. Use the appropriate tools and materials to fix damages, such as touch-up paint or rust inhibitors. Delaying repairs can lead to more extensive damage, requiring costly replacements later. Regularly check for loose hardware or broken panels, and tighten or replace parts as needed. Keeping up with timely repairs maintains your fence’s integrity and prolongs its lifespan. Always document repairs and schedule follow-up inspections to catch emerging issues early. Staying proactive guarantees your pool fence remains secure, attractive, and well-maintained year-round.
Troubleshooting Common Painting and Maintenance Issues

Even with careful preparation, you might encounter issues like peeling, chipping, or uneven paint on your pool fence over time. These problems can happen due to weather exposure, improper surface cleaning, or using incompatible paint. To fix peeling or chipping, gently scrape off loose paint, then sand the area smooth before repainting. For uneven paint, ensure you’re applying thin, even coats and avoid painting in direct sunlight. If you notice persistent rust or corrosion, treat these spots with a rust converter before repainting. Keep an eye out for these common issues:
- Peeling or chipping paint
- Uneven or blotchy color
- Rust spots or corrosion
- Mildew or mold growth
Addressing these problems promptly helps maintain your fence’s appearance and durability.
Extending the Lifespan of Your Pool Fence With Proper Care

Regular maintenance and proper care are key to ensuring your pool fence stays in great shape for years to come. Start by cleaning your fence regularly with a mild soap solution and water to remove dirt, grime, and chlorine buildup. Inspect it monthly for signs of rust, loose screws, or peeling paint, and address issues promptly. Reapply protective coatings or paint every few years to prevent corrosion and weather damage. Avoid harsh chemicals that can degrade finishes. Keep vegetation trimmed back to reduce moisture and prevent damage. If you notice any damaged panels or hardware, replace or repair them immediately. Proper care not only maintains your fence’s appearance but also extends its durability, ensuring it remains safe and functional for your family’s enjoyment.
Frequently Asked Questions
How Often Should I Repaint My Pool Fence to Maintain Its Appearance?
You might wonder how often to repaint your pool fence to keep it looking fresh. Typically, you should plan on repainting every 3 to 5 years, depending on your climate and fence material. Regular inspections help identify signs of wear, like peeling or fading, so you can address issues early. Proper preparation and using quality paint can extend the life of your finish, ensuring your fence stays attractive and protected.
Can I Use Spray Paint for Pool Fence Painting Projects?
You can use spray paint for your pool fence painting project, but choose a high-quality, outdoor-rated paint designed for metal or wood, depending on your fence material. Make sure to clean and sand the surface before applying. Use even, sweeping strokes and multiple thin coats for a smooth, durable finish. Spray paint speeds up the process and gives a professional look, making it an excellent choice when done properly.
What Are the Safety Precautions During the Painting Process?
Sure, because who doesn’t love playing safety inspector while wielding a spray can? You’ll want to wear protective gear, like gloves and masks, to avoid inhaling fumes or getting paint on your skin. Make sure the area is well-ventilated, keep a fire extinguisher nearby, and avoid open flames. And, of course, read the paint’s instructions—because safety is just as important as a perfect coat!
How Do Weather Conditions Affect the Painting and Drying Process?
Weather conditions play a vital role in painting and drying. If it’s too hot, paint can dry too quickly, leading to cracks or uneven coverage. Too cold or humid, and the paint may not cure properly, causing peeling or long drying times. You should avoid painting in rain, strong winds, or direct sunlight. Check the forecast and choose a mild, dry day for the best results.
Is It Necessary to Remove Rust Before Painting the Fence?
Many experts agree that removing rust before painting is essential for a durable finish. Rust can cause paint to peel or flake over time, compromising the fence’s integrity. You should thoroughly clean and sand rusty areas to make certain of proper adhesion. Skipping this step might save time initially, but it can lead to costly repairs later. Prioritizing rust removal guarantees a smoother, longer-lasting paint job on your fence.
Conclusion
With a fresh coat of paint, your pool fence becomes more than just a barrier—it transforms into a vibrant expression of your care. While maintenance keeps it looking new, neglect can turn beauty into decay. Investing time now guarantees safety and style endure, blending pride with peace of mind. Remember, a well-maintained fence isn’t just about appearance; it’s about protecting what matters most, turning everyday upkeep into a lasting symbol of your dedication.