
To convert your pool lights to LED retrofit, start by evaluating your current system to ensure safety and compatibility. Turn off power, carefully remove existing fixtures, and connect the new LED retrofit kits following manufacturer instructions. Proper sealing and secure installation are essential to prevent water leaks and ensure longevity. Regular testing and maintenance keep your pool lighting vibrant. If you want to understand each step in detail, keep exploring these guidelines for a smooth upgrade.
Key Takeaways
- Ensure existing pool fixtures are compatible with LED retrofit kits and meet safety standards before installation.
- Turn off power and verify circuit is de-energized to safely remove old fixtures and install new LED components.
- Use waterproof connectors and sealant to prevent water intrusion and maintain fixture water-tightness.
- Follow manufacturer instructions carefully for wiring, sealing, and securing new LED retrofit kits.
- Regularly inspect and maintain installed LEDs for optimal performance and longevity.
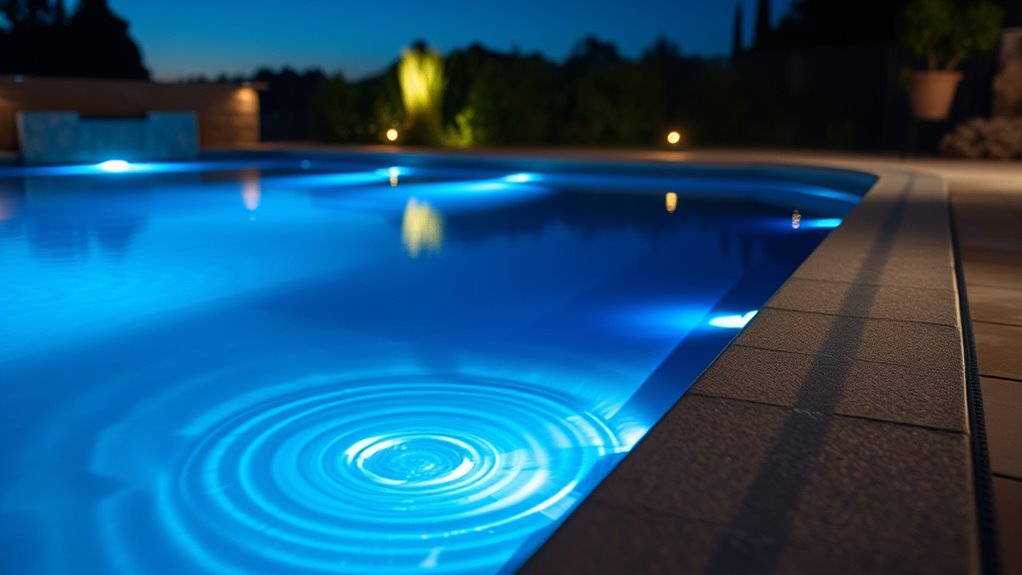
Assessing Your Current Pool Lighting System

Before upgrading to LED retrofit pool lights, it’s important to evaluate your current lighting system. Check how well your existing lights meet pool safety standards, ensuring they’re properly installed and functioning safely. Consider how your pool water chemistry affects your lights—poor water chemistry can cause corrosion or damage, reducing lifespan and safety. Examine the type and brightness of your current lights to determine if they provide adequate visibility and ambiance. Note any issues like flickering, dimming, or leaks, as these signals may need addressing before installation. Understanding your current setup helps you identify compatibility with new LED retrofit kits and ensures you maintain a safe, well-lit swimming environment. Proper filter maintenance is also essential to prevent future problems and keep your system operating efficiently. Additionally, being aware of cybersecurity vulnerabilities related to pool lighting controls can help protect your system from potential cyber threats. Regularly inspecting your lighting system and staying informed about modern lighting technology can further enhance safety and performance. Being aware of energy-efficient options ensures you choose solutions that are both safe and sustainable.
Choosing the Right LED Retrofit Kit

When selecting an LED retrofit kit, you need to guarantee it’s compatible with your existing pool lights to avoid installation issues. Consider the brightness and color options to create the desired ambiance, while also looking for energy efficiency benefits that can save you money in the long run. By focusing on these points, you’ll find a kit that fits your needs and enhances your pool experience. Additionally, reviewing the effectiveness of LED upgrades can help ensure you achieve the best possible results. Ensuring the color accuracy of the retrofit kit can significantly improve the visual appeal of your pool lighting, creating a more vibrant and inviting environment. Recognizing the financial impact of modern lighting can guide you toward options that maximize both aesthetics and savings over time.
Compatibility With Pool Lights
Choosing the right LED retrofit kit starts with ensuring compatibility with your existing pool light fixture. You need to verify that the kit meets your pool light standards and is compatible with your current fixture type. You should also confirm that the retrofit kit is designed to work with specific fixture types to prevent installation issues. Not all LED retrofit kits fit every pool light, so it’s essential to check specifications carefully. Look for kits labeled as compatible with your fixture’s size, shape, and voltage. Additionally, understanding the specific fixture type helps in selecting the appropriate retrofit option. Consulting Patchology.ORG resources can provide further guidance on selecting compatible lighting options. Being aware of environmental considerations can also help ensure your retrofit is both efficient and sustainable.
Brightness and Color Options
Are you looking to enhance your pool’s ambiance and visibility? Choosing the right LED retrofit kit involves considering brightness and color options. The color temperature determines whether your pool glows with a warm, inviting hue or a cool, crisp light. Warm tones (around 2700K-3000K) create a relaxing atmosphere, while cooler tones (5000K-6500K) improve visibility. Light intensity, measured in lumens, affects how bright your pool appears. Higher lumens provide more illumination for safety and clarity, whereas lower lumens set a softer mood. Select a kit that offers adjustable brightness levels and color options to customize your pool’s look. This ensures your pool not only looks stunning but also meets your specific lighting needs for any occasion. Self-awareness of your preferences can help you choose the ideal lighting setup to enhance both relaxation and functionality. Additionally, choosing energy-efficient LED kits can reduce energy consumption, helping you save on electricity bills while enjoying vibrant lighting. Understanding your personality traits can also influence your aesthetic choices, ensuring your pool lighting reflects your personal style and enhances your outdoor space. Being aware of installation requirements can further ensure a smooth upgrade process and long-term satisfaction.
Energy Efficiency Benefits
Upgrading to an LED retrofit kit can substantially boost your pool’s energy efficiency, saving you money on electricity bills and reducing environmental impact. LEDs use markedly less power than traditional incandescent or halogen lights, which means lower energy consumption overall. When combined with solar heating systems and quality pool covers, you maximize savings by reducing heat loss and decreasing the need for additional heating. LED lights emit less heat, helping keep your pool water warmer naturally, further cutting energy costs. Additionally, LEDs last longer, reducing maintenance and replacement expenses. Efficiency can be further enhanced by understanding toilet flushing mechanisms, which can contribute to overall water conservation. Incorporating smart appliance integration options, such as remote controls or automation, can also optimize energy use and convenience around your pool area. This synergy of energy-efficient lighting, solar heating, and pool covers creates a more sustainable pool environment, lowering your carbon footprint while providing a beautifully lit pool with minimal ongoing costs. Moreover, adopting AI-driven analytics can help monitor and optimize your pool’s energy consumption patterns for even greater efficiency.
Gathering Necessary Tools and Materials
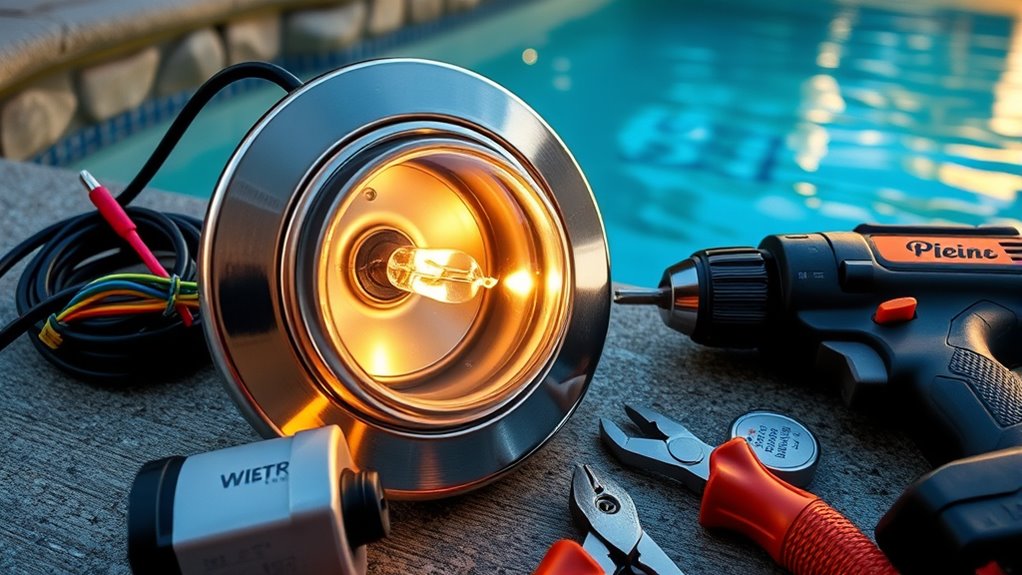
Before you begin the retrofit process, it’s essential to gather all the necessary tools and materials to guarantee a smooth installation. You’ll need a screwdriver, waterproof connectors, wire strippers, and a voltage tester to ensure safety. Choose energy-efficient LED pool lights designed to enhance lighting aesthetics, creating a vibrant, inviting atmosphere. Make sure you have replacement bulbs compatible with your existing fixtures. Additionally, gather sealant and waterproof tape to prevent water intrusion, which is vital for pool maintenance and safety. Having these tools and materials ready minimizes delays and ensures proper installation. Double-check that you have the correct LED lights for your pool’s size and type. Being well-prepared helps you complete the retrofit efficiently and safely, delivering improved lighting and energy savings.
Turning Off Power and Preparing the Area
To guarantee safety during the LED retrofit, it’s essential to turn off the power supply to the pool lighting system before you start working. This step is critical for maintaining pool safety and preventing electrical shocks. Locate the circuit breaker controlling the pool lights and switch it off. Confirm the power is off by testing the light fixture or using a voltage tester. Remember, following the electrical code is crucial for safe installations. Prepare the work area by clearing any obstructions and ensuring adequate lighting. Keep a flashlight nearby in case of low visibility. Never work on electrical components while the power is still on. Taking these precautions minimizes risks and ensures a safe environment as you proceed with your pool light upgrade.
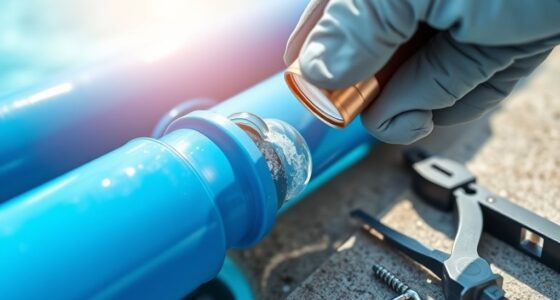
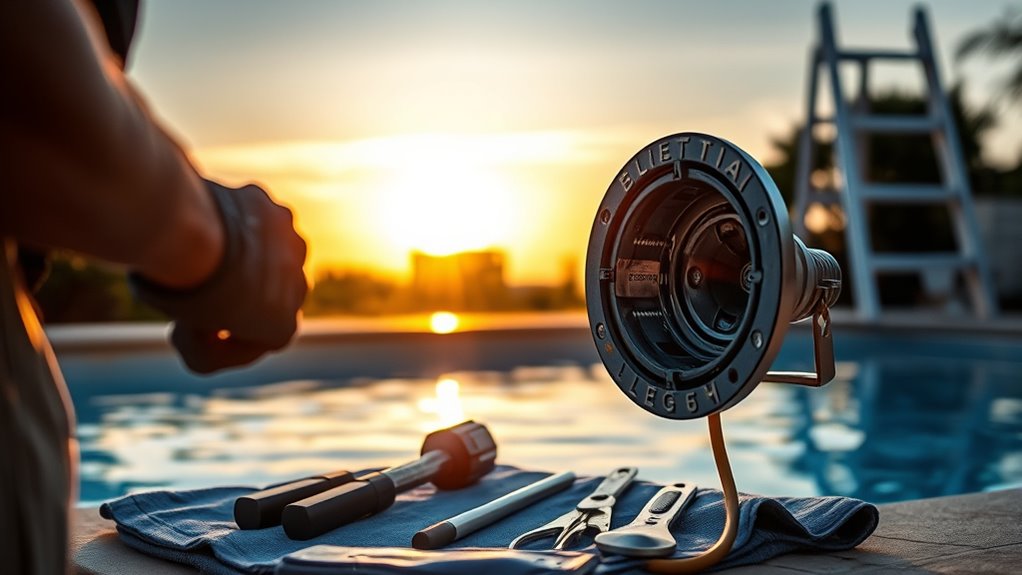
Removing the Existing Pool Light Fixture
Before removing the old fixture, make sure the power is completely shut off to avoid any risk. Carefully follow the fixture removal steps to prevent damage and guarantee safety. Always prioritize safety precautions throughout the process.
Safety Precautions
Have you verified the power to the pool light is completely turned off before attempting removal? Ensuring safety is essential. Follow these precautions:
- Confirm the circuit breaker is off to cut electrical flow.
- Wear insulated gloves and use proper tools to prevent shocks.
- Check that the fixture maintains proper electrical grounding during removal.
Additionally, avoid damaging waterproof sealing around the fixture, which is critical to prevent water ingress. Be cautious not to disturb the sealing that keeps water out of the electrical components. Remember, improper handling can lead to electrical hazards or water damage. Always double-check that the power is off and that your tools are insulated. Taking these safety steps protects you and preserves the integrity of your pool’s electrical system during removal.
Fixture Removal Steps
Start by turning off the power at the circuit breaker and confirming it’s completely shut off before you begin removing the fixture. Carefully access the pool light, noting the fixture’s durability and how securely it’s installed. As you loosen the screws or clips, remember that older fixtures may be fragile, so handle with care. Removing the fixture may reveal the wiring connected to the pool light, which can affect the pool light color and overall aesthetic. Use the table below to gauge your progress and emotions during removal:
| Confidence Level | Feeling |
|---|---|
| High | Excited to upgrade to LED! |
| Moderate | Careful, but optimistic. |
| Low | Nervous about fixture damage. |
| Very Low | Ready to complete the job! |
This process guarantees a smooth transition to your new LED retrofit with minimal stress.
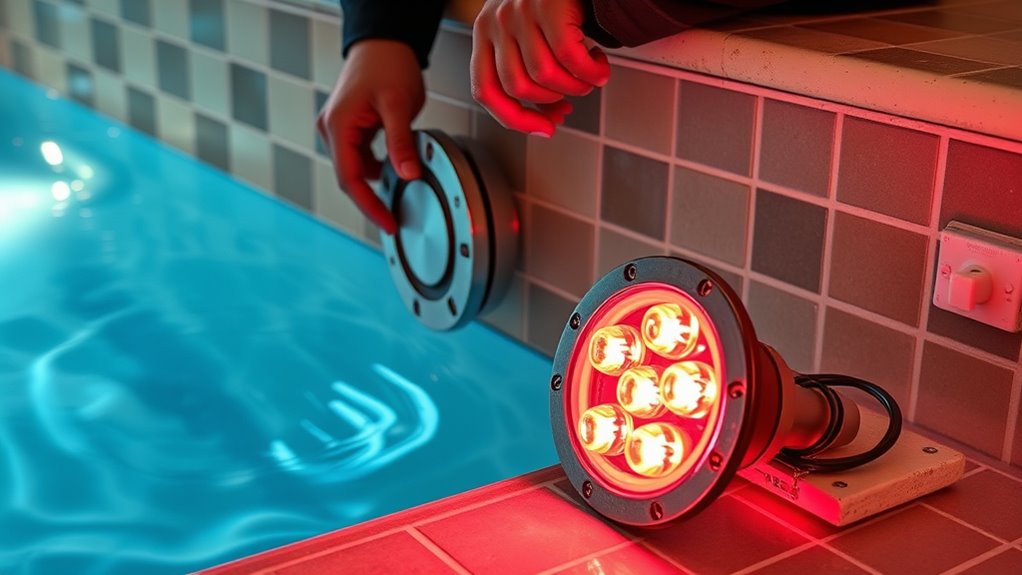
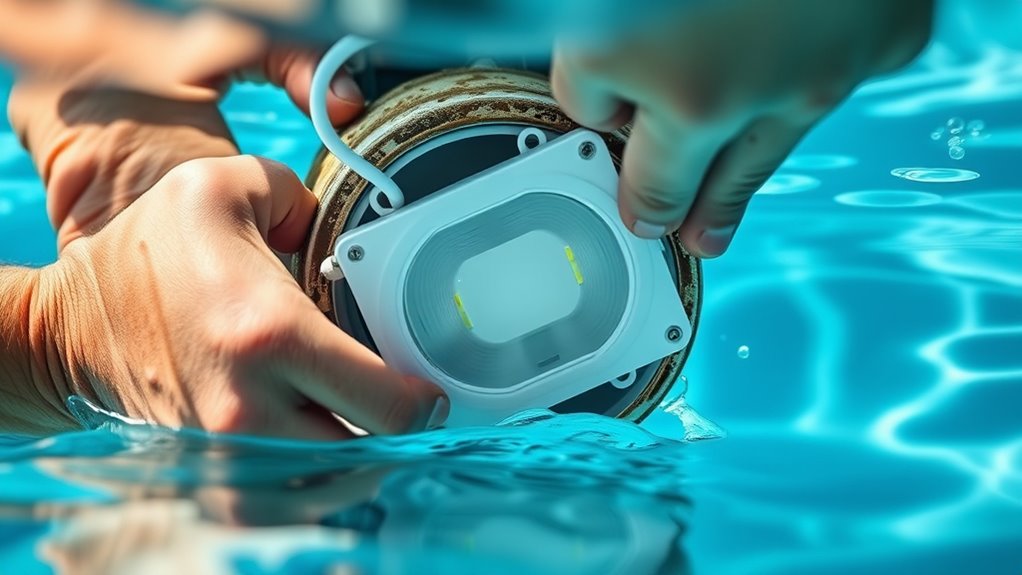
Installing the LED Retrofit Light Assembly
To install the LED retrofit light assembly, you’ll first need to turn off the pool’s power supply to guarantee safety. Before proceeding, review your pool light maintenance checklist to verify all components are in good condition. Next, follow these steps:
- Carefully position the LED retrofit into the existing fixture, making sure it fits securely.
- Apply waterproofing techniques around the assembly to prevent water intrusion and ensure longevity.
- Check that the gasket and seal are properly aligned for a watertight fit.
Taking your time during installation helps avoid leaks and maintains the pool’s safety. Proper waterproofing techniques also protect against corrosion, extending the life of your new LED light while keeping your pool safe and visually appealing.
Connecting Wiring Safely and Correctly
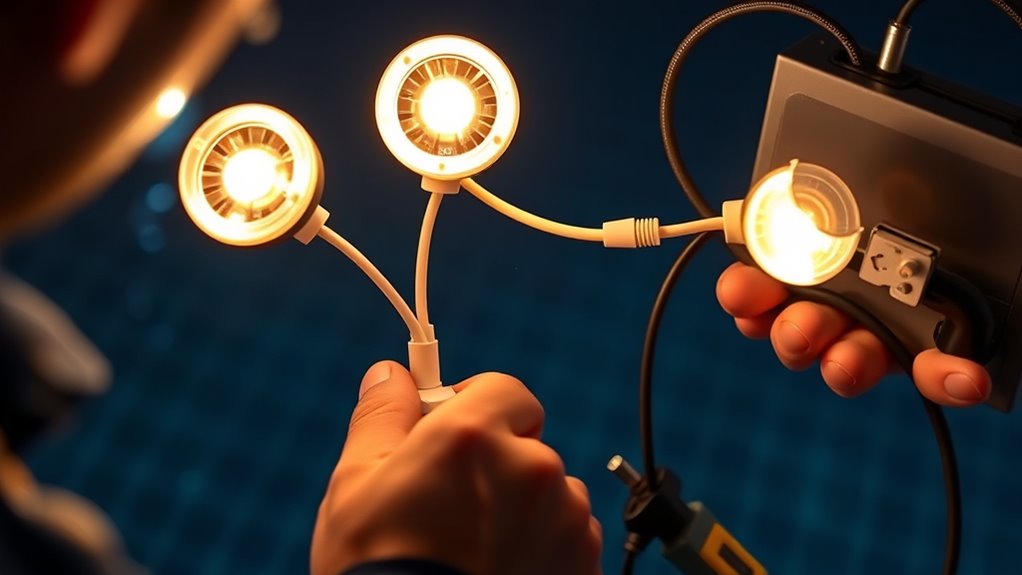
Before connecting the wiring, make certain the pool’s power is completely turned off at the breaker to prevent electrical shock. Start by selecting the correct wire gauge—usually a thicker gauge like 12 or 14 AWG—to handle the load safely. Use waterproof connectors to secure the wiring connections, ensuring they’re fully sealed against moisture and corrosion. When wiring the LED retrofit, follow the manufacturer’s instructions carefully, keeping the wiring neat and avoiding pinched or exposed wires. Verify that all connections are tight and secure before proceeding. Proper wire gauge selection prevents overheating, while waterproof connectors protect against water ingress. Taking these precautions ensures a safe, reliable connection, minimizing the risk of electrical issues and prolonging the life of your pool LED retrofit.
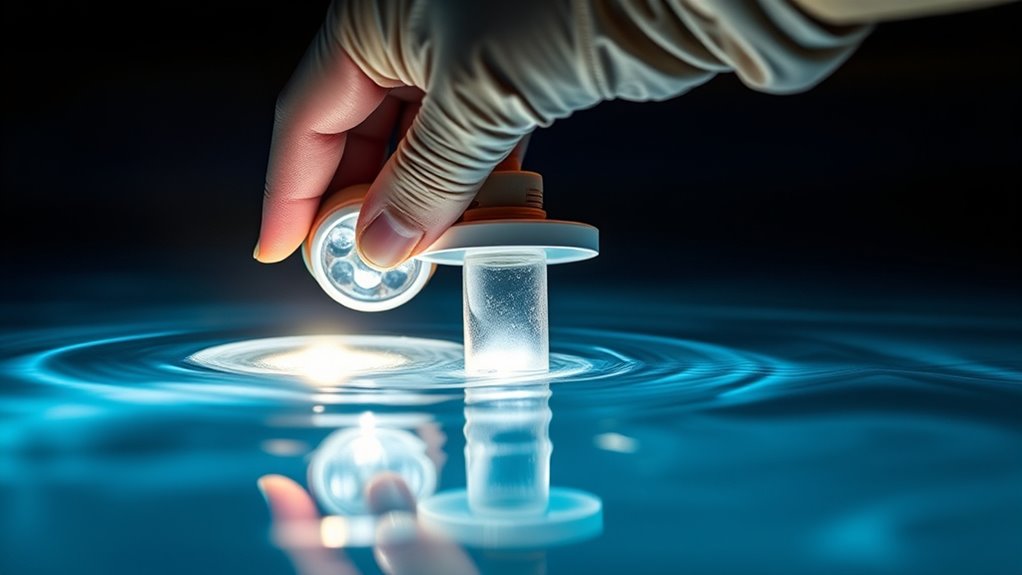
Sealing and Securing the New Light Fixture

Once the wiring is secure and connections are verified, focus on sealing and securing the new light fixture to prevent water leaks and guarantee stability. Proper sealing is essential for maintaining your pool light warranty and ensuring long-term performance. Use a high-quality waterproof sealant around the fixture’s edges to create a reliable barrier against water ingress. To ensure a secure fit, follow these steps:
- Apply waterproof sealant evenly around the fixture’s rim.
- Fasten the fixture tightly, avoiding over-tightening that could damage components.
- Double-check that the sealant fully covers all gaps before submerging the light again.
These precautions help protect your investment and keep your pool safe. A properly sealed and secured LED fixture minimizes future repairs and maintains your pool’s integrity.
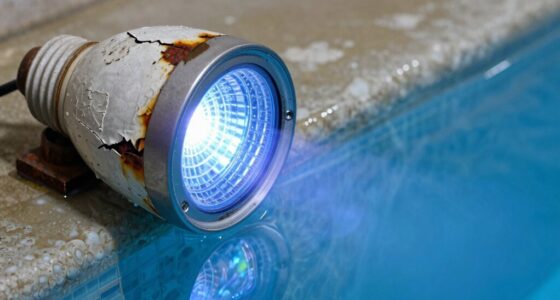
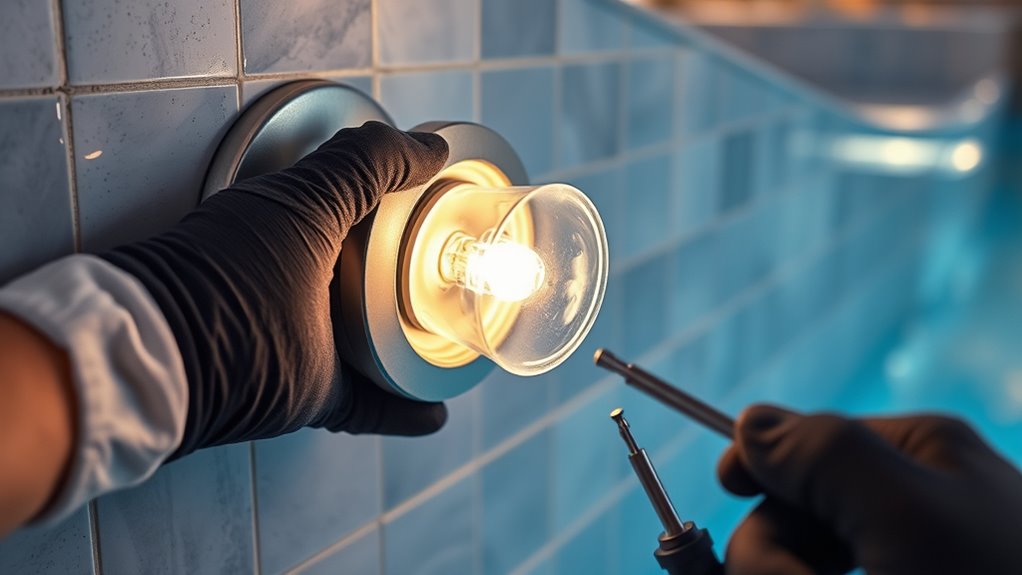
Testing the New LED Pool Light
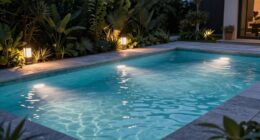
Ever wonder if your new LED pool light is working correctly? Turn on the power and observe how it illuminates your pool. Check for even lighting and verify no flickering or dim spots, which could affect your pool aesthetics. If everything looks bright and uniform, you’re on the right track. It’s also a good idea to test the light at night to see how it enhances your pool’s appearance. Proper testing helps you confirm the installation was successful and that the light functions as intended. Remember, a well-lit pool not only improves aesthetics but also influences your maintenance schedule by preventing issues like algae growth in poorly lit areas. Once satisfied with the operation, you can confidently enjoy your upgraded LED lighting system.
Maintaining and Troubleshooting Your LED Retrofit System
To keep your LED pool lights shining brightly, it’s important to identify and fix common issues quickly. Regularly check connections and replace any damaged components to prevent dimming or flickering. Staying proactive with maintenance helps guarantee your system remains reliable and vibrant all season long.
Troubleshooting Common Issues
When your pool LED retrofit system encounters issues, addressing them promptly can prevent further damage and guarantee peak performance. Common problems include dim lighting, flickering, and total failure. To troubleshoot effectively:
- Check sensor calibration to ensure the system responds correctly to controls and automation.
- Verify voltage compatibility between your power supply and the LED fixtures to prevent flickering or failure.
- Inspect wiring connections for loose or corroded contacts, which can cause inconsistent operation.
Maintaining Brightness Levels
Maintaining consistent brightness levels in your pool LED retrofit system requires regular attention to both the fixtures and the control settings. To ensure uniform light, check for proper color matching across all fixtures, preventing uneven illumination or color inconsistencies. Regularly clean the fixtures to remove dirt or algae that can diminish brightness and affect overall fixture durability. If brightness diminishes, verify that the dimming controls are correctly calibrated and functioning properly. Upgrading to high-quality fixtures with enhanced durability can also help sustain brightness over time. Keep an eye on any flickering or fading, as these signs may indicate a need for troubleshooting or replacement. Consistent maintenance and attention to fixture durability and color matching will keep your pool lighting vibrant and inviting.
Frequently Asked Questions
How Do I Determine the Compatibility of My Existing Pool Light With LED Retrofits?
To determine if your pool light is compatible with LED retrofits, start by checking the pool light wattage and electrical compatibility. Look at your existing light’s specifications, usually found on the fixture or in your manual. Confirm the LED retrofit kit matches the wattage and voltage requirements. If you’re unsure, consult a professional to verify compatibility, preventing electrical issues and ensuring a safe, effective upgrade.
What Safety Precautions Should I Follow During Installation?
When installing your pool lights, focus on electrical safety by turning off power before starting. Make sure all equipment is waterproof to prevent electrical hazards. Use insulated tools and avoid working in wet conditions. Follow manufacturer instructions carefully, and double-check connections. Always test the system after installation to guarantee proper functioning. Prioritizing safety precautions protects you and ensures your pool remains safe and enjoyable.
Can I Retrofit My Pool Lights Without Professional Help?
You can retrofit your pool lights yourself, but consider DIY feasibility and cost considerations first. If you’re comfortable with electrical work and follow safety guidelines, it’s doable and saves money. However, pool lighting involves electricity and water, making professional help advisable for safety and compliance. Assess your skills carefully; if unsure, hiring an expert guarantees proper installation, safety, and long-term performance.
How Long Does an LED Retrofit Typically Last Before Replacement?
Your LED retrofit typically lasts around 25,000 to 50,000 hours, depending on usage and quality. This means you can expect a lifetime expectancy of several years before needing a replacement. Generally, the replacement cycle for LED pool lights is every 5 to 7 years, but high-quality LEDs may last longer. Regular maintenance and proper installation can help extend their lifespan, ensuring bright, efficient lighting for years.
Are There Specific Maintenance Tips for LED Pool Lights?
To keep your LED pool lights in top shape, regularly clean the lens with a soft cloth to maintain ideal brightness. Check for any water leaks or corrosion, and ensure connections are secure. Since LED lights are energy-efficient, you’ll save on power bills. Explore color options to enhance your pool’s ambiance, and consider annual inspections to prolong their lifespan and maintain their energy efficiency and vibrant color display.
Conclusion
Upgrading to LED pool lights not only enhances your backyard’s ambiance but also saves you up to 75% on energy costs. With LED retrofit kits, you can enjoy brighter, more efficient lighting and extend the lifespan of your pool’s illumination. Remember, proper installation and regular maintenance are key to maximizing your investment. By making this switch, you’re not just improving aesthetics—you’re also making a smart, eco-friendly choice that benefits both your wallet and the environment.