
When applying leak sealer products, wait until the leak is clearly identified and surface conditions are suitable—clean, dry, and free of debris. Follow the instructions carefully, and apply the product evenly to the area using the recommended method, such as spraying or pressing in sealant. Make sure to guarantee sufficient curing time before exposing the area to water or pressure. If you keep exploring, you’ll discover detailed steps to ensure a long-lasting seal.
Key Takeaways
- Identify the leak type and surface before choosing an appropriate leak sealer product.
- Thoroughly clean and dry the area to ensure proper adhesion and effective sealing.
- Apply the sealer evenly, pressing it into cracks or holes as recommended by the manufacturer.
- Follow specific application instructions, including curing time and temperature guidelines.
- Use protective gear, work in well-ventilated areas, and store products safely after use.
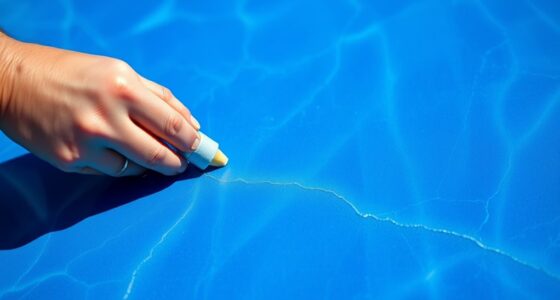
Leak sealer products are essential tools for quickly stopping leaks in pipes, roofs, and other surfaces. When you notice a leak, your first instinct might be to grab a sealant and fix it immediately. Knowing the right application techniques ensures that you get the best results, while understanding safety precautions keeps you protected throughout the process. Applying leak sealers effectively involves a few key steps that can make a significant difference in how well the repair holds up over time.
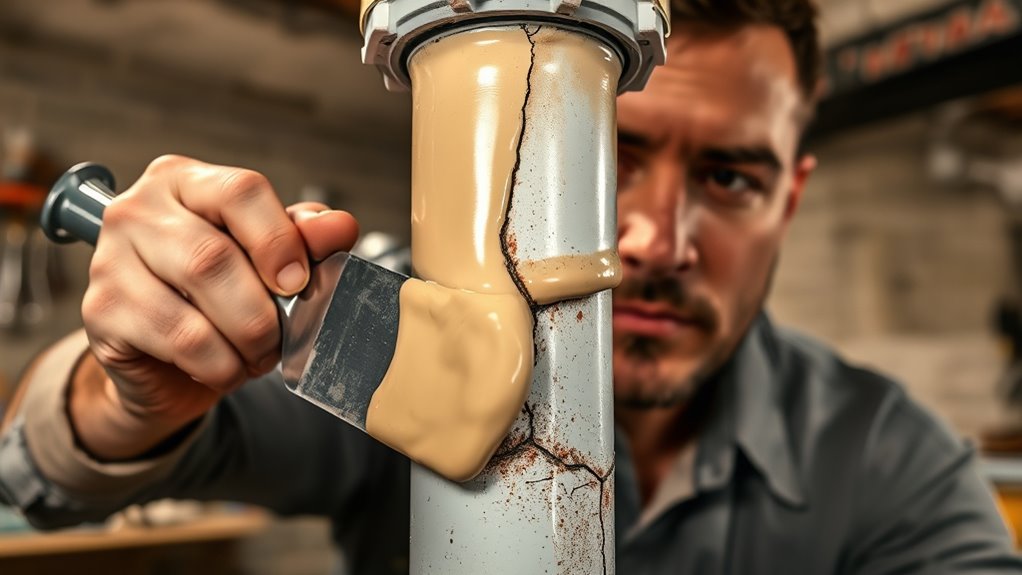
Before you start, assess the leak and the surface to determine which type of sealer is appropriate. Some products are designed for use on wet surfaces, while others require the area to be dry. Once you’ve selected the right product, clean the surface thoroughly to remove dirt, grease, or loose debris. Proper surface preparation is vital for the sealant to adhere correctly and create a reliable barrier. If the leak is in a pipe, you might need to isolate the section or drain the pipe to prevent water flow during application. For roof leaks, ensure the area is dry and free from loose shingles or debris. Recognizing the importance of surface preparation can significantly improve sealing effectiveness.
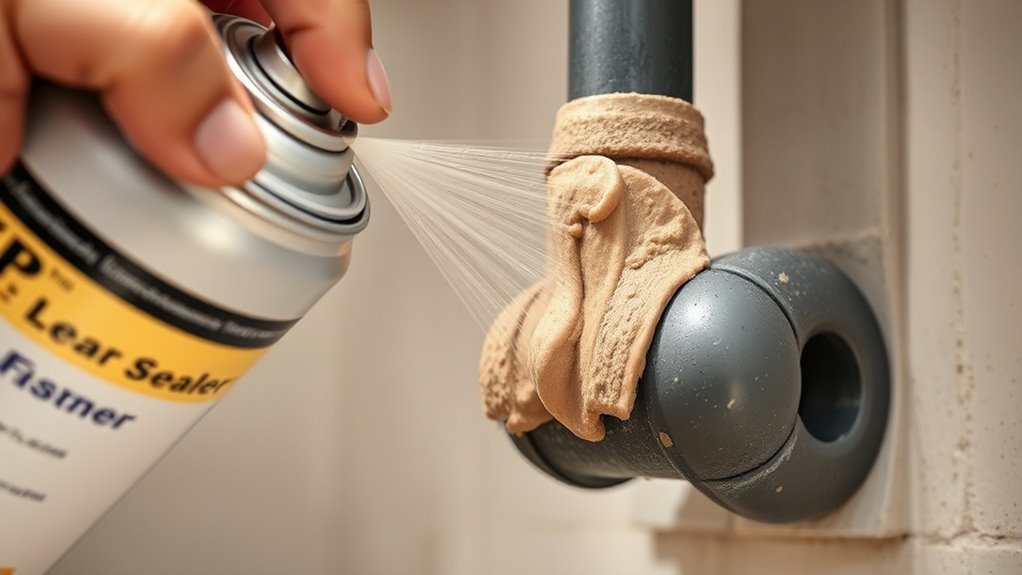
Application techniques vary depending on the product you’re using. Many leak sealers come in spray cans, which are quick and easy to apply, especially for small cracks or surface leaks. For larger cracks or holes, you might need to use a putty or a patching compound, pressing it firmly into the affected area. Applying sealants evenly and thoroughly is essential—over-application can lead to messes, while under-application might not seal the leak completely. For best results, follow the manufacturer’s instructions regarding curing time, temperature conditions, and recommended number of coats.
Safety precautions are paramount when working with leak sealer products. Always read the label carefully before use. Many sealants contain chemicals that can be harmful if inhaled or if they come into contact with your skin or eyes. Work in well-ventilated areas, wear gloves, and consider using goggles or a mask if recommended. Keep the product out of reach of children and pets, and avoid smoking or open flames nearby, as some sealants are flammable. If accidental contact occurs, wash the affected area immediately with soap and water, and seek medical attention if irritation persists.
Frequently Asked Questions
Can Leak Sealer Products Be Used on All Types of Leaks?
Leak sealer products can’t be used on all types of leaks, as material compatibility is essential. You need to assess the leak’s surface and choose the right product accordingly. Proper application techniques involve cleaning the area thoroughly and applying the sealer evenly. If the leak is too large or the surface incompatible, the sealer may not work effectively. Always follow manufacturer instructions for best results.
How Long Does a Leak Sealer Typically Last?
Leak sealers typically last between 1 to 5 years, depending on the product’s durability and your maintenance efforts. To maximize longevity, you should regularly inspect sealed areas and perform necessary touch-ups. Proper application ensures better durability, reducing the need for frequent reapplications. Keep the surface clean and dry before sealing, and follow manufacturer instructions carefully. With good maintenance, your leak sealer can provide effective, lasting protection.
Are Leak Sealers Safe for Plumbing Systems?
Leak sealers are generally safe for plumbing systems if you choose products with proven chemical compatibility. Always check the label to guarantee it’s compatible with your pipes and fixtures. Be mindful of the environmental impact; opt for eco-friendly options when possible. Proper application minimizes risks, and if used correctly, leak sealers won’t harm your plumbing or the environment. Always follow manufacturer instructions for safe, effective results.
Can Leak Sealer Products Be Applied Outdoors in Rain?
Applying leak sealer products outdoors in rain is like trying to paint a wet canvas—you won’t get good results. Weather considerations are essential; avoid applying during rain or immediately before it. Wait for dry, clear weather, and choose ideal application timing to guarantee the product adheres properly. This way, your leak sealer works effectively, sealing leaks without washing away or losing effectiveness.
Do Leak Sealers Require Professional Installation?
Leak sealers generally don’t require professional assistance for application, making DIY maintenance feasible if you follow instructions carefully. You can apply them yourself for simple leaks, saving time and money. However, for extensive or complex leaks, professional help ensures proper sealing and long-term effectiveness. If you’re unsure about the severity of the leak or the best product to use, consulting a professional is a wise move to avoid future problems.
Conclusion
Now that you know how to use leak sealer products, you’re prepared to fix minor leaks quickly and effectively. Remember, over 60% of homeowners have faced water damage from leaks they didn’t catch early enough. By applying leak sealers promptly, you can save your home from costly repairs and water wastage. Stay vigilant, follow the directions carefully, and you’ll keep your home dry and protected for years to come.