To guarantee your vinyl liner tear holds, start by thoroughly cleaning and drying the area, then sand it lightly for better adhesion. Choose a patch made from the same vinyl as your liner, and use a waterproof, flexible adhesive designed for pools. Carefully apply the patch, smoothing out bubbles for a secure seal. Proper surface prep and quality materials make all the difference—keep exploring to learn the full repair process for long-lasting results.
Key Takeaways
- Properly clean, dry, and lightly sand the damaged area to ensure strong adhesion of the patch.
- Choose a compatible, waterproof, and flexible vinyl patch and adhesive suited for pool use.
- Cut the patch larger than the tear with rounded edges to prevent peeling and stress concentration.
- Apply adhesive evenly, press firmly, and smooth out bubbles to ensure full contact and durability.
- Maintain correct chemical balance and environmental conditions to prevent future damage and prolong repair life.
Is Your Vinyl Pool Liner Damaged? How to Tell if You Can Patch It Yourself

Wondering if your vinyl pool liner has a tear? Start by inspecting the pool for visible signs of damage, such as bulges, wrinkles, or discoloration. During seasonal maintenance, check for any rough patches or small punctures that might have gone unnoticed. Keep in mind that pool chemicals can weaken the liner over time, making it more prone to tears. If you notice a small tear or hole, you might be able to patch it yourself, but only if the damage is minor and the liner is still in good condition. Be sure the pool is clean and dry before applying any patch. Additionally, understanding the contrast ratio of your pool lighting setup can help you better assess the extent of the damage under different lighting conditions. Using proper patching techniques can significantly improve the durability of your repair. For best results, consult the liner manufacturer’s instructions and consider material compatibility to ensure a secure and lasting fix. If the damage is extensive or the liner is brittle, it’s best to consult a professional.
What Causes Tears in Vinyl Liners and How They Impact Your Pool

Tears in vinyl liners often occur because of sharp objects, improper installation, or aging materials that become brittle over time. When your pool isn’t properly maintained, debris or rough edges can cause punctures. Poor chemical balancing can weaken the liner, making it more prone to tears. For instance, imbalanced pH or low alkalinity can degrade the vinyl, leading to cracks or rips. Regular pool maintenance helps identify potential issues before they become serious, such as inspecting for sharp debris or rough patches. Additionally, understanding the materials used in vinyl liners can help you choose more durable options that resist tears better over time. Proper chemical balancing not only preserves water quality but also enhances the longevity of the liner by preventing material deterioration. Tears can impact your pool’s integrity by allowing water to escape or causing uneven surfaces that affect swimming quality. Addressing these issues early through proper maintenance and chemical balancing can prolong your liner’s lifespan and prevent costly repairs.
How to Assess the Size and Location of a Tear

How can you accurately determine the size and location of a tear in your vinyl liner? First, carefully inspect the pool’s surface for any visible damage or irregularities. Use a clean, dry cloth to wipe down the area, which helps reveal tears or holes that might be hidden by dirt or algae. Adjust the pool’s water level if necessary to better see the damaged spot. Keep in mind that poor pool chemistry can weaken the liner, making tears more difficult to spot. Measure the tear with a ruler or tape measure for precise size. Knowing the exact location and extent of the damage is essential, especially if you’re considering liner replacement or patching, to ensure your repair holds and your pool remains safe and functional. Proper assessment can also prevent further damage and extend the life of your liner, much like how proper precious metal investments can protect your financial future. Additionally, understanding the material composition of your liner can help determine the most effective patching method and improve the longevity of the repair. Conducting a thorough damage assessment can save you time and money by guiding you toward the most suitable repair approach. Recognizing common signs of deterioration early can help you address issues before they lead to larger tears, which is a key part of preventive maintenance for pool liners.
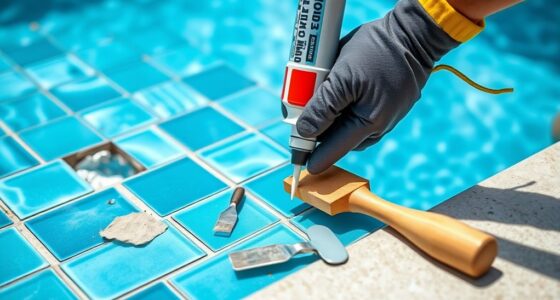
Choosing the Best Patch and Glue for Vinyl Liner Repair

Once you’ve identified the size and location of the tear, selecting the right patch and glue becomes the next important step. For effective vinyl repair, choose a patch made from a compatible vinyl material that matches your liner’s thickness and color. Self-adhesive patches are convenient, but for a stronger bond, consider using a vinyl repair adhesive designed specifically for pool maintenance. Verify the glue is waterproof, flexible, and suitable for underwater repairs if needed. Proper preparation, like cleaning and drying the area thoroughly, enhances adhesion. Using the correct patch and glue combination ensures your repair holds up against pool use and water pressure, extending your liner’s lifespan. Investing in quality materials now prevents future leaks and keeps your pool in top condition. Understanding market trends can also inform you about the best repair products available and their durability over time. Additionally, selecting appropriate repair materials that are designed for vinyl helps ensure long-lasting results. Being aware of essential DIY tools and safety tips can further improve your repair process and ensure safe handling of repair supplies. Moreover, paying attention to product compatibility can help you choose the most effective repair options for your specific liner type. Incorporating professional advice can also help you achieve a more durable and seamless repair.
Step-by-Step: How to Patch Your Vinyl Pool Liner and Make It Last

To guarantee a successful patch that lasts, you need to follow a clear, step-by-step process. Proper patching is essential for effective pool maintenance and ensures your liner holds during seasonal opening. Here’s what to do:
- Drain the pool slightly below the tear, then clean and dry the area thoroughly.
- Cut the patch material slightly larger than the tear, removing any wrinkles.
- Apply the adhesive evenly to both the patch and the liner, following the manufacturer’s instructions.
- Press the patch firmly over the tear, smoothing out bubbles and ensuring full contact.
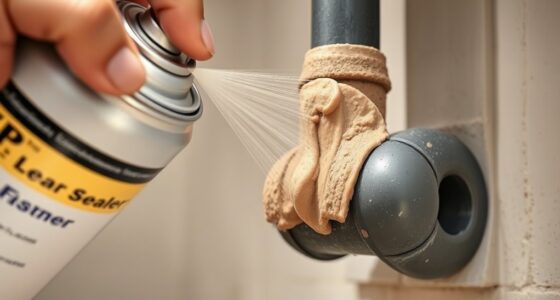
- For best results, use a high-pressure sprayer to ensure even application of the adhesive and minimize air bubbles.
- To achieve a durable repair, ensure the patch adheres in a dust-free environment, as surface cleanliness directly impacts adhesion quality. Additionally, maintaining proper temperature and humidity conditions can significantly improve adhesive bonding.
- Remember that surface preparation is critical for a lasting repair, so take extra care to prepare the area thoroughly before applying the patch. Proper surface cleaning helps remove any oils or residues that could weaken the bond.
- Allow adequate curing time before refilling. Proper patching extends your liner’s lifespan and helps you enjoy your pool season after season.
Common Mistakes When Patching Vinyl Liners and How to Avoid Them

One common mistake is skipping proper surface preparation before applying the patch, which can prevent it from sticking properly. Make sure you clean and dry the area thoroughly to guarantee a strong bond. Additionally, choosing the correct patch material is vital; using the wrong type can lead to leaks and further damage. Properly understanding regional characteristics can also help in selecting the most durable repair solutions to withstand local environmental factors. Being aware of climate influences can guide you in choosing materials that will last longer in your specific area.
Proper Surface Preparation
Proper surface preparation is essential for a successful vinyl liner patch, yet many overlook this step and make common mistakes that compromise the repair. To ensure the patch holds, you need a clean, smooth surface free of contaminants. First, make sure the pool chemical balance is correct, as imbalanced chemicals can damage the liner. Second, thoroughly clean the area with a gentle detergent and water, removing dirt and oils. Third, dry the patch site completely, avoiding moisture that can weaken adhesion. Fourth, lightly sand the area to create a rough surface, improving the patch’s grip. Regular seasonal maintenance helps prevent debris buildup and chemical imbalance, which can cause surface issues. Proper preparation guarantees the patch bonds well and lasts longer.
Choosing Correct Patch Material
Choosing the right patch material is key to a lasting repair after properly preparing the surface. You need to select a patch that matches your liner material to guarantee compatibility and durability. Avoid using generic or incompatible patches, as they can fail quickly, especially when exposed to pool chemicals. Check that the patch is made from the same type of vinyl as your liner to prevent peeling or bubbling. Consider the strength and flexibility of the patch; it should withstand the constant movement and chemical exposure in your pool. Always read product labels and instructions, making certain the patch can tolerate pool chemicals and UV exposure. Using the correct patch material helps prevent future tears and prolongs the life of your liner.
Frequently Asked Questions
How Long Does a Patched Vinyl Liner Typically Last?
A patched vinyl liner usually lasts around 3 to 5 years, depending on patch durability and application quality. If you follow proper patch application techniques, ensuring the patch adheres well and is sealed properly, it can extend the lifespan. Regular maintenance and avoiding sharp objects or rough handling also help. Keep in mind that the longevity varies based on water chemistry, pool usage, and climate conditions.
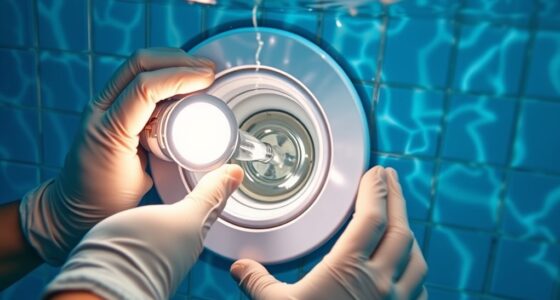
Can Patches Be Applied Underwater or Only When Dry?
You can apply patches underwater, which is great if a leak happens unexpectedly. Underwater patching allows you to seal tears without draining the pool. However, for the best results, dry application is recommended when possible, as it guarantees the patch adheres more securely. If you must patch underwater, follow specific product instructions carefully. For long-lasting repairs, dry patching when feasible is your best bet.
Are There Specific Brands of Patches That Work Best?
Imagine sealing a tiny boat against a storm—some brands of patches excel where others falter. You’ll want patches made from durable patch material paired with strong adhesive options that bond well to vinyl. Not all brands are equal; look for trusted names like UltraSeal or PoolSeal, which are designed specifically for pool liners. These patches offer reliable hold, ensuring your liner stays intact despite the water’s relentless pressure.
What Signs Indicate a Repair Is Failing Over Time?
You’ll notice your patch repair is failing if it starts peeling, bubbling, or if the tear widens over time. These signs indicate the patch’s durability is compromised, often due to poor repair materials or improper application. Keep an eye on water leaks or wet spots around the patch, which suggest it’s no longer holding. Regularly inspecting your repair helps catch issues early, ensuring your liner stays sealed and functional.
Is Professional Help Necessary for Large Tears or Complex Repairs?
For large tears or complex repairs, professional help is absolutely essential—trying DIY methods can turn into a complete disaster faster than you can say “waterlogged.” You’ll need expert skill and the right tools, like a heavy-duty vinyl patch and a high-quality adhesive. Professionals guarantee the repair holds long-term and prevents future leaks. Trust me, it’s worth investing in their expertise to avoid a watery mess that could flood your entire pool.
Conclusion
By identifying tears early, choosing the right patch and glue, and following proper repair steps, you can extend your vinyl liner’s life. You’ll prevent leaks, save money, and enjoy a worry-free swim season. You’ll avoid costly replacements, dodge frustrating repairs, and keep your pool looking its best. With patience and attention to detail, you’ll master the art of patching, ensuring your pool remains watertight, durable, and ready for endless summer fun.