
To set up your floating solar lights, choose a sunny, stable spot on your water surface away from shade, debris, and strong currents. Unpack, inspect, and assemble components carefully, then charge them in direct sunlight for 8-12 hours before first use. Secure the lights with weights or anchors, and adjust their position for *ideal* stability and brightness. Regularly clean the solar panels, check batteries, and *guarantee* they’re protected during harsh weather to keep your lights shining brightly over time.
Key Takeaways
- Select a sunny, stable water location away from shade, debris, and strong currents for optimal charging and stability.
- Carefully assemble solar panels and lights, ensuring secure connections and proper placement on floating devices before initial charging.
- Place lights in direct sunlight for 8-12 hours with switches off to fully charge batteries before use.
- Regularly clean solar panels and check connections to maintain efficiency and extend the lifespan of the lights.
- Reposition and anchor lights securely to prevent drifting, and store or cover during harsh weather to protect the lights.
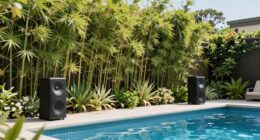
Choosing the Right Location for Your Floating Solar Lights

Choosing the right location for your floating solar lights is essential to guarantee they work effectively and look great. You want to place them where they’ll receive ample sunlight during the day, ensuring their batteries charge fully. Avoid shaded areas caused by trees, buildings, or overhanging branches that block sunlight. Position your lights in spots with stable water surfaces to prevent drifting or tipping. Consider the overall aesthetic—spread them evenly to create a balanced, inviting glow across your pond or pool. Ensure they’re not too close to edges or debris, which can cause damage or obstruct illumination. By selecting an ideal spot, you’ll maximize their brightness, longevity, and visual appeal, making your outdoor space both functional and enchanting. Proper placement also helps prevent issues like ineffective purification caused by incorrect positioning, ensuring your lights perform optimally. Additionally, placing lights where they can easily access natural sunlight can further enhance their efficiency and reduce energy consumption.
Unpacking and Assembling Your Lights

When you receive your floating solar lights, start by unboxing them carefully and inspecting each part for any damage. Next, gather all components and follow the included instructions to assemble them properly. Taking these steps now guarantees your lights will function smoothly and last longer. Be sure to also check for any outdoor lighting safety guidelines to ensure proper installation. Additionally, verifying solar panel efficiency during setup can help maximize energy absorption for better performance. As you prepare, consider reviewing data privacy concerns related to your outdoor devices to ensure compliance with safety standards. Understanding performance upgrades can also help you optimize your setup for the best results. Moreover, considering the Gold IRA Rollovers concepts can inspire ways to diversify your investment portfolio with reliable assets.
Unboxing and Inspection
Have you ever wondered what to expect when unboxing your floating solar lights? When you open the package, check for all components listed in the manual, including the solar panel, lights, and any accessories. Carefully inspect each part for damage, cracks, or missing pieces. Verify the solar panel’s surface is clean and free of debris, as dirt can reduce efficiency. Look over the lights themselves for cracks or defects that could affect performance. If any parts are damaged or missing, contact the supplier before proceeding. Take a moment to read through the instructions included in the box. Proper inspection guarantees your setup goes smoothly and your lights function correctly, giving you confidence as you prepare for installation. Additionally, understanding the digital literacy of the product can help you troubleshoot issues more effectively. Being familiar with the electricity conversion process can also enhance your ability to maintain and optimize your solar lighting system. Recognizing the features and functionality of your lights enables you to maximize their benefits and longevity. Developing a basic knowledge of Ford tuning can also improve your ability to customize and optimize your vehicle’s performance, similar to how understanding solar light features enhances their use. Gaining a basic understanding of relationship dynamics can also improve your overall experience with shared or family installations.
Assembling Components
After unboxing your floating solar lights, the next step is to assemble the components correctly. Begin by identifying each part: the solar panel, the light fixture, and the floatation device. Attach the solar panel to the designated mounting area on the light fixture, ensuring it clicks into place securely. Next, connect the power cable if applicable, making sure it’s firmly attached and protected from water exposure. Place the assembled unit onto the floatation device, aligning any notches or guides. Secure the light to the float with the provided clips or fasteners. Double-check all connections and fittings to guarantee stability. Proper assembly is vital for ideal performance and longevity of your floating solar lights. Being aware of the cultural heritage associated with solar technology can enhance your understanding of renewable energy principles. Additionally, understanding the impact of AI in business can provide insights into innovative energy solutions and sustainable practices. To ensure your solar lights operate efficiently, regularly inspecting the solar panels for dirt or debris and cleaning them as needed will help maintain optimal sunlight absorption.
Properly Charging Your Solar Lights Before First Use
Before using your floating solar lights for the first time, it’s important to give them a proper charge. Place the lights in direct sunlight, ensuring the solar panels are unobstructed. Let them sit for at least 8-12 hours to fully charge the batteries. Avoid turning them on during this initial charging period, as it can interfere with the process. If your lights have a switch, keep it in the “off” position until they’re fully charged. Proper initial charging guarantees maximum brightness and longer battery life. Additionally, storing the lights in a location with consistent sunlight exposure helps maintain battery efficiency over time. Once charged, you can turn them on and enjoy their illumination. Remember, consistent sunlight exposure keeps the batteries charged and maintains ideal performance of your floating solar lights over time. Regularly monitoring the solar panel effectiveness can help ensure optimal charging and operation, especially since state tax implications can influence the overall maintenance costs of your solar setup. Additionally, understanding privacy policy guidelines can help you stay informed about data collection related to your solar device usage, which is an important aspect of ethical considerations in renewable energy devices.
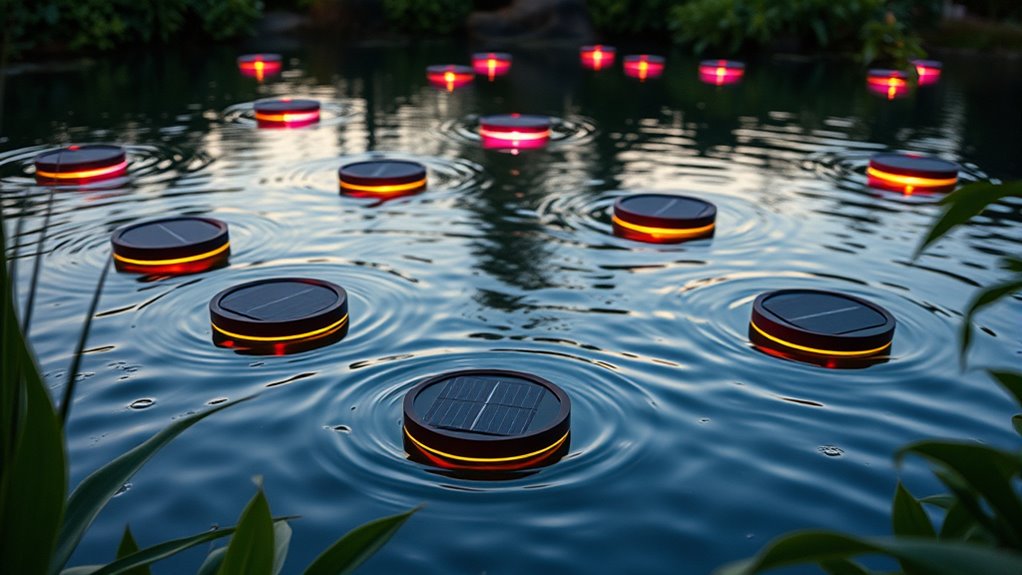
Installing the Lights on Water Surfaces
Once your floating solar lights are fully charged and ready to go, it’s time to install them on your water surface. Place each light gently on the water, making sure they’re floating evenly. Use the included weights or anchoring mechanisms if necessary to keep them stable, especially in windy conditions. Position them where you want the light to illuminate, avoiding areas with strong currents that might shift their placement. Keep in mind the proximity to power sources or electrical outlets if your lights need connection points. Confirm the lights are not obstructed by floating debris or plants, which could block sunlight or affect their stability. Regularly checking sensor functionality ensures they operate efficiently over time. Additionally, inspecting the installation site periodically helps maintain optimal performance. Ensuring proper maintenance practices can extend the lifespan of your lights and keep them functioning beautifully. With careful placement, you’ll set the stage for ideal lighting and longevity of your floating solar lights.
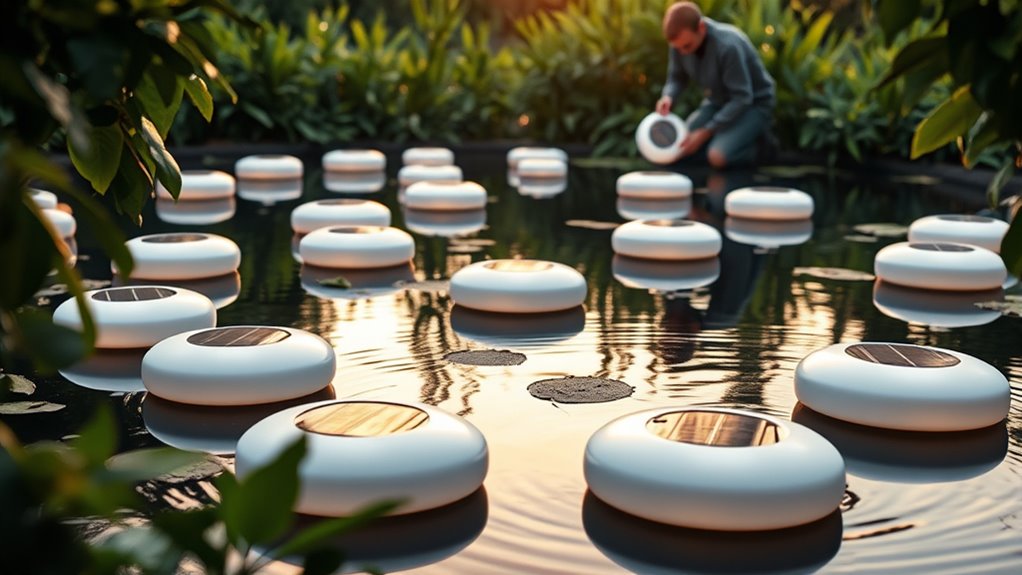
Adjusting and Securing the Lights for Optimal Performance
To guarantee your floating solar lights perform their best, you need to adjust their position and secure them properly. Start by placing the lights where they receive maximum sunlight throughout the day. If some areas are shaded, reposition the lights to avoid reduced charging. Once in position, secure them firmly to prevent drifting or tipping. Use the provided anchors or weights to keep the lights stable, especially in windy conditions or on moving water. Check that each light is balanced and not tilted, as this can affect their illumination and charging efficiency. Periodically review their placement to ensure they remain secure and aligned for optimal performance. Proper adjustment and secure positioning help your solar lights stay bright and functional for longer.
Routine Maintenance and Cleaning Tips

To keep your floating solar lights working their best, you need a consistent cleaning routine. Make sure to clean the solar panels gently and check the batteries regularly for peak performance. Staying on top of these simple maintenance tasks will extend the life of your lights and ensure they shine brightly whenever you need them.
Regular Cleaning Schedule
Regular cleaning is essential to keep your floating solar lights functioning efficiently and looking their best. Establish a routine schedule, ideally every two weeks, to prevent dirt, algae, and debris from accumulating. Start by removing the lights from the water and wiping the surface with a soft cloth or sponge. Use a gentle brush to scrub away algae or grime, especially around the solar panel and base. Rinse thoroughly with clean water to avoid soap residue. Regular cleaning guarantees maximum sunlight absorption and prevents blockages that can reduce battery life. Keep an eye out for buildup or damage, and address issues promptly. A consistent cleaning schedule not only extends the lifespan of your lights but also maintains their bright, attractive appearance.
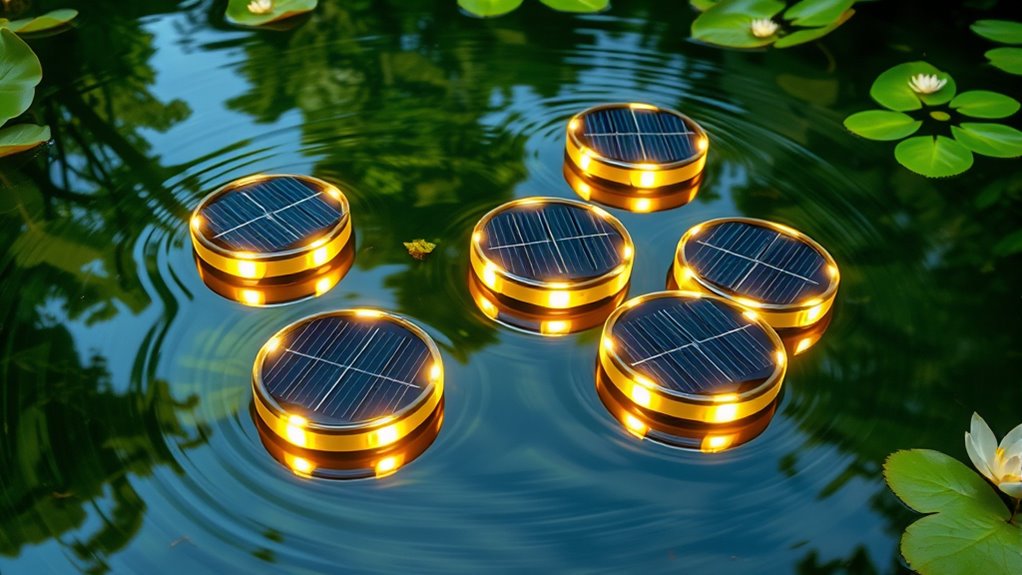
Proper Solar Panel Care
Ensuring your solar panels stay clean and well-maintained is key to maximizing their efficiency. Regularly inspect your panels for dirt, leaves, or bird droppings that can block sunlight. Use a soft brush or sponge with mild soap and water to gently clean the surface, avoiding harsh chemicals that could damage the panels. Rinse thoroughly to remove soap residue. Check for any cracks or damage, and address issues promptly. Keep the panels free from debris, especially after storms or heavy winds. Avoid walking on the panels to prevent damage. Maintaining a clean surface allows sunlight to reach the cells effectively, boosting energy production. Consistent care ensures your floating solar lights operate at peak performance and longevity.
Battery Maintenance Tips
Maintaining your solar battery is essential for peak performance and longevity. Regularly check the battery terminals and connections for corrosion or dirt, and clean them with a mixture of baking soda and water if needed. Verify the battery stays in a cool, dry place, as excess heat or moisture can reduce its lifespan. Avoid overcharging by disconnecting the lights once the battery is fully charged. If your system has a charge controller, use it to monitor and regulate charging levels. Periodically inspect the battery for leaks or swelling, and replace it if you notice any issues. Keeping the battery clean and well-maintained helps maximize energy storage and ensures your floating lights shine brightly for a longer time.
Troubleshooting Common Issues With Floating Solar Lights

Even though floating solar lights are generally low-maintenance, issues can still arise that disrupt their performance. Common problems include lights not turning on, dim illumination, or uneven floating. To troubleshoot, start by checking the solar panel for dirt or debris, which can block sunlight and reduce charging efficiency. Confirm the battery is properly connected and has enough charge; replace it if necessary. Inspect the light for damage or corrosion, especially after harsh weather. Also, verify the light is positioned correctly to receive maximum sunlight.
- Clean the solar panel regularly to maintain ideal performance
- Replace or recharge the battery if it’s dead or weak
- Check for physical damage or corrosion in the light
- Adjust the light’s position for better sunlight exposure
Extending the Lifespan of Your Solar Lights With Proper Care

Proper care can considerably extend the lifespan of your solar lights, saving you money and hassle over time. Regularly clean the solar panels with a soft cloth and mild soap to guarantee maximum efficiency. Keep debris, dirt, and leaves away from the panels and lights to prevent blockages and damage. Check the batteries periodically and replace them when they no longer hold a charge; using high-quality batteries makes a difference. Position your lights where they receive ample sunlight during the day, avoiding shaded areas or obstructions. Cover or store the lights during harsh weather or winter to protect them from damage. By maintaining your floating solar lights with these simple steps, you’ll enjoy bright, reliable illumination for years to come.
Frequently Asked Questions
Can Floating Solar Lights Be Used in Saltwater Environments?
You might wonder if floating solar lights work in saltwater environments. Generally, these lights are designed for freshwater, so saltwater can cause corrosion and damage the components. If you want to use them in saltwater, look for models specifically rated for marine or saltwater use, which feature corrosion-resistant materials. Regular maintenance and rinsing with fresh water can also help extend their lifespan in salty conditions.
Are There Safety Precautions for Installing Floating Solar Lights Near Children?
Imagine a quiet pond, lights shimmering gently, but suddenly, safety concerns emerge. You’ll want to guarantee your floating solar lights are securely installed, especially near children. Keep them out of reach, avoid placing them where kids might tug or trip, and always follow manufacturer instructions. Regularly inspect the setup for stability. With these precautions, you can enjoy the beautiful glow without risking safety, making your space both stunning and secure.
How Do I Prevent Algae Buildup Around My Floating Solar Lights?
To prevent algae buildup around your floating solar lights, you should regularly clean the water surface and monitor nutrient levels. Consider adding beneficial algae control products or using a gentle water agitator to discourage growth. Keep the area clear of excess organic debris, and make certain your pond or lake isn’t overly fertilized. Proper maintenance and monitoring will help keep your water clear and algae-free, enhancing your floating lights’ appearance.
What Is the Ideal Depth for Placing Floating Solar Lights?
Did you know that the ideal depth for floating solar lights is typically between 6 to 12 inches? You should place your lights in a spot where they won’t sink or be too close to the surface, ensuring maximum illumination and stability. Check your lights’ instructions, as some models may have specific depth recommendations. Proper placement will enhance their performance and longevity, making your pond or pool look beautiful and functional.
Do Floating Solar Lights Work During Cloudy or Rainy Weather?
During cloudy or rainy weather, floating solar lights may not work as effectively because they rely on sunlight to generate power. You might notice dimmer illumination or no light at all. However, some models with built-in batteries can store energy for brief periods, so they might still emit light after a cloudy day. To guarantee consistent performance, choose lights with good battery capacity and consider additional lighting options for cloudy weather.
Conclusion
With proper setup and regular care, your floating solar lights will shine bright for years to come. Keep them clean, make sure they’re charged, and secure them well to prevent issues. Don’t let small problems snowball—address them early. Remember, a stitch in time saves nine, so taking a little extra effort now will keep your lights glowing and your water features looking stunning. Brighten up your space and enjoy the magic of sustainable lighting all season long!