To repair loose pool tiles, start by carefully removing damaged or loose tiles using a chisel, rubber mallet, and grout saw. Clean out the old grout completely for a solid bond, then apply waterproof, flexible grout with a rubber float, smoothing the surface with a damp sponge. When replacing tiles, use tile adhesive or thin-set mortar, press the tile firmly, and ensure proper alignment. If you want to master every step for a lasting fix, keep exploring the details.
Key Takeaways
- Use a grout saw or utility knife to carefully remove old grout around loose tiles.
- Gently loosen tiles with a chisel and rubber mallet to prevent damage.
- Clean the area thoroughly to ensure proper adhesion of new grout or tiles.
- Apply waterproof, flexible grout with a rubber float, pressing firmly into joints.
- Replace entire tiles if broken, ensuring proper alignment, adhesive, and sealing for durability.
Have you noticed loose pool tiles disrupting the smooth surface of your pool? If so, you’re probably aware that addressing this issue promptly is essential to maintaining both the aesthetic appeal and safety of your pool. The first step in repairing loose tiles involves understanding the process of grout repair and, in some cases, tile removal. These tasks require specific tools and techniques to guarantee a long-lasting fix.
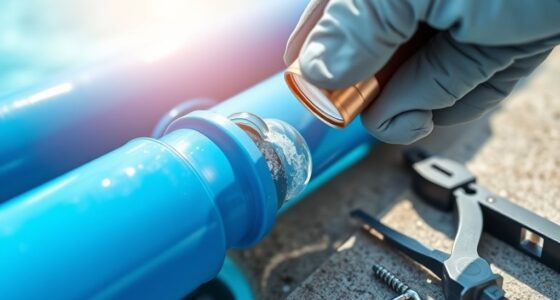
When tackling loose pool tiles, you need to start by carefully removing the damaged or loose tiles. Tile removal isn’t as simple as just prying them up; it requires patience and the right tools to avoid damaging surrounding tiles or the pool surface. A chisel and a rubber mallet work well for gently loosening tiles. You might also use a grout saw or a utility knife to cut through the grout surrounding the loose tile, which helps to loosen it without disturbing neighboring tiles. Take your time to carefully lift the tile, ensuring you don’t crack or break it if you plan to reuse it, or to prevent unnecessary damage if replacing.
Once the tile is removed, you’ll need to prepare the area for new grout and a fresh tile. The old grout that remains should be chipped out completely using a grout removal tool or a small chisel. Proper grout removal is essential because it ensures that the new grout adheres properly, providing a solid bond for the new tile. After clearing away the old grout, you should thoroughly clean the area to remove any debris, dust, or residual grout. This cleaning step is critical for a durable repair.
Remove old grout completely and clean thoroughly for a durable tile repair.
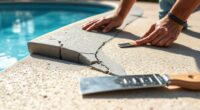
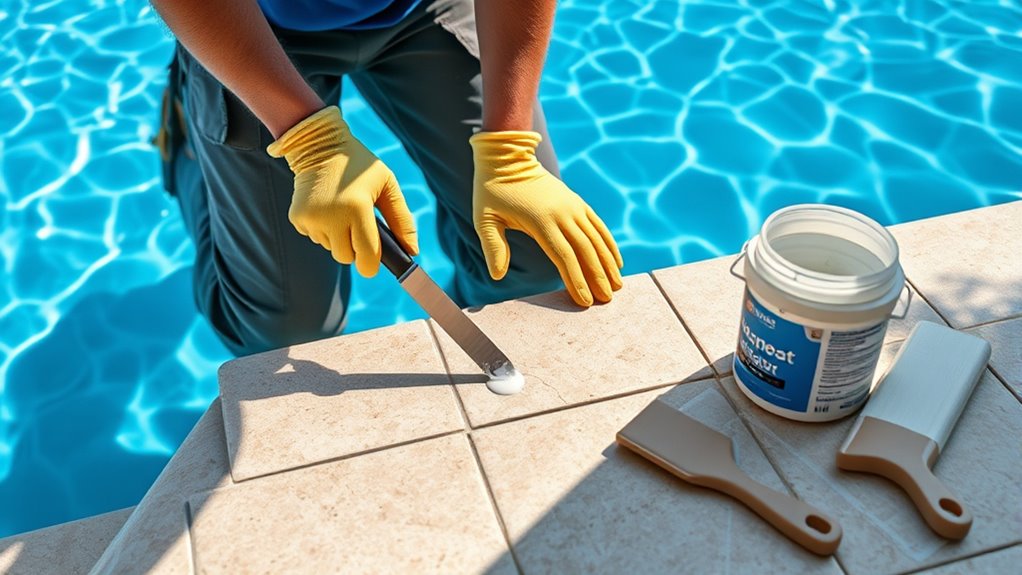
Next comes grout repair, which involves mixing and applying new grout designed specifically for pools. Pool grout needs to withstand water exposure, so use a waterproof, flexible grout suited for wet environments. Apply the grout with a rubber float, pressing it firmly into the joints to fill all gaps completely. Once the grout is in place, smooth the surface and remove excess grout with a damp sponge. Allow the grout to cure according to the manufacturer’s instructions before using the pool again. Proper curing is fundamental to prevent future loosening or cracking.
Additionally, understanding the importance of using the correct tools and techniques can significantly improve the longevity of your repair, saving you time and money in the long run. In some cases, you might find that the damage is extensive, requiring you to replace entire tiles rather than perform simple grout repairs. When doing this, after removing the old tile, apply a layer of pool tile adhesive or thin-set mortar, then press the new tile into place. Make sure it’s level and aligned with neighboring tiles before the adhesive sets. Finishing with fresh grout and proper sealing will restore your pool’s surface, making it look seamless and secure. With patience and the right tools, you can effectively repair loose pool tiles and keep your pool looking clean, safe, and inviting.
Frequently Asked Questions
How Long Does a Typical Pool Tile Repair Process Take?
A typical pool tile repair takes about a few hours to a day, depending on the extent of damage. You’ll start with tile removal, which can take 30 minutes to an hour. After placing new tiles, you’ll need to wait for the adhesive to cure, usually around 24 hours. During this time, refrain from using the pool to ensure proper bonding and a durable repair.
Can I Repair Loose Tiles Without Draining the Pool?
Think of it like your smartphone’s screen—sometimes, you can fix loose tiles without draining the whole pool. You can do minor repairs during routine pool maintenance with underwater adhesive, but full tile replacement usually requires draining. To guarantee a proper fix, carefully assess the looseness, clean the area, and use waterproof adhesive designed for pool tiles. This way, you preserve your pool’s beauty without a full drain.
What Safety Precautions Should I Follow During Tile Repair?
When repairing pool tiles, always wear personal protective equipment like gloves and goggles to protect your skin and eyes. Make certain electrical safety by turning off the pool’s power and unplugging any equipment before starting. Keep the work area dry to prevent slips and electrical hazards. Work carefully, follow manufacturer instructions, and stay alert. These precautions help keep you safe while you fix your pool tiles effectively.
Are There Eco-Friendly Adhesives Suitable for Pool Tile Repair?
You might be surprised, but eco-friendly adhesives for pool tile repair do exist. These sustainable bonding options are specially formulated to be safe for both your pool and the environment. Look for products labeled as biodegradable or low-VOC, which guarantee minimal harmful impact. Using eco-friendly adhesives not only helps protect aquatic life but also promotes healthier water quality, making your repair both effective and environmentally responsible.
How Often Should Pool Tiles Be Inspected for Loose or Damaged Tiles?
You should inspect your pool tiles at least once a month as part of your regular tile maintenance. Regular inspections help you catch loose or damaged tiles early, preventing bigger issues later. Keep an eye on grout lines and tile surfaces for cracks or looseness. An consistent inspection schedule guarantees your pool stays safe, attractive, and well-maintained, reducing the need for costly repairs in the future.
Conclusion
With the right tools and techniques, repairing loose pool tiles is manageable, even if you’re new to DIY projects. Don’t let the fear of damaging your pool hinder you; taking your time and following proper steps ensures a professional finish. Remember, minor imperfections are normal during repairs. By carefully addressing loose tiles now, you prevent costly issues later, keeping your pool safe and beautiful for years to come.